Brickmason Details for Curved Residential Entry Walls
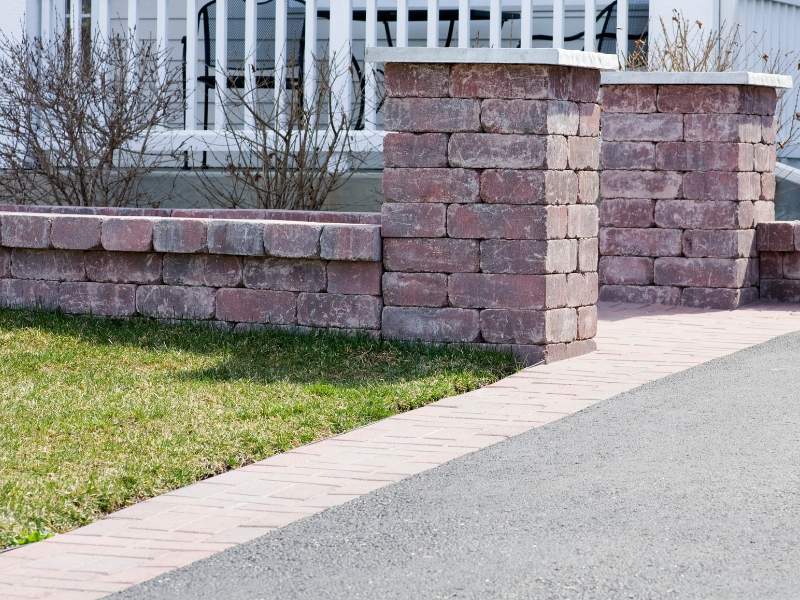
Brickmason constructing a curved brick entry wall at a residential property in Frisco, Texas.

A straight wall forgives small mistakes. A curved one shows every one of them. Drive past a home with a sweeping brick entry wall, and you’ll notice right away if the curve flattens in one spot, the joints get wider halfway around, or the cap looks pieced together. Those problems almost always trace back to planning and layout, which is why curved entry walls are a job for an experienced brickmason who treats the curve as the main design decision, not an afterthought.

This guide is for homeowners planning a new entry wall, along with builders and landscape designers who coordinate the work. It covers how the curve is set, which bricks work best, how alignment stays true, and how caps and moisture control protect the finished wall. Knowing these details helps you ask better questions before construction begins.

Planning the Curve and Radius of a Residential Entry Wall

The radius is the distance from the center point of the curve to the wall’s face. A large radius makes a gentle sweep, while a small radius creates a tight bend. That single number affects brick choice, joint size, labor, and cost. Settle it early with your designer and mason.

Start by laying out the curve on site. Many masons drive a stake at the center point and swing a string or rod to mark the arc on the ground. This shows how the wall relates to the driveway, walkway, planting beds, and property lines. It also reveals whether the curve feels balanced from the street and the front door.

The footing follows the same curve. A concrete footing gives the wall a stable base, and its size and depth depend on soil, wall height, and local code. Curved footings take more forming time than straight ones, so plan for that in the schedule. If the wall will hold back soil, it may function as a retaining wall and need engineering review.

Brick Selection and Joint Spacing for Consistent Curved Masonry

Standard rectangular bricks have flat faces, so a curved wall is really a series of short straight segments. On a gentle curve, that’s barely noticeable. On a tight curve, the outside joints open wider while the inside joints squeeze together, and the bricks start to look faceted. Brick length, radius, and the look you want all affect where that limit falls.

There are a few ways to handle tighter curves. Some manufacturers offer radial bricks made for specific radii. Half bricks or bricks laid with the short end facing out can follow a curve more closely. Your brickmason can show samples or mockups so you can see the difference before committing.

Joint spacing should stay as even as possible around the curve. Consistent mortar joints make the wall look smooth instead of choppy. Ask your mason how they plan to control joint width, especially on the outside face. Matching brick color and mortar to the home or existing brick masonry helps the entry wall look like part of the original design.

How a Brickmason Maintains Alignment Along Curved Wall Sections

On a straight wall, masons stretch a string line between corners to keep each course straight. A curve can’t use one long line. Instead, masons rely on templates, radius rods, and frequent checks from the center point. Each course has to follow the same arc as the course below it.

Height control matters just as much. A story pole, which is a marked board showing each course height, helps keep courses level all the way around. The mason checks plumb, or vertical straightness, often with a level. Small errors compound quickly on curves, so frequent checks prevent a wall that leans or wanders.

Good alignment practices include:

  • A fixed center stake or reference point used throughout the build
  • Templates cut to the wall’s radius for checking each course
  • Regular checks for plumb, level, and course height
  • Dry-laying sections before mortar to confirm fit and spacing

Ask your mason how they’ll track the curve on your project. A clear answer usually means they’ve built curved walls before.

Designing Wall Caps and End Details for Curved Entrances

The cap is the top layer that protects the wall from water. On curved walls, caps need extra planning. Brick caps, often laid as a rowlock with bricks on edge, follow a curve well because each unit is small. Stone or precast caps can look sharp too, but they usually need to be cut or made in curved segments to fit the radius.

A good cap overhangs the wall face slightly and sheds water away from the brick below. Some caps include a drip edge, a groove or lip that stops water from running back down the wall. Flashing beneath the cap can add another layer of protection. The right details depend on cap material, wall design, and exposure.

End details give the wall a finished look. Many curved entry walls end in brick piers or columns, which add strength and a place for lighting, address plaques, or gates. Some walls step down in height or turn into planters. Plan these early, because they affect footing layout and wiring.

Managing Moisture and Movement in Curved Brick Entry Walls

Water and movement cause most masonry wall problems. Brick expands slightly as it absorbs moisture and changes temperature over time. Long walls may need movement joints, which are planned gaps that let the wall expand without cracking. Their placement depends on wall length, design, and materials, so your mason or designer should plan them.

Keep water out of the wall wherever possible. Caps should shed rain, and the ground at the base should slope away so water doesn’t pool against the bricks. Sprinklers aimed at the wall add moisture that can cause staining, efflorescence, and mortar damage. Adjust them before the wall goes up.

Soil movement can also affect walls. Expansive soils swell when wet and shrink when dry, which may shift a footing over time. Ask your mason about soil conditions and footing design if your yard has a history of cracks or settlement. Planning for drainage early protects both the wall and nearby features like a brick patio or walkway.

Frequently Asked Questions

Can standard bricks be used for a curved wall?

Standard bricks work well on gentle curves. Tighter curves may cause uneven joints and a faceted look. Radial bricks, half bricks, or different laying patterns can help on smaller radii. Your brickmason can recommend the best option for your curve.

How much more does a curved brick wall cost?

Curved walls usually cost more than straight walls of the same size. Layout, forming, cutting, and alignment checks all take more time. Special bricks or caps can add material cost too. A detailed quote should show where those costs come from.

What is the best cap for a curved entry wall?

Brick rowlock caps follow curves easily and match the wall. Stone or precast caps can look great but need curved pieces or careful cutting. The cap should overhang the wall and shed water. Your mason can help you compare options for your design.

Brick Cracks After a Heatwave? When to Call a Masonry Contractor

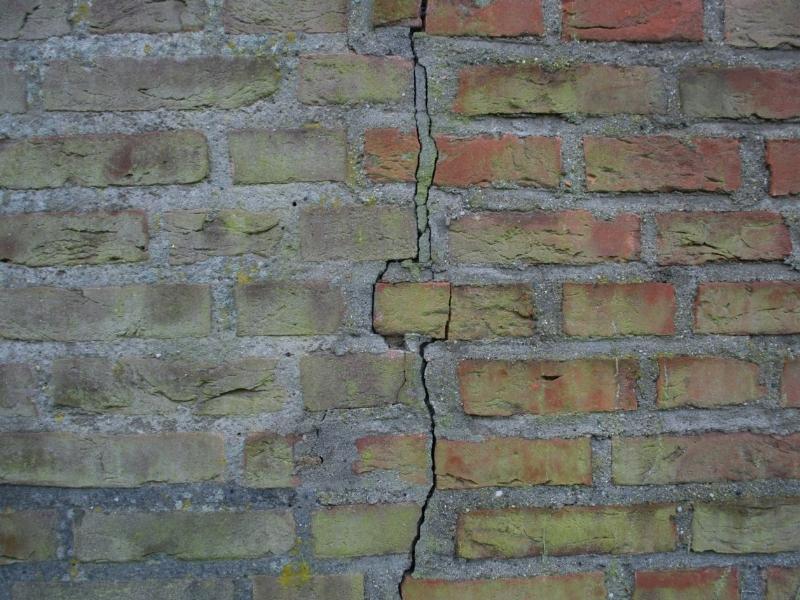
Masonry contractor inspecting cracks in a brick home exterior in Fort Worth, Texas, after a heatwave.

Most heat-related cracks are minor and fixable. A few point to movement in the foundation or wall, and those need a professional look soon. If you own a brick home in Fort Worth or nearby, document what you see, watch how the cracks change and call a masonry contractor when the signs below show up.

You walk the yard after a stretch of brutal heat and spot a new crack running through the brick. Maybe it is thin and tidy. Maybe it zigzags through the mortar joints. Either way, it raises the same question about whether this is harmless or the start of something serious.

Why Extreme Heat Can Cause Cracks in Brick Homes

Brick and mortar expand slightly when hot and shrink when they cool. That is normal. Problems start when the wall cannot move freely or when heat arrives alongside other stresses.

Several things can combine during a heatwave:

  • Sun-baked walls expand during the day and contract at night, which stresses mortar joints.
  • Older or weathered mortar is often softer and more brittle than the brick around it.
  • Missing or blocked expansion joints leave the wall with no room to move.
  • Clay-heavy soil can dry out and shrink during long dry, hot periods, which can shift the ground under a foundation.

North Texas homes often sit on clay soil, and clay reacts strongly to moisture changes. Soil conditions vary from lot to lot, so the effect on your house depends on the property, drainage and foundation design. Heat does not always create new damage. Sometimes it exposes a weakness that was already there.

How to Identify Heat-Related Cracks in Brickwork

Heat-related cracking usually looks small and stays small. The pattern matters more than the crack itself.

Look for these signs:

  • Hairline cracks in the mortar joints, often following the joint lines
  • Small gaps where mortar has pulled away from the brick
  • Short cracks near corners, windows or doors that have not widened
  • Cracks on the side of the house that gets the most afternoon sun
  • Minor spalling, where the brick face flakes or chips

Walk the whole house, not just the spot that caught your eye. Take photos with a ruler or coin beside each crack for scale. Date them. Then check again in a few weeks.

A crack that stays the same size after temperatures settle is usually less worrying. One that grows is a different story. Mortar cracks are generally easier to repair than cracks that cut through the brick itself, though a contractor should confirm the cause.

Warning Signs That Cracks May Indicate Structural Movement

Some cracks mean the wall is moving, not just flexing. Movement often traces back to the foundation, drainage or soil, and it should not be treated as a cosmetic fix.

Be concerned if you notice:

  • Stair-step cracks that follow the mortar joints diagonally up the wall
  • Cracks wider than a hairline, or ones that keep growing
  • Cracks wider at the top than the bottom, or the reverse
  • Bricks that bulge, lean or sit out of line with the wall
  • Doors and windows that now stick or will not latch
  • Gaps between the brick and the window frames or the foundation
  • Sloping or uneven floors inside the home

Interior signs matter. Cracks in drywall near the same spot, or doors that suddenly rub the frame, support the idea that something below or behind the brick has shifted.

A masonry contractor can describe the brickwork condition. They are not a substitute for a structural engineer or a foundation specialist. If movement is suspected, expect to involve one. Do not patch a moving wall and call it finished, because new cracks will usually reappear.

When to Call a Masonry Contractor for Brick Crack Repairs

Call a masonry contractor when cracks are growing, when mortar is crumbling or when bricks are loose or damaged. Call sooner if water can get into the wall.

Good reasons to schedule an inspection:

  • Cracks that widen over a few weeks
  • Loose, missing or spalled bricks
  • Mortar that crumbles when you touch it
  • Gaps that let rain reach the wall cavity
  • Cracks near an outdoor fireplace, chimney or retaining wall
  • Damage around patios, steps or walkways attached to the house

A contractor can look at the pattern, check mortar condition and test for moisture. They should explain what is cosmetic, what needs repair and what needs another specialist. If they spot signs of foundation movement or drainage trouble, a good one will say so rather than quote a quick patch.

Before the visit, gather your photos, note when you first saw each crack and list any other changes inside the house. Ask what they plan to check and what they cannot determine from the outside. Repair needs depend on the property, soil conditions, drainage, materials and the extent of the damage.

Repair Methods and Maintenance to Protect Brickwork After a Heatwave

The right repair depends on the cause. Fixing the symptom without the cause is the most common reason cracks return.

Common methods include:

  • Repointing. Old mortar is ground out and replaced with new mortar matched to the wall. It is the standard fix for failing joints.
  • Brick replacement. Cracked or spalled bricks are removed and replaced. Matching color and texture on older homes takes care.
  • Crack sealing. Narrow, stable cracks may be filled to keep water out. This is not suitable for moving cracks.
  • Expansion joint repair. Where a wall has no room to move, a contractor may add or restore joints.
  • Foundation or drainage correction. If movement is the cause, other professionals may need to address it before the masonry is repaired.

Mortar type matters. Modern, hard mortar can be too stiff for older brick and can damage it. Ask the contractor how they will match the mix to your wall.

Maintenance is simple. Keep gutters and downspouts clear, and direct water away from the foundation. Check the soil near the house during dry spells and ask a foundation professional about proper watering practices if your lot has movement history. Inspect mortar each season. Keep landscaping and irrigation from soaking the base of the wall.

If your yard includes a brick patio, stone patio, retaining wall or masonry steps, check them too. Those features share soil and drainage with the house, and heat and moisture swings can affect them as well.

Frequently Asked Questions

Can a heatwave crack brick?

Yes, mostly at the mortar joints. Heat causes expansion and contraction, and dry soil can add stress to the foundation. Many cracks are minor, but growing or stair-step cracks should be inspected.

Are cracks in brick always a foundation problem?

No. Many are caused by mortar aging or normal thermal movement. Patterns such as stair-step cracks, bulging or sticking doors suggest movement and call for a closer look.

How can I tell if a brick crack is serious?

Watch for growth, wide gaps, stair-step patterns, bulging bricks and interior changes like sticking doors. Photograph the crack with a ruler and monitor it over several weeks. A professional can confirm the cause.

Brick Fireplace Facades That Frame Built-In Shelving

Find answers about brick fireplace facades with built-in shelving, including brick colors, cabinet installation order, mantel placement, fire clearances, and maintenance.

A brick fireplace flanked by built-in shelves can turn one wall into the best-looking part of the house. The brick gives the room weight and warmth, and the shelves add storage and a place for books, art, and family photos. The problem is that masonry and cabinetry are built by different trades on different timelines, and the wall only looks right when both are planned together.

That’s the main takeaway here. Decide the brick layout, shelf sizes, mantel height, and fire clearances before anyone lays a brick or builds a cabinet box. The sections below explain how to plan the facade, choose brick, handle the joints between materials, meet clearance needs, and keep the surfaces looking good.

Planning Brick Fireplace Facades Around Built-In Shelving

Start with the full wall, not just the fireplace. Measure the width from corner to corner, the ceiling height, and the position of windows, outlets, and vents. Then decide how wide the brick facade will be and how much space is left for shelving on each side.

Symmetry usually works best on a fireplace wall. Equal shelf units on both sides make the brick feel centered and planned. If the firebox sits off-center, a mason can sometimes widen the facade on one side to balance the wall visually.

Talk through these points with your mason and cabinet builder early:

  • Whether the brick runs to the ceiling or stops at the mantel
  • How far the brick face projects from the wall
  • Which gets installed first, the brickwork or the cabinets
  • Where wiring for shelf lighting or a TV will run

In most projects, the brick goes in first and the cabinets are built to fit it. Masonry has small variations in size, so cabinetry measured from finished brick fits better. If you’re refacing an existing brick fireplace, have a mason check the current brick and mortar for damage before shelving locks the wall in place.

Choosing Brick Colors and Textures That Complement Shelves

The brick and shelves should contrast enough to read as two materials but share some common color. A warm red brick pairs well with white, cream, or natural wood shelves. Lighter tan or gray brick suits painted cabinetry in deeper tones like navy, green, or charcoal.

Texture matters as much as color. Smooth, uniform brick gives a clean, modern look that matches flat cabinet doors. Tumbled or wire-cut brick has more character and fits traditional rooms with raised-panel doors or open wood shelving.

Mortar color changes the whole look of brick masonry. Light mortar highlights each brick and makes the pattern stand out. Mortar close to the brick color lets the facade read as one surface, which can feel calmer next to busy shelves full of books.

Bring a cabinet door sample or paint chip when you pick brick. Look at both under your room’s light, not just in a showroom. Reclaimed brick, thin brick, and full-size brick can all work, and the right one depends on the look you want, your budget, and how much depth the wall can take.

Creating Clean Transitions Between Brickwork and Cabinetry

The joint where brick meets wood is where most fireplace walls look unfinished. Brick is never perfectly straight, so a cabinet butted tight against it will show uneven gaps. A good transition hides that variation on purpose.

A scribe strip is a thin piece of trim cut to follow the brick’s edge. The cabinet installer shapes it so it fits tight against the masonry. This closes the gap cleanly without forcing the cabinet itself to match an uneven surface.

Some designers prefer a small, even gap between brick and shelving, often about half an inch. This reveal creates a crisp shadow line that separates the two materials. It looks intentional and forgives minor variations in the brick.

Plan the brick returns as well. A return is where the brick wraps back toward the wall on the side of the facade. Clean, square returns give the cabinets a solid edge to meet, and they look much better than a raw brick end peeking past the shelves.

Coordinating Mantel Placement, Shelf Depth, and Fireplace Clearances

Fire safety sets the limits for everything near the opening. Wood mantels, shelf boxes, trim, and cabinet faces are combustible materials. Codes and fireplace manufacturers set minimum distances between the firebox opening and anything that can burn, and those distances often depend on how far the material projects from the wall.

Confirm the exact numbers with your fireplace’s installation manual and your local building department. Gas inserts, wood-burning fireboxes, and factory-built units can each have different requirements. Don’t rely on what worked in a neighbor’s house, because a small change in mantel depth can change the required clearance.

Mantel height and shelf depth also need to work visually. A mantel that lines up with a shelf or cabinet top ties the whole wall together. Shelves are usually shallower than the brick facade projects, which lets the fireplace stand forward as the focal point.

Think about heat as well as fire codes. Shelves close to the opening can get warm, which may dry out wood, fade finishes, or damage items stored there. Keep candles, electronics, and delicate objects on the shelves farthest from the firebox.

Maintaining Brick Fireplace Surfaces Near Built-In Storage

Brick near cabinetry needs gentle cleaning. Harsh brick cleaners and acid washes can stain wood finishes, damage paint, or soak into cabinet edges. Mask the shelving with painter’s tape and plastic before any deep cleaning.

For routine care, dry brushing and vacuuming handle most dust and light soot. A mild soap and water mix works on most interior brick when the stain needs more. Test any cleaner in a hidden spot first and rinse lightly so water doesn’t run into the cabinet joints.

Watch the joints between brick and wood over time. Small cracks in caulk or trim usually show normal seasonal movement and are easy to touch up. Loose bricks, crumbling mortar, or soot stains above the opening point to a fireplace problem that a mason should look at before it gets worse.

Frequently Asked Questions

Should the brick or the shelving be installed first?

In most projects, the brick goes in first. Masonry has small size variations that cabinet makers can measure and fit around. Building cabinets first often leaves awkward gaps against the brick. Your mason and cabinet builder should agree on the order before work starts.

Can built-in shelves be added next to an existing brick fireplace?

Yes, shelves are often added beside an existing fireplace. The brick should be checked for loose units, cracked mortar, or damage first. Clearances to the opening still apply to new cabinetry. A scribe strip or reveal can handle any unevenness in older brick.

How close can wood shelving be to a brick fireplace opening?

The allowed distance depends on your fireplace type, how far the wood projects, and local code. Manufacturers list clearances in the installation manual. Your building department can confirm what applies to your home. Measure from the firebox opening, not from the outer edge of the brick.

What brick color works best with white built-ins?

Warm red, brown, and multicolored brick all contrast nicely with white shelving. Painted or whitewashed brick can also work for a softer, matched look. The choice depends on your flooring, trim, and how bold you want the fireplace to be. Compare samples in your own room before deciding.

How do I clean brick without damaging nearby cabinets?

Protect the cabinets with tape and plastic before cleaning. Start with a dry brush or vacuum to remove loose dust and soot. Use mild soap and water for tougher spots and avoid acid-based cleaners. Rinse lightly so moisture doesn’t seep into wood joints.

Masonry Planters Need Drainage That Protects Nearby Walls

Brick masonry planter with drainage outlets and landscaping beside an exterior brick wall in Fort Worth, Texas

White, chalky streaks creeping across a brick wall are often the first clue. Damp mortar, flaking brick faces, and dark stains near the base usually follow. When a planter sits against or near that wall, poor drainage is one of the most common causes.

Masonry planters are raised beds built from brick, stone, or block that hold soil for plants. They look great framing a patio or entry, but they soak up a lot of water every time it rains or the sprinklers run. Plan where that water goes before the first course is laid, and the walls around the planter will stay drier and last longer.

How Poor Planter Drainage Affects Adjacent Masonry Walls

Wet soil keeps masonry wet. Brick, stone, and mortar are porous, so moisture from a soggy planter moves into the planter walls and any wall they touch. Over time, that steady dampness causes both visible and hidden damage.

Common signs of a drainage problem include:

  • Efflorescence, the white salt deposits left when water evaporates from masonry
  • Soft, crumbling, or washed-out mortar joints
  • Spalling, where the face of the brick or stone flakes off
  • Green or dark staining from algae and mildew
  • Bulging or leaning planter walls from trapped water pressure

The risk grows when a planter is built against a house. Brick veneer walls usually have weep holes, which are small openings near the bottom that let moisture drain out of the wall. A planter that covers those openings or holds wet soil against the wall can trap moisture inside the wall system.

Planning Masonry Planter Placement and Drainage Outlets

Good drainage starts during layout. First, decide whether the planter needs to touch a wall at all. A freestanding planter with a few inches of space behind it lets air move and water escape, and it keeps soil away from weep holes and siding.

If a planter has to sit against a wall, plan a separation detail. That might be a waterproofed back wall, a drainage gap, or a separate planter wall built in front of the existing one. The right approach depends on the wall type, the planter size, and the overall project design.

Next, decide where water will exit. Weep holes in the planter’s lowest course or drain pipes through the base give water a path out. A planter built on open soil may drain partly downward, while one built on a slab or patio needs outlets through its walls. Talk through outlet size and spacing with your mason before construction starts, since the right setup depends on the planter.

Using Drainage Layers and Waterproofing to Manage Soil Moisture

Inside the planter, layers do most of the work. A typical setup includes:

  • Gravel or drainage aggregate at the bottom
  • Filter fabric over the gravel to keep soil from clogging it
  • A drainage mat against the inside walls in some designs
  • Planting soil on top

Each layer gives water a faster path to the outlets than soil alone would. The fabric matters more than most people expect, because fine soil washing into gravel can clog it within a few seasons. Ask what type of fabric and aggregate your mason plans to use.

Waterproofing protects the masonry itself. A membrane or coating on the inside face of the planter walls keeps wet soil from soaking straight into the brick or stone. Waterproofing can’t do the job of drainage, though. A sealed planter with no way out simply becomes a tub, so both systems should be designed together.

Directing Excess Water Away From Walls and Foundations

Water leaving a planter still needs a safe place to go. Outlets that empty onto a patio right beside the house can send water straight back toward the foundation. The goal is to carry it away from walls, footings, and walkways.

Your options depend on the site. Outlets can discharge onto sloped brick pavers or stone pavers that move water away, or onto splash blocks or gravel strips. Larger planters may tie into a yard drain line. The ground around the planter should slope away from the house so water doesn’t pool at its base.

Look at nearby features too. A planter beside a brick patio, an outdoor kitchen, or a retaining wall can change how water moves across the whole area. On sloped yards, check where runoff from higher ground enters the planter so it doesn’t overwhelm the drainage you planned.

Maintaining Planter Drainage to Prevent Long-Term Moisture Damage

Even a well-built planter needs routine checks. Weep holes and drain outlets can clog with soil, mulch, roots, or insect nests. Clear them a few times a year and after heavy storms.

Watch the irrigation as well. Sprinklers and drip lines that run too long keep the soil soaked and the masonry damp. Adjust watering by season, and keep spray heads from hitting nearby brick masonry or stone masonry walls.

Stay alert for early warning signs. New efflorescence, soft mortar, or dark staining near a planter usually means water isn’t leaving the way it should. Catching these signs early often means a simpler repair. Over many years, the soil may need to come out so the fabric, gravel, or waterproofing can be checked or replaced.

Frequently Asked Questions

Do masonry planters need drainage holes?

Most masonry planters need a way for water to escape. Without outlets, water collects in the soil and soaks into the planter walls. That trapped moisture can lead to staining, mortar damage, and spalling. The type and spacing of outlets depend on the planter design and what it sits on.

Can I build a masonry planter against my house?

It’s possible, but it takes careful planning. Wet soil against a house wall can trap moisture and cover the weep holes on brick veneer. Many designs leave a gap or add a waterproofed back wall to separate the planter from the house. A mason can review your wall type and suggest a safer layout.

What causes white stains on a brick planter?

White stains are usually efflorescence, which forms when water carries salts to the surface and evaporates. It’s a sign that moisture is moving through the masonry. Brushing it off may help for a while, but it will return if the water source isn’t fixed. Check drainage outlets, waterproofing, and irrigation first.

Should the inside of a masonry planter be waterproofed?

Waterproofing the inside face is common and helps keep wet soil from soaking into brick or stone. It works best alongside drainage layers and outlets. A waterproofed planter without a way for water to escape can hold water like a tub. The right product depends on the materials and the planter design.

How often should planter drainage be checked?

A quick check a few times a year works for most planters. Look at weep holes and outlets after heavy rain and seasonal cleanups. Watch nearby walls for new stains or soft mortar. Older planters may need a deeper look at the drainage layers over time.

Brick Arches Depend on Hidden Support Above the Opening

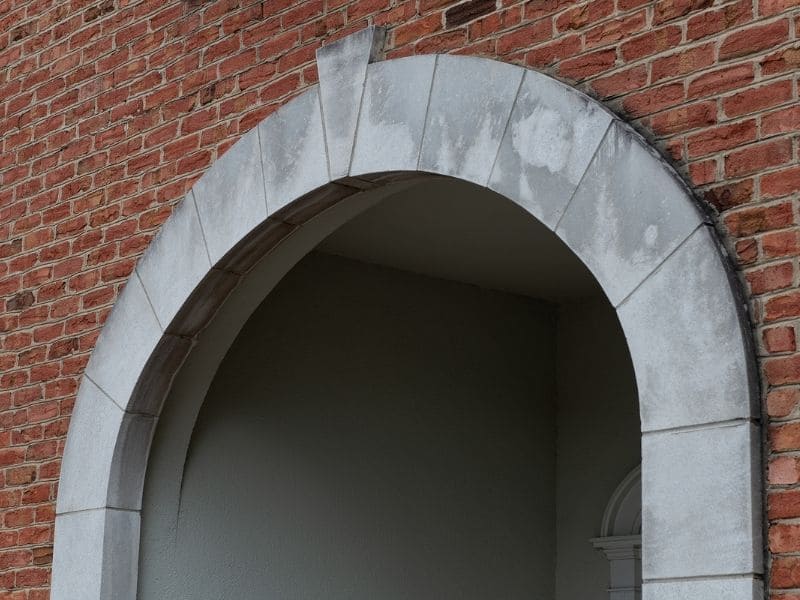
Brick arch over a doorway showing masonry support, lintel, curved opening, and surrounding brickwork.

A brick arch looks like it’s holding itself up. Sometimes it is, and sometimes a steel lintel, a backup wall, or a carefully planned load path is doing much of the work. Brick arches over doors, windows, outdoor kitchens, and garden walls stay straight and crack-free only when that support is planned, built, and maintained correctly. Know what’s above the opening before you build, repair, or buy, and you’ll avoid the most common arch failures.

This guide is for homeowners, builders, and remodelers planning or maintaining brick arches, with designers in mind. It explains how arches carry weight, what support options exist, and what to check over time. Structural details depend on the opening size, wall design, and loads, so have a qualified mason or engineer confirm the specifics.

How Hidden Support Carries the Weight of Brick Arches

Brick arches carry weight by turning the load above them into sideways and downward forces that travel into the walls on each side. Those side supports are called abutments or jambs. If they can’t resist that push, the arch spreads, sags, or cracks.

Many arches also rely on support you can’t see. A steel lintel, which is a beam spanning the opening, may sit behind or within the arch to carry the brick above. In brick veneer on a framed house, the arch is often a decorative face supported by a lintel and tied back to the structure.

During construction, a temporary wooden form called centering holds the arch shape until the mortar cures. Once it’s removed, the arch and its support take over the load. Pulling centering too early is a common cause of early sagging.

Choosing the Right Support Above a Brick Arch Opening

The right support depends on the arch type, the span, the wall construction, and what sits above. A short decorative arch in a garden wall may need different support than a wide arch carrying brick veneer and a roof load. No single option fits every opening.

A properly built arch with solid abutments can carry load on its own once the mortar has cured. Deeper arches with good proportions tend to work better this way. They still need careful design, especially over wider openings.

Steel angle lintels are common in brick veneer over doors and windows. For arched openings, the lintel may be curved to match the arch or placed behind it, depending on the design. Lintels need rust protection, the right size for the span, and enough bearing on each side. Bearing is the length of lintel that rests on the masonry at each end.

Planning the Arch Opening and Load Path

The load path is the route weight takes from the roof and wall above, through the arch and its support, and down into the foundation. Planning it means confirming each piece can carry its share. A weak link anywhere in that chain eventually shows up as cracks.

Start with the opening size and arch shape. Wide, flat arches push harder sideways than tall, rounded ones. The walls on each side need enough mass or reinforcement to resist that push. Proper masonry support becomes especially important when an opening carries significant weight from the wall or structure above.

Check what’s below too. Abutments sit on footings or foundations, and settlement there can crack an arch even if the arch itself was built well. For outdoor features like outdoor kitchens, outdoor fireplaces, or garden walls, footing design depends on soil, size, and local requirements.

How Installation Details Affect Brick Arch Stability

Installation details often decide whether a brick arch stays tight or starts to crack. A good design can still fail if mortar joints, centering, flashing, or lintel placement are handled poorly. These are the details worth discussing with your mason.

Several steps carry extra weight in arch work. Each one affects how the arch handles load and weather. Ask about these:

  • Centering that holds the exact shape and stays in place until the mortar cures
  • Fully filled mortar joints that stay consistent in width
  • Voussoir and keystone placement that keeps the curve even
  • Lintel bearing, alignment, and rust protection
  • Flashing and weep holes above the lintel to let water out

Voussoirs are the wedge-shaped bricks that form the curve, and the keystone is the center brick at the top. Flashing is a waterproof layer that directs water out of the wall above the opening. Without it, water can rust a steel lintel, and rust expands enough to crack the brick around it.

Inspecting Hidden Support for Long-Term Arch Durability

Inspecting hidden support means looking for signs that the lintel, abutments, or load path are struggling. You can’t see a lintel directly in most walls, but the brick around it tells the story. Check arches once a year and after major storms or nearby construction.

Watch for warning signs in the brick masonry around the opening. Each can point to a support problem. Look for:

  • Cracks radiating from the arch or running above the opening
  • A sagging or flattening curve, or a dropped keystone
  • Rust stains or bulging brick just above the opening
  • Gaps between the arch and the wall beside it
  • Doors or windows below the arch that start sticking

Rust jacking is when a corroding steel lintel expands and pushes brick out of place. It often starts with small cracks at the corners of the opening. Catch it early, since repairs grow quickly once brick shifts.

If you see these signs, call a mason or engineer instead of patching cracks yourself. Brick repair should address the underlying problem rather than simply covering the visible cracks. A proper assessment looks at the support, the drainage, and the foundation together.

Frequently Asked Questions

Do brick arches need a steel lintel?

Not always. A well-built arch with strong abutments can be self-supporting, while many veneer arches rely on a lintel. The choice depends on the span, the wall construction, and the loads. A mason or engineer can confirm what your opening needs.

Why is my brick arch cracking?

Common causes include a rusting lintel, settling foundations, weak abutments, or poor original construction. Water getting into the wall is often part of the problem. The crack pattern can hint at the cause. Have a professional inspect before repairing.

Can a sagging brick arch be repaired?

Many sagging arches can be repaired by resetting bricks and correcting the support. Severe cases may need the arch rebuilt. The right fix depends on what caused the sag. Repairs should address support and drainage along with the visible damage.

How long do brick arches last?

A well-built and well-maintained arch can last for generations. Lifespan depends on design, materials, drainage, and upkeep. Rusted lintels and missing flashing shorten it. Routine inspections help catch problems early.

Can I add a brick arch to an outdoor kitchen or garden wall?

Yes, brick arches can work well in outdoor kitchens, garden walls, and entries. They need proper footings, abutments, and support like any other arch. Weather exposure makes drainage and joint quality especially important. Plan the design with a mason before construction

Thin Brick Can Add Texture Without Rebuilding a Full Wall

Thin brick veneer adding texture to an outdoor wall, kitchen, or fireplace.

A plain block base or a flat siding wall can make a good outdoor space feel unfinished. Plenty of homeowners want the warmth of brick masonry without tearing out a wall or pouring a wider footing. Thin brick solves that problem on a lot of projects.

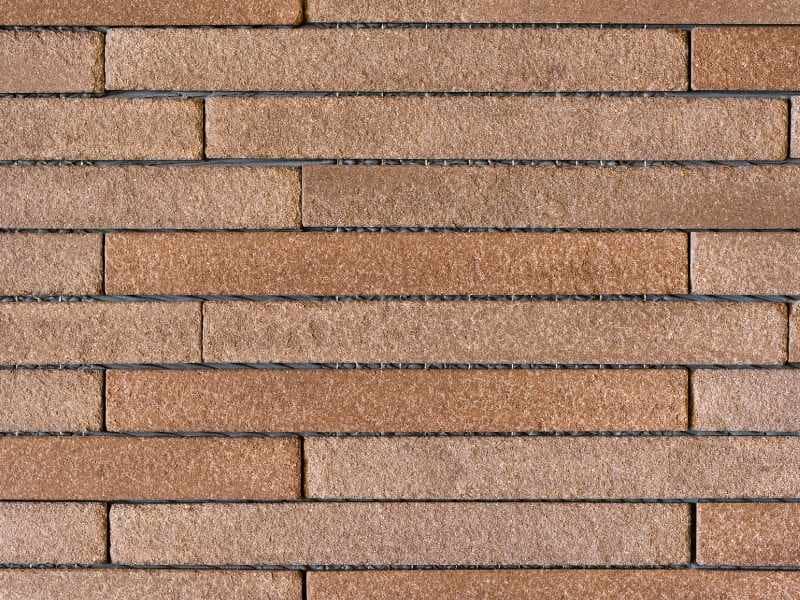
Thin brick is real fired clay brick made about half an inch to one inch thick. It’s set in mortar over a prepared surface, so you get the face and texture of brick without the weight of a full unit. It only performs as well as the wall behind it and the water control around it, so plan those details before you pick a color.

Where Thin Brick Works Best Around the Home

Thin brick works best on solid surfaces that won’t flex or stay wet. The base has to carry the added weight and stay stable for years. Common spots include:

  • Outdoor kitchen islands built from block or framed with cement board
  • Outdoor fireplace surrounds and chimney faces
  • Foundation skirts and porch columns
  • Accent walls on covered patios
  • The face of a low retaining wall that’s already structurally sound

It’s a poor fit on a wood fence, a cracked block wall, or a retaining wall that’s leaning. Veneer over a structural problem only hides it for a while. If you’re unsure about a wall’s condition, have a mason or engineer check it before you choose a finish.

Choosing Thin Brick for Texture and Durability

Pick thin brick the same way you’d pick full brick, by look and by rating. For outdoor work, ask for units made for exterior exposure, since some products are meant for interiors only. Faces range from smooth and wire-cut to tumbled, sand-struck, and reclaimed styles. A rougher face reads older and hides small joint variations, while a smooth face looks cleaner and more modern.

Corner pieces matter more than most people expect. These are L-shaped units that wrap an outside corner, so the edge shows a brick end instead of a thin slice. Skipping them is the quickest way to make veneer look fake. Ask your installer whether the product line includes matching corners and how many the project needs.

Planning Transitions Between Brick and Outdoor Materials

Transitions are where thin brick projects look either custom or patched. Every spot where brick meets a stone patio, a countertop, a cap, or siding needs a plan. Decide on each edge detail before the first brick goes up.

In an outdoor kitchen, a countertop with a small overhang protects the top course and sheds water. On an outdoor fireplace, a cap or mantel ledge does the same job. Where veneer runs down to a brick patio, brick pavers, or stone pavers, leave a clean joint instead of butting it tight to the paving. That break gives each surface room to move with heat and soil changes.

Mixing materials works when there’s a reason for it. A stone retaining wall can sit comfortably beside a thin brick kitchen if the colors share a tone and the mortar ties them together. Two or three materials repeated around the yard usually look planned, while five or six start to look busy.

Managing Drainage Around Thin Brick Installations

Water is the main threat to adhered masonry. Thin brick doesn’t have the mass of a full wall, so moisture behind it has fewer places to go. Most exterior systems use a water-resistant barrier, metal lath, and a scratch coat behind the brick, with a way for water to exit at the bottom. The exact system depends on the wall type, the product, and local code, so follow the manufacturer’s instructions and your installer’s design.

Grading around the base matters just as much. Patios, walkways, and soil should slope away from veneered walls, never toward them. Keep the bottom course off the ground and out of standing water. Sprinklers that spray the wall daily will stain the mortar, and a slab that settles can crack the brick above it, so check for low spots and poor downspout drainage before work begins.

Maintaining Thin Brick for Long-Term Performance

Thin brick needs about the same care as any brick masonry. Walk the installation once or twice a year and look at the joints, the bottom edge, and the top cap. Fix hairline cracks, loose units, or missing mortar early, before water gets behind them.

Clean with a soft brush, water, and a mild cleaner made for brick. High-pressure washing can erode joints and force water behind the veneer, so keep the pressure low. White chalky residue is usually efflorescence, which means water is moving through the masonry. Brush it off dry, then track down where the water is coming from.

Sealers are optional and depend on the brick. If you use one, choose a breathable product that lets vapor escape. Ask your mason which sealers work with your specific material before applying anything.

Frequently Asked Questions

What is thin brick?

Thin brick is fired clay brick made much thinner than a standard unit, usually about half an inch to one inch thick. It’s installed in mortar over a prepared wall surface. From the front, it looks like a full brick wall with real joints and texture. It’s often used where full brick would be too heavy or would need a new footing.

Can thin brick be installed outdoors?

Yes, as long as the product is rated for exterior use and the wall is built for outdoor exposure. Outdoor kitchens, fireplaces, and column wraps are common uses. The installation needs a moisture plan, including a barrier and a way for water to drain at the base. Requirements vary by product and local code, so check both before starting.

Can thin brick go over an existing wall?

Often it can, but it depends on the wall. Concrete, block, and properly prepared framed walls usually accept it well. Painted surfaces, damaged stucco, and walls that flex need repair or a new substrate first. A mason should inspect the wall before you buy materials.

How long does thin brick last?

A well-installed thin brick wall can last for decades. The brick holds up well because it’s the same fired clay used in full brick. Most failures come from water getting behind the veneer or from a base that moves. Good drainage, a solid substrate, and early joint repair make the biggest difference.

Will thin brick match my existing brick?

It can come close, but an exact match isn’t guaranteed. Brick color varies by batch, and older brick has weathered for years. Comparing samples outside in daylight is the best way to judge. A complementary color sometimes looks more intentional than a near-match.

Brick Steps Need Consistent Heights From Sidewalk to Porch

Most people never notice a good set of steps. Their feet find a rhythm on the first rise and carry them to the door without a second thought. One step that sits half an inch taller than the rest breaks that rhythm, and that’s where trips start. The fix is simple to say and harder to build: plan every step as one system, from the sidewalk all the way to the porch.

Why Consistent Step Heights Matter From Sidewalk to Porch

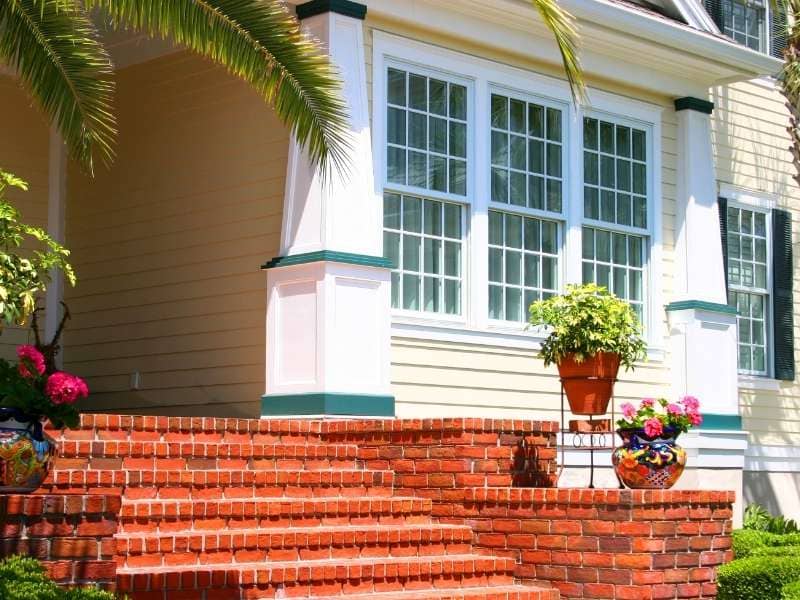
Brick steps should have risers of the same height and treads of the same depth from bottom to top. A riser is the vertical face of each step, and the tread is the flat part you stand on. People set their stride on the first step or two and expect the rest to match. When one riser is off, a foot can catch the edge or land short, especially at night or with full hands.

The top and bottom steps cause the most trouble. The bottom step often ends up wrong because the sidewalk slopes or has settled. The top step can be off when the porch height wasn’t measured carefully, or when a thicker brick cap raised the landing.

Local code may limit riser height, tread depth, and how much steps can vary from one another. Those rules can differ by city and project, so confirm them with your mason or local building department before the design is final. Handrail needs can also depend on the number of steps and the total rise.

Plan the Walkway Before Choosing Brick or Stone

Steps are part of a path, so the walkway layout should come first. Start by measuring the total rise from the sidewalk to the porch floor. Divide that height into equal risers, then figure out how much run you need for comfortable treads. If the run doesn’t fit, a landing or a longer, curved approach can absorb some of the grade.

Think about where people actually walk. A front walk might also lead to a side gate, a brick patio, a garden, or a seating area near an outdoor fireplace. Mapping those routes early helps you and your stone mason place the steps where they feel natural and determine how each surface should meet the next. 

Changes in Elevation and Retaining Walls

Sloped yards often need more than steps. A short retaining wall on each side can hold soil back and create a level spot for a landing or planter. The wall and steps should be designed together so heights, caps, and drainage line up. Taller walls or steep grades may need an engineer’s input, depending on the site and local requirements.

Choose Materials That Work With the Step Design

Brick and stone both make great steps, and the better choice depends on your house, traffic, budget, and existing masonry. Brick is uniform in size, which makes even riser heights easier to hold across a full run. Natural stone varies more in thickness, so a stone mason may need to cut or select pieces carefully to keep every step level. That care matters more on steps than on a flat stone patio.

Match the steps to existing brick masonry or stone masonry when you can. If the house has red brick and the walkway uses brick pavers, brick steps usually tie the look together. A home with a stone outdoor kitchen might suit stone treads with brick risers. Mixing the two can work well, but it should look planned rather than patched.

Paver thickness affects step height too. Brick pavers and stone pavers come in different thicknesses, and switching products midway can throw off the last riser. Ask your mason which paver, cap, and mortar bed they plan to use, because those layers add up. Texture matters as well, since smooth stone can get slick when wet.

Manage Drainage Where Steps Meet Patios and Walkways

Water is one of the main reasons steps shift and heights drift over time. Each tread should have a slight pitch so rain runs off instead of pooling. Nearby walkways and patios should slope away from the steps and the foundation. Standing water at the base can soften the soil and lead to settling.

Transitions are the weak points. Where steps meet a patio, sidewalk, or stone walkway, water can collect in the joint and seep under the base. Your mason should plan where water goes next, such as a lawn, a drain, or a gravel strip. Downspouts that empty beside the steps are worth rerouting before work begins.

Clay soils that shrink when dry and swell when wet can also move steps out of level. Good grading and controlled drainage won’t stop that movement completely. They do reduce how much it shows up in your steps.

Build for Durability and Easier Masonry Maintenance

Durable brick steps start below the surface. Base preparation usually means removing soft soil, adding compacted base material, and building on a stable footing or slab. The right depth and base type depend on soil conditions, step size, and project design. Skipping this work is the fastest way to end up with uneven risers a few years later.

Ask how the new steps will meet the porch and what happens if one settles differently from the other. This is also the time to look at existing masonry. Cracked or loose brick on the porch should be repaired before new steps tie into it.

After the steps are built, a little upkeep goes a long way. Check mortar joints each year and repair cracks before water gets in. If a step starts to rock or a riser looks taller than it used to, call a brick mason early, since small repairs cost less than a rebuild.

Frequently Asked Questions

How do I know if my brick steps have uneven heights?

Measure each riser from the top of one tread to the top of the next. Write down every number, including the step off the sidewalk and the step onto the porch. If the numbers differ noticeably, especially at the top or bottom, the steps are likely uneven. A mason can tell you whether the fix is a simple reset or a full rebuild.

Can uneven brick steps be repaired without rebuilding them?

Often they can. A single step that is settled can usually be taken up, re-based, and reset to match the others. If the whole set was built with uneven risers or the base has failed, rebuilding may be the better choice. It depends on the base, the soil, and how far off the heights are.

Should I choose brick or stone for my front steps?

Both can work well for front steps. Brick has consistent sizing, which makes even riser heights easier to achieve. Stone has a natural look, but pieces vary and may need more cutting to stay level. Your existing masonry, budget, and preferred style should guide the choice.

How do I keep water from pooling on my steps?

Each tread should slope slightly so water runs off the front edge. The walkway and patio around the steps should also slope away from the house. Downspouts and yard grading should send water away from the base. A mason can check these details before building so drainage isn’t an afterthought.

How often do brick steps need maintenance?

A quick check once or twice a year is usually enough. Look for cracked mortar, loose bricks, and any step that rocks or sits higher than the others. Clean off dirt and moss that can make treads slippery. Fixing small problems early helps the steps last much longer.

Brick Pavers Near Downspouts Need a Clear Drainage Path

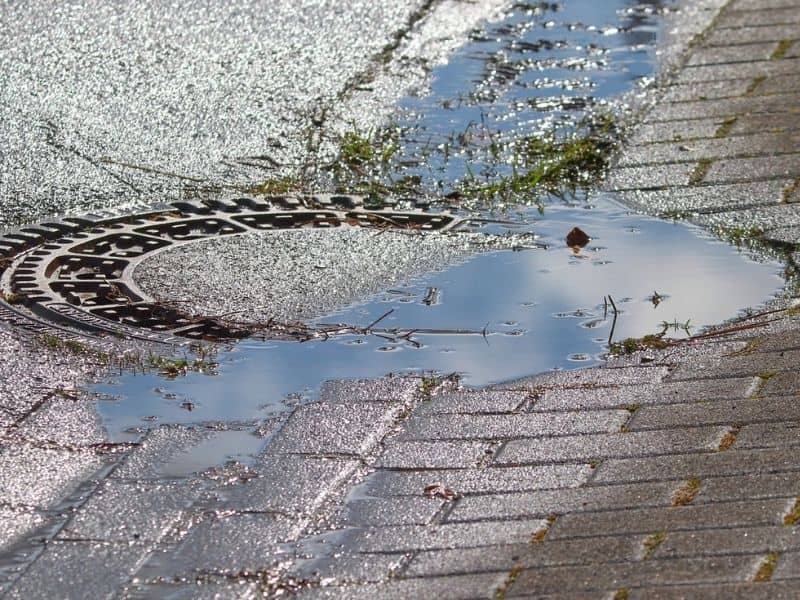
Wet paving stones surrounding a drainage cover, illustrating brick pavers near downspouts after rain

A roof sheds a huge amount of water every time it rains, and every drop funnels down to just a few spots. That’s what a downspout does. It takes water collected across the whole roof and pours it out in one narrow stream at ground level. When brick pavers sit right where that stream lands, they need somewhere for the water to go. A patio or walkway that looks great in dry weather can turn into a soggy problem the first time it gets a hard rain, and the fix almost always comes down to one thing: giving that water a clear path away from the house.

Track Roof Runoff From Downspout to Final Discharge

Before you plan anything with brick pavers, walk the path the water actually takes. Start at the gutter, follow it down the downspout, and keep going until you reach the spot where the water finally soaks into the ground or reaches a storm drain. That endpoint matters as much as the downspout itself.

Too many paver projects only look at the patch of ground right under the downspout. They fix that one spot and ignore everything past it. If the water still has nowhere to go twenty feet later, you’ve just moved the puddle instead of solving it. Map the whole route first, from roof to final discharge, then figure out where the pavers fit into that route without blocking it.

Keep Downspout Outlets From Emptying Into Paver Joints

The exact spot where a downspout empties out matters more than most homeowners realize. If that outlet sits right above the joints between brick pavers, you’re asking those joints to absorb a concentrated stream of water every time it rains.

Paver joints are usually filled with sand or fine jointing material, and that material washes out fast under repeated direct flow. Once the joint sand disappears, the base underneath starts to erode too. Pavers begin to rock, sink, or shift out of line, and what started as a drainage problem turns into a structural one. The fix is simple in concept: give the downspout a deliberate route away from the pavers instead of letting it dump straight onto one small section, over and over, storm after storm.

Coordinate Brick Pavers With Downspout Extensions and Drain Inlets

There’s more than one way to move water past a paved area, and the right choice depends on the site. Some setups use an above-ground extension, like a rigid pipe or splash block, that carries water a few extra feet before it reaches the pavers. Others run a buried pipe underneath the paved surface and pop out somewhere past it, so the connection stays hidden and the surface stays clean.

A third option ties the downspout into a drain inlet or catch basin built right into the paver layout. That inlet collects the water and routes it into an underground pipe instead of letting it spread across the surface. Any of these can work well. What matters is picking the layout before the pavers go in, not trying to squeeze a solution in afterward.

Preserve the Drainage Route When Brick Pavers Are Installed

Once the drainage plan is set, the installation itself has to protect it. This is where a lot of well-planned drainage gets ruined by accident. A crew digging out the base for new pavers can easily cut through a buried extension pipe without realizing it’s there, or grade the sub-base so it slopes the wrong way and sends water back toward the house instead of away from it.

Mark every existing downspout line and buried connection before excavation starts. Keep any pipe joints and outlets accessible rather than burying them under a solid run of pavers with no way to reach them later. And check the finished grade with a level, not just by eye, since even a small reverse slope can undo the entire drainage plan. Getting this step right during installation saves a lot of digging later.

Recheck Downspout Discharge After Heavy Rain

The real test of any drainage plan comes during and after an actual storm, when the system gets plenty of hard, fast rain to put that plan to work. Walk the discharge point once the rain lets up and look closely at what happened. A drainage path that works on paper doesn’t always hold up once the water is actually flowing.

Watch for these signs that something isn’t draining the way it should:

  • Water pooling or backing up right at the downspout outlet
  • A wet trail crossing pavers in a direction it shouldn’t be going
  • Standing water lingering where the downspout meets the paving, long after the rain stops
  • Soil or mulch washed onto the paver surface near the outlet
  • Pavers that feel soft, loose, or slightly sunken near the discharge point

Catching these signs early means a small adjustment, like repositioning an extension or clearing a blocked inlet, instead of a bigger repair down the road.

Painted Brick Removal Can Damage the Original Fired Surface

Peeling paint and a test removal area exposing the original fired brick surface in Fort Worth, Texas.

Painted brick can start to feel like a mistake. The color fades, the paint peels, and many owners want the natural brick back. So they set out to strip the paint and return the wall to its original look without causing surface damage.

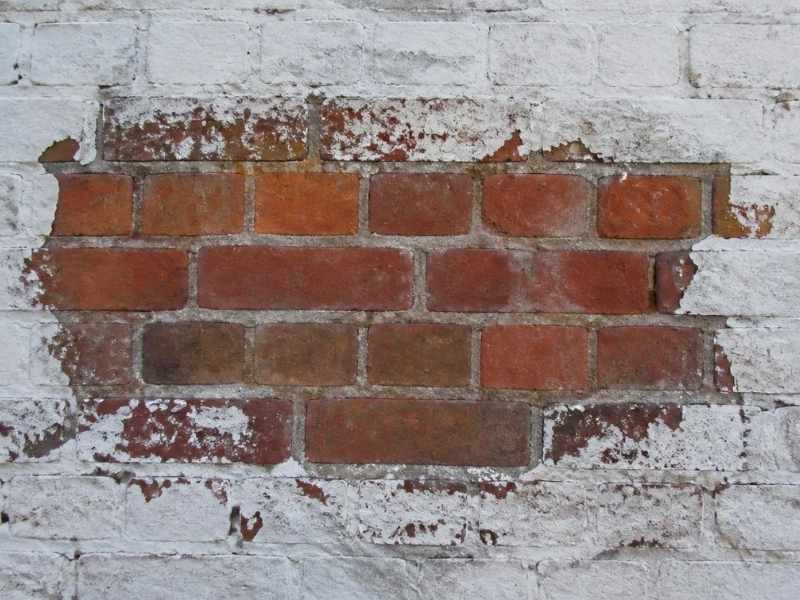
That goal is understandable, but the process carries real risk. Brick has a hard outer layer that forms during firing. Strip the paint the wrong way, and you can tear off that layer along with it. Once it is gone, the brick underneath is softer, weaker, and open to damage.

Here is the takeaway. Painted brick removal can harm the original fired surface if it is done too aggressively. The fired surface is the tough outer skin that protects the brick. The sections below explain why that skin matters, how removal methods affect it, and how to protect your brick.

Why Painted Brick Removal Can Damage the Fired Face

Brick gets its strength in the kiln. High heat hardens the outer surface into a dense, weather-resistant skin. This fired face is tougher than the brick’s inner core and helps protect the brickwork from water and wear.

Paint clings tightly to that surface, sometimes soaking into the pores. Removing it means pulling against a bond that does not want to let go. Harsh methods that break the bond can also break the fired face. When the skin comes off, the soft interior is exposed.

That exposed core is the real problem. The inside of a brick is more porous than its fired skin. It soaks up water fast once the surface is gone. Over time, that moisture leads to crumbling, flaking, and decay.

How Paint Stripping Methods Affect Brick Surfaces

Not all removal methods are equal. Some are hard on brick, and some are gentler. The method you choose decides whether the fired face survives.

Abrasive methods are the most damaging. Sandblasting and aggressive grinding wear away paint by wearing away the surface. That means the fired skin goes too. Pressure washing at high force can do the same, blasting off the outer layer and driving water deep into the brick, which can leave it more vulnerable to weather exposure.

Chemical strippers work differently and can be safer when used with care. They soften the paint so it can be removed with less force. Even so, the wrong product or too much scrubbing can still harm the surface. Methods and results vary by paint type, brick age, and wall condition, so a mason should guide the approach.

Assessing Brick Condition Before Paint Removal Begins

Smart removal starts with a good look at the brick. Not every wall can handle paint stripping. Checking the condition first tells you what the brick can take.

A mason examines several things before any work begins. They look at the age of the brick, since older brick is often softer. They check for cracks, crumbling, and loose mortar that signal weakness. They also note how many layers of paint are present. Signs a mason watches for include:

  • Soft or flaking brick faces
  • Existing cracks or spalling
  • Loose or failing mortar joints
  • Multiple thick layers of old paint
  • Areas where the surface already looks worn

This check shapes the whole plan. Brick in good shape may handle careful stripping. Brick that is already weak may be better left painted or handled another way.

Testing Small Areas Before Full-Scale Brick Cleaning

Never strip a whole wall without testing first. A test patch shows how the brick and paint react. It is the safest way to avoid a costly mistake across the entire surface.

A mason picks a small, low-visibility spot to start. They apply the chosen method and watch closely. The test shows whether the paint lifts cleanly and whether the fired face stays intact. If the surface starts to damage, the plan changes before real harm is done.

This step saves brick and money. A failed method on one small patch is easy to accept. The same failure across a full wall is a disaster. Testing gives you real proof of what works before committing to the whole job.

Planning Repairs When the Original Surface Is Compromised

Sometimes the damage is already done. Maybe a past removal stripped the fired face, or the brick was fragile to begin with. When the surface is compromised, a repair plan protects what is left.

A mason has a few ways to help. They can apply a breathable masonry sealer to slow water absorption on exposed brick. They can repoint failing mortar to keep joints tight. In bad cases, they may replace individual bricks that have decayed past saving.

Sometimes the best move is to repaint or coat the brick again. A quality masonry coating can protect a surface that has lost its fired skin. A mason can weigh the options for your wall. The right choice depends on how much damage exists and what look you want.

Frequently Asked Questions

Can you remove paint from brick without damage?

It is possible, but it takes the right method and careful work. Gentle chemical strippers used by an experienced hand are safer than abrasive blasting. The brick’s condition also matters, since weak brick damages easily. A mason can test and guide the process to protect the fired surface.

Why is removing paint from brick risky?

Brick has a hard fired skin that protects it from water and wear. Paint bonds tightly to that skin and can pull it off during removal. Harsh methods like sandblasting strip the surface along with the paint. Once the skin is gone, the softer brick underneath absorbs water and decays.

What is the safest way to strip painted brick?

Careful chemical stripping is usually gentler than abrasive or high-pressure methods. The paint is softened so it lifts with less force on the surface. A test patch first confirms the method works without harm. Because results vary, an experienced mason should choose and manage the approach.

Should I remove paint from old brick?

Older brick is often softer, which makes removal riskier. In some cases the brick is better left painted or recoated. A mason can assess whether your brick can handle stripping. That check helps you avoid turning a cosmetic issue into structural damage.

What if paint removal already damaged my brick?

There are still ways to protect and repair the surface. A mason can seal exposed brick, repoint mortar, or replace badly damaged units. Recoating the wall is another option when the fired skin is gone. The best fix depends on how much damage the brick has taken.

Stone Mailbox Caps Help Limit Water Entry From Above

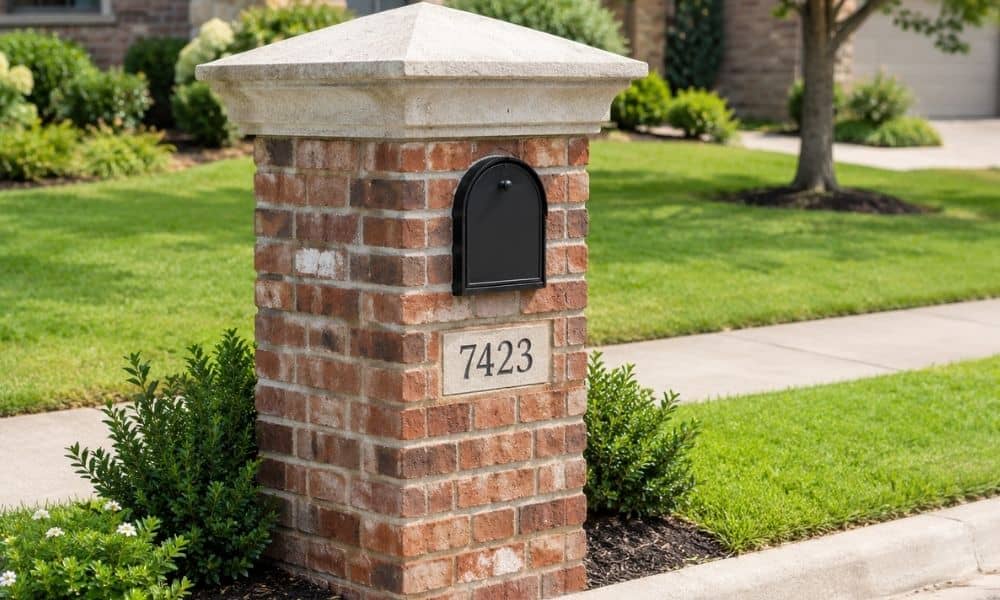
Brick residential mailbox with an overhanging stone cap designed to shed rainwater and limit water entry

A stone mailbox sits out at the curb with nothing over it. No roof, no porch, no tree branch to block the rain. When a storm rolls through Fort Worth, the top of that mailbox takes the hit first, and water always looks for a way in from the top down. The cap stone up top is what stands between a hard rain and the parts you actually care about, like your mail and the metal box inside.

Most people never look at the top of their mailbox. They check the door, grab the mail and walk back inside. But the cap does quiet work every single day, and when it fails, the damage starts up high and moves down where you can’t see it.

The good news is that stopping this kind of damage is simple once you know where the water goes and what the cap is supposed to do about it. A weak or missing cap lets rain travel somewhere it shouldn’t. A good one keeps it off your mail and out of your stone.

Why the Top of a Stone Mailbox Takes the Worst Hits

The top of a stone mailbox is the most exposed part of the whole structure. It’s flat or close to flat, it faces straight up at the sky, and it has no cover at all. Rain, hail and wind-driven water all land there before they land anywhere else.

Fort Worth makes this harder than it sounds. Spring storms from about April through June bring heavy downpours and hail, and the wind pushes rain sideways so it hits the top and the seams at the same time. A mailbox at a storm-exposed entrance can get more weather in one afternoon than a wall tucked under your roofline gets in a month.

Stone and mortar also soak up water. Masonry is full of tiny holes, so a wet top doesn’t just dry off on its own. It pulls water inward, and gravity carries that water down into the column instead of letting it run off the sides.

How Water Moves Down Through the Column

Water that gets past the top doesn’t stay put. It runs straight down the inside of the mailbox, and it takes the easiest path down. That path leads right to the parts that cost you money and headaches.

Most stone mailboxes wrap around a metal mailbox. When top-down water reaches that metal box, it starts to rust. Rust spreads, stains the stone, and can leave the little door stuck or hard to close. Your mail sits in that same space, so damp or spotted letters are often the first thing people notice.

The water keeps going after that. It settles into the mortar joints lower down, pools at the base and soaks the bottom stones. Over a few seasons, joints that stay wet start to crumble, and in winter that trapped water can freeze. Water swells about 9 percent when it freezes, and that small push is enough to crack mortar and pop the face off a stone.

What a Good Cap Does to Keep Water Out

A good cap does one main job. It covers the whole top of the mailbox and sends rain off to the sides before it can soak in or drip down inside. Think of it as the roof for the little structure.

The cap should sit a bit wider than the column so its edges hang past the stone below. That small lip, called a drip edge, lets water fall clear of the face instead of running back against it. A cap with a gentle slope, even just a few degrees, moves water off faster than a dead-flat top that lets rain pool and sit.

The seam under the cap matters as much as the cap itself. That’s where the cap meets the top course of stone, and it’s a common spot for water to sneak in. A mason beds the cap in fresh mortar and seals that joint so rain rolls off the edge instead of slipping under it and heading for the mail.

Signs Water Is Already Getting In From Above

You can catch most cap problems early if you know what to look for. The clues show up around the top and the mail door, not just at the base. Walk out after the next big storm and check for these:

  • Rust streaks or brown stains running down from the mail door
  • A mail door that sticks, drags or won’t shut all the way
  • Damp, curled or spotted mail even when it hasn’t rained in a day or two
  • White, chalky stains trailing down from the cap seam
  • A cap that feels loose, wobbles or has shifted off center
  • Crumbling or missing mortar in the joint right under the cap

Any one of these means water is finding a way in from the top. Two or more together means the cap has likely been leaking for a while, and the fix only gets bigger the longer it waits.

Getting the Cap Fixed Before It Costs More

The cap is a small part, so fixing it early is one of the cheaper masonry repairs you can make. A mason can re-bed a loose cap, reseal the seam or set a proper cap with an overhang if yours is flat, undersized or missing. That work usually takes far less time and money than rebuilding a column that’s been soaking for years.

If your mailbox already shows rust stains, a stuck door or soft mortar near the base, the water has done more than surface damage. At that point a mason should check how far it has traveled before sealing anything back up, since trapping wet stone only makes it worse. A quick look after storm season is the easiest way to stay ahead of it.

Your stone mailbox handles more weather than almost anything else on your property, and it does it with no roof and no overhang to help. The cap is the one part carrying that load. Keep it tight and sloped, and it will keep water where it belongs, which is off your mail and out of your stone.

Frequently Asked Questions

What is a stone mailbox cap?

The cap is the top stone that covers a stone mailbox and works like its roof. It closes off the open top of the column and pushes rain to the sides so water can’t drip straight down inside. A cap that hangs a little past the edges works best, because it carries runoff clear of the stone face.

How can I tell if water is getting into my mailbox from the top?

Look near the mail door and the top of the column, not just the ground. Rust streaks below the door, a door that sticks or letters that feel damp all point to water coming in from above. Chalky white marks below the cap seam are another common clue that rain is slipping under the cap.

Can I seal a stone mailbox cap myself?

You can brush a breathable masonry sealer on the surface, and that helps a dry, sound cap shed water. But a loose cap, a cracked seam or a cap with no overhang needs a mason to re-bed and reseal it the right way. Sealing over a cap that’s already leaking traps the water and speeds up the damage.

Does every stone mailbox need a cap?

Yes, because the open top of a stone column is the easiest place for water to get in. Without a cap, rain lands on bare stone and open joints and soaks straight down toward the mail and the base. A well-fitted cap with a slight slope and an overhang is the simplest way to protect the whole structure.

How often should I check my mailbox cap?

Check it at least once or twice a year, and again after any big storm or hail. Fort Worth’s spring storm months are a smart time for a close look, since that’s when wind-driven rain hits hardest. A two-minute check for a loose cap or fresh stains can save you a much larger repair later.