Painted Brick Removal Can Damage the Original Fired Surface
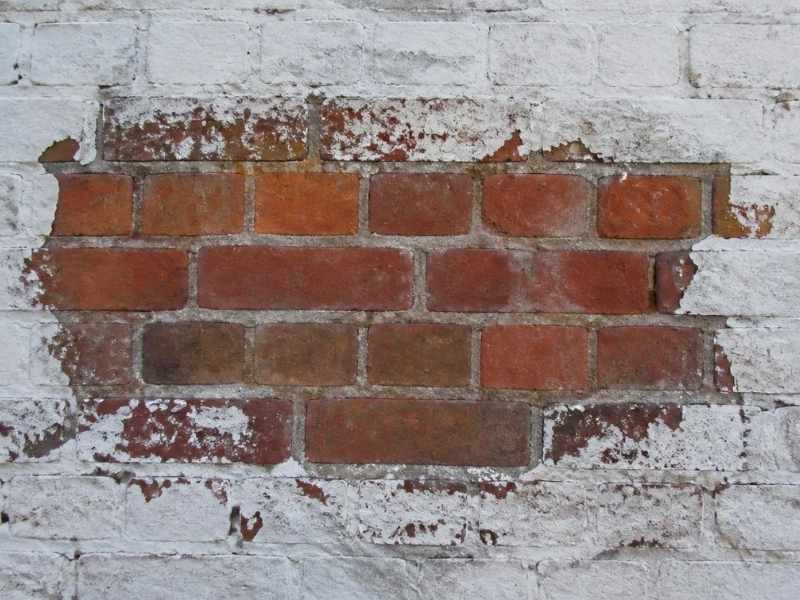
Peeling paint and a test removal area exposing the original fired brick surface in Fort Worth, Texas.

Painted brick can start to feel like a mistake. The color fades, the paint peels, and many owners want the natural brick back. So they set out to strip the paint and return the wall to its original look without causing surface damage.

That goal is understandable, but the process carries real risk. Brick has a hard outer layer that forms during firing. Strip the paint the wrong way, and you can tear off that layer along with it. Once it is gone, the brick underneath is softer, weaker, and open to damage.

Here is the takeaway. Painted brick removal can harm the original fired surface if it is done too aggressively. The fired surface is the tough outer skin that protects the brick. The sections below explain why that skin matters, how removal methods affect it, and how to protect your brick.

Why Painted Brick Removal Can Damage the Fired Face

Brick gets its strength in the kiln. High heat hardens the outer surface into a dense, weather-resistant skin. This fired face is tougher than the brick’s inner core and helps protect the brickwork from water and wear.

Paint clings tightly to that surface, sometimes soaking into the pores. Removing it means pulling against a bond that does not want to let go. Harsh methods that break the bond can also break the fired face. When the skin comes off, the soft interior is exposed.

That exposed core is the real problem. The inside of a brick is more porous than its fired skin. It soaks up water fast once the surface is gone. Over time, that moisture leads to crumbling, flaking, and decay.

How Paint Stripping Methods Affect Brick Surfaces

Not all removal methods are equal. Some are hard on brick, and some are gentler. The method you choose decides whether the fired face survives.

Abrasive methods are the most damaging. Sandblasting and aggressive grinding wear away paint by wearing away the surface. That means the fired skin goes too. Pressure washing at high force can do the same, blasting off the outer layer and driving water deep into the brick, which can leave it more vulnerable to weather exposure.

Chemical strippers work differently and can be safer when used with care. They soften the paint so it can be removed with less force. Even so, the wrong product or too much scrubbing can still harm the surface. Methods and results vary by paint type, brick age, and wall condition, so a mason should guide the approach.

Assessing Brick Condition Before Paint Removal Begins

Smart removal starts with a good look at the brick. Not every wall can handle paint stripping. Checking the condition first tells you what the brick can take.

A mason examines several things before any work begins. They look at the age of the brick, since older brick is often softer. They check for cracks, crumbling, and loose mortar that signal weakness. They also note how many layers of paint are present. Signs a mason watches for include:

  • Soft or flaking brick faces
  • Existing cracks or spalling
  • Loose or failing mortar joints
  • Multiple thick layers of old paint
  • Areas where the surface already looks worn

This check shapes the whole plan. Brick in good shape may handle careful stripping. Brick that is already weak may be better left painted or handled another way.

Testing Small Areas Before Full-Scale Brick Cleaning

Never strip a whole wall without testing first. A test patch shows how the brick and paint react. It is the safest way to avoid a costly mistake across the entire surface.

A mason picks a small, low-visibility spot to start. They apply the chosen method and watch closely. The test shows whether the paint lifts cleanly and whether the fired face stays intact. If the surface starts to damage, the plan changes before real harm is done.

This step saves brick and money. A failed method on one small patch is easy to accept. The same failure across a full wall is a disaster. Testing gives you real proof of what works before committing to the whole job.

Planning Repairs When the Original Surface Is Compromised

Sometimes the damage is already done. Maybe a past removal stripped the fired face, or the brick was fragile to begin with. When the surface is compromised, a repair plan protects what is left.

A mason has a few ways to help. They can apply a breathable masonry sealer to slow water absorption on exposed brick. They can repoint failing mortar to keep joints tight. In bad cases, they may replace individual bricks that have decayed past saving.

Sometimes the best move is to repaint or coat the brick again. A quality masonry coating can protect a surface that has lost its fired skin. A mason can weigh the options for your wall. The right choice depends on how much damage exists and what look you want.

Frequently Asked Questions

Can you remove paint from brick without damage?

It is possible, but it takes the right method and careful work. Gentle chemical strippers used by an experienced hand are safer than abrasive blasting. The brick’s condition also matters, since weak brick damages easily. A mason can test and guide the process to protect the fired surface.

Why is removing paint from brick risky?

Brick has a hard fired skin that protects it from water and wear. Paint bonds tightly to that skin and can pull it off during removal. Harsh methods like sandblasting strip the surface along with the paint. Once the skin is gone, the softer brick underneath absorbs water and decays.

What is the safest way to strip painted brick?

Careful chemical stripping is usually gentler than abrasive or high-pressure methods. The paint is softened so it lifts with less force on the surface. A test patch first confirms the method works without harm. Because results vary, an experienced mason should choose and manage the approach.

Should I remove paint from old brick?

Older brick is often softer, which makes removal riskier. In some cases the brick is better left painted or recoated. A mason can assess whether your brick can handle stripping. That check helps you avoid turning a cosmetic issue into structural damage.

What if paint removal already damaged my brick?

There are still ways to protect and repair the surface. A mason can seal exposed brick, repoint mortar, or replace badly damaged units. Recoating the wall is another option when the fired skin is gone. The best fix depends on how much damage the brick has taken.
Brick Patio Edges Can Spread Without Proper Restraint

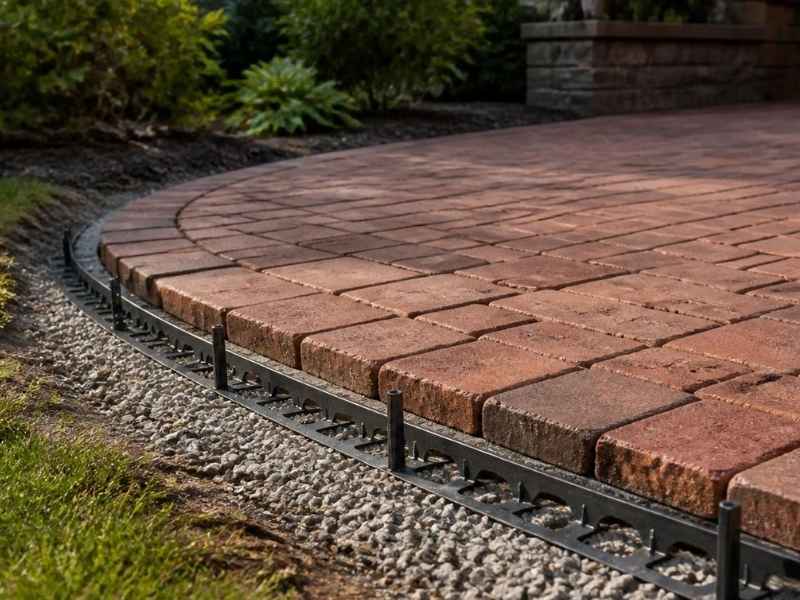
Brick patio pavers secured by edge restraint on a compacted base in Fort Worth, Texas.

A brick patio looks solid the day it goes in. The pavers sit tight, the lines run straight, and the surface feels firm underfoot. Give it a few seasons without the right edge support, and those clean lines can start to drift.

Edges are the weak point of any paver patio. The outer bricks have nothing holding them from the side. Without restraint, they slide outward, gaps open up, and the whole surface loosens. Once the edge goes, the rest of the patio soon follows.

Here is the takeaway. A brick patio needs proper edge restraint and strong perimeter support to hold its shape over time. Edge restraint is the system that locks the outer pavers in place and helps prevent them from shifting outward. The sections below explain why edges spread, how restraints stop it, and what to check before the job is done.

Why Brick Patio Edges Begin to Spread

A brick patio is built from many separate pavers set on a prepared base. The pavers are not glued or mortared in most patio designs. They rely on tight joints, pressure from all sides, and proper base support to stay in place. That balance is what keeps the surface firm.

The problem is that edge pavers only have support on the inside. Nothing pushes back from the outer side. Foot traffic, weather, and the weight of the patio itself all press outward. Over time, that pressure nudges the edge bricks away from the field.

Texas soil adds to the strain. Clay-heavy ground in the Fort Worth area swells when wet and shrinks when dry. That movement works against a patio edge with no restraint. As the edges creep, joints widen and pavers wobble.

How Edge Restraints Keep Patio Pavers in Position

Edge restraint is a border that holds the outer pavers tight. It sits along the perimeter and blocks the bricks from sliding out. This added edge stability helps keep the patio aligned and prevents the surface from spreading over time.

Restraints come in a few common forms. Some are plastic or metal strips staked into the base along the edge. Others are a band of concrete, called a concrete haunch, set against the outer pavers. A solid border of soldier bricks can also help when built correctly.

Whatever the type, the job is the same. The restraint gives the edge pavers something firm to push against. That pressure holds the joints tight across the whole patio. Common restraint options include:

  • Plastic or metal edging staked to the base
  • A concrete haunch along the perimeter
  • A mortared border course
  • A poured curb at the patio edge

Your mason can help pick the right one for your patio and soil.

Why Base Preparation Matters at Patio Perimeters

Edge restraint only works if it sits on a solid base. The base is the layer of compacted material under the pavers. At the edges, that base needs to extend past the last brick. A restraint anchored in loose soil will not hold.

Good base prep starts below the surface. A proper base includes compacted gravel topped with a setting layer such as sand. This base must reach beyond the paver edge to support the restraint. When the base stops short, the edging has nothing firm to grip.

Compaction is just as important at the perimeter. Loose or thin base material lets the edge sink or shift. That movement pulls the restraint out of line and lets pavers spread. A well-built, compacted base at the edges keeps the whole system tight.

Coordinating Patio Edges With Drainage and Landscaping

A patio edge does more than hold pavers. It also meets the yard, the plants, and the flow of water. Planning these together keeps the edge strong and the patio dry.

Water is the main concern. A brick patio should slope gently so water runs off the surface. That runoff needs somewhere to go once it leaves the edge. If water pools along the perimeter, it can wash out the base and undermine the restraint.

Landscaping plays a role too. Garden beds, mulch, and irrigation near the edge add moisture to the soil. In clay ground, that extra water fuels swelling and shrinking. A good plan keeps beds and sprinklers from soaking the patio edge. Any local drainage rules can vary by city and county, so confirm them before major work.

Checking Edge Support Before Patio Installation Is Complete

The last chance to catch an edge problem is before the job wraps. Once the patio is finished and settled, fixing the edge means pulling it apart. A quick check at the end saves that trouble.

A mason should confirm the restraint is fully installed and anchored. They should also check that the base extends past the pavers and is well compacted. The edge pavers should sit tight with no gaps or movement. Small fixes now prevent big repairs later.

This review is worth the time on every patio. A firm, well-supported edge is what keeps the surface tight for years. Ask your mason to check the edge support before calling the work done. That final step protects the whole patio.

Stone Mailbox Caps Help Limit Water Entry From Above

Brick residential mailbox with an overhanging stone cap designed to shed rainwater and limit water entry

A stone mailbox sits out at the curb with nothing over it. No roof, no porch, no tree branch to block the rain. When a storm rolls through Fort Worth, the top of that mailbox takes the hit first, and water always looks for a way in from the top down. The cap stone up top is what stands between a hard rain and the parts you actually care about, like your mail and the metal box inside.

Most people never look at the top of their mailbox. They check the door, grab the mail and walk back inside. But the cap does quiet work every single day, and when it fails, the damage starts up high and moves down where you can’t see it.

The good news is that stopping this kind of damage is simple once you know where the water goes and what the cap is supposed to do about it. A weak or missing cap lets rain travel somewhere it shouldn’t. A good one keeps it off your mail and out of your stone.

Why the Top of a Stone Mailbox Takes the Worst Hits

The top of a stone mailbox is the most exposed part of the whole structure. It’s flat or close to flat, it faces straight up at the sky, and it has no cover at all. Rain, hail and wind-driven water all land there before they land anywhere else.

Fort Worth makes this harder than it sounds. Spring storms from about April through June bring heavy downpours and hail, and the wind pushes rain sideways so it hits the top and the seams at the same time. A mailbox at a storm-exposed entrance can get more weather in one afternoon than a wall tucked under your roofline gets in a month.

Stone and mortar also soak up water. Masonry is full of tiny holes, so a wet top doesn’t just dry off on its own. It pulls water inward, and gravity carries that water down into the column instead of letting it run off the sides.

How Water Moves Down Through the Column

Water that gets past the top doesn’t stay put. It runs straight down the inside of the mailbox, and it takes the easiest path down. That path leads right to the parts that cost you money and headaches.

Most stone mailboxes wrap around a metal mailbox. When top-down water reaches that metal box, it starts to rust. Rust spreads, stains the stone, and can leave the little door stuck or hard to close. Your mail sits in that same space, so damp or spotted letters are often the first thing people notice.

The water keeps going after that. It settles into the mortar joints lower down, pools at the base and soaks the bottom stones. Over a few seasons, joints that stay wet start to crumble, and in winter that trapped water can freeze. Water swells about 9 percent when it freezes, and that small push is enough to crack mortar and pop the face off a stone.

What a Good Cap Does to Keep Water Out

A good cap does one main job. It covers the whole top of the mailbox and sends rain off to the sides before it can soak in or drip down inside. Think of it as the roof for the little structure.

The cap should sit a bit wider than the column so its edges hang past the stone below. That small lip, called a drip edge, lets water fall clear of the face instead of running back against it. A cap with a gentle slope, even just a few degrees, moves water off faster than a dead-flat top that lets rain pool and sit.

The seam under the cap matters as much as the cap itself. That’s where the cap meets the top course of stone, and it’s a common spot for water to sneak in. A mason beds the cap in fresh mortar and seals that joint so rain rolls off the edge instead of slipping under it and heading for the mail.

Signs Water Is Already Getting In From Above

You can catch most cap problems early if you know what to look for. The clues show up around the top and the mail door, not just at the base. Walk out after the next big storm and check for these:

  • Rust streaks or brown stains running down from the mail door
  • A mail door that sticks, drags or won’t shut all the way
  • Damp, curled or spotted mail even when it hasn’t rained in a day or two
  • White, chalky stains trailing down from the cap seam
  • A cap that feels loose, wobbles or has shifted off center
  • Crumbling or missing mortar in the joint right under the cap

Any one of these means water is finding a way in from the top. Two or more together means the cap has likely been leaking for a while, and the fix only gets bigger the longer it waits.

Getting the Cap Fixed Before It Costs More

The cap is a small part, so fixing it early is one of the cheaper masonry repairs you can make. A mason can re-bed a loose cap, reseal the seam or set a proper cap with an overhang if yours is flat, undersized or missing. That work usually takes far less time and money than rebuilding a column that’s been soaking for years.

If your mailbox already shows rust stains, a stuck door or soft mortar near the base, the water has done more than surface damage. At that point a mason should check how far it has traveled before sealing anything back up, since trapping wet stone only makes it worse. A quick look after storm season is the easiest way to stay ahead of it.

Your stone mailbox handles more weather than almost anything else on your property, and it does it with no roof and no overhang to help. The cap is the one part carrying that load. Keep it tight and sloped, and it will keep water where it belongs, which is off your mail and out of your stone.

Frequently Asked Questions

What is a stone mailbox cap?

The cap is the top stone that covers a stone mailbox and works like its roof. It closes off the open top of the column and pushes rain to the sides so water can’t drip straight down inside. A cap that hangs a little past the edges works best, because it carries runoff clear of the stone face.

How can I tell if water is getting into my mailbox from the top?

Look near the mail door and the top of the column, not just the ground. Rust streaks below the door, a door that sticks or letters that feel damp all point to water coming in from above. Chalky white marks below the cap seam are another common clue that rain is slipping under the cap.

Can I seal a stone mailbox cap myself?

You can brush a breathable masonry sealer on the surface, and that helps a dry, sound cap shed water. But a loose cap, a cracked seam or a cap with no overhang needs a mason to re-bed and reseal it the right way. Sealing over a cap that’s already leaking traps the water and speeds up the damage.

Does every stone mailbox need a cap?

Yes, because the open top of a stone column is the easiest place for water to get in. Without a cap, rain lands on bare stone and open joints and soaks straight down toward the mail and the base. A well-fitted cap with a slight slope and an overhang is the simplest way to protect the whole structure.

How often should I check my mailbox cap?

Check it at least once or twice a year, and again after any big storm or hail. Fort Worth’s spring storm months are a smart time for a close look, since that’s when wind-driven rain hits hardest. A two-minute check for a loose cap or fresh stains can save you a much larger repair later.

Brick Mailbox Numbers Should Stay Visible From the Street

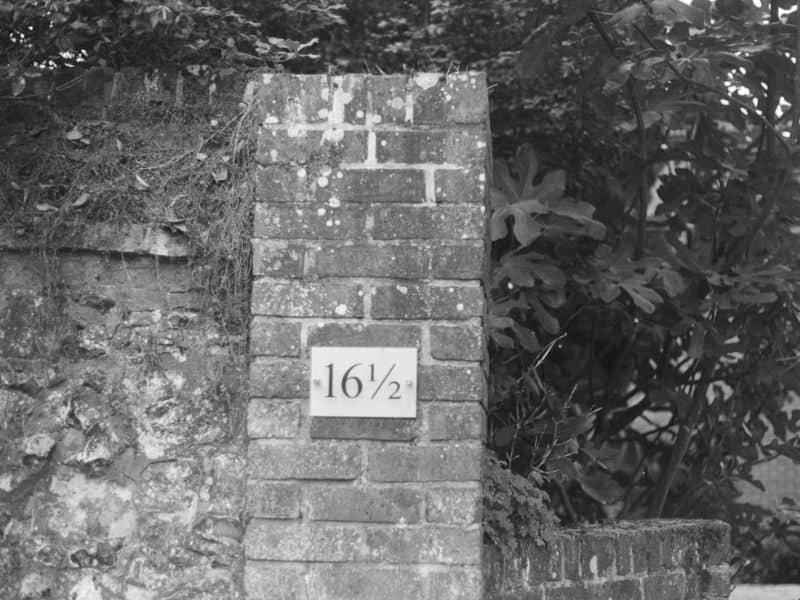
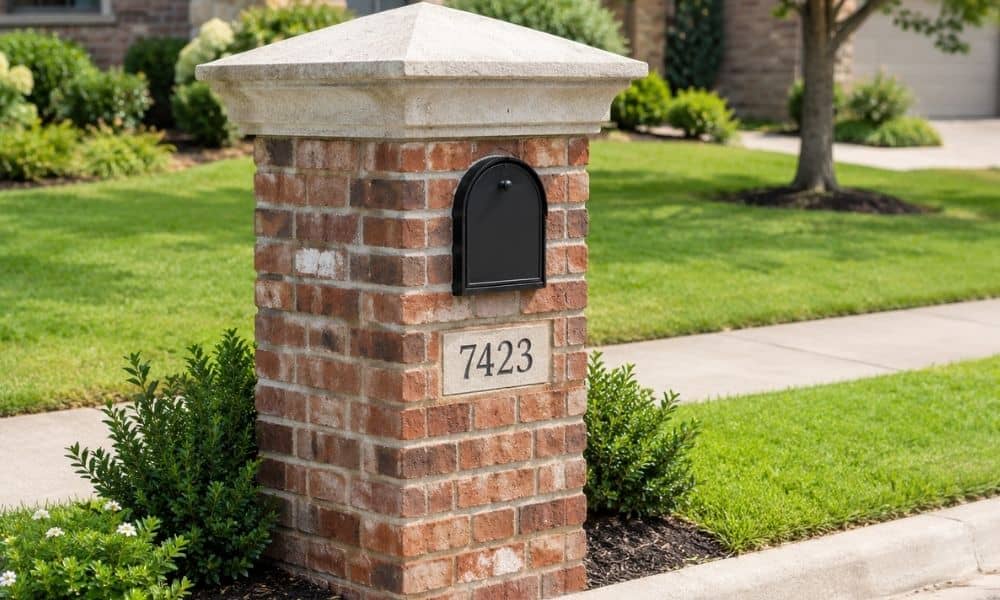
Brick mailbox with a clearly visible house number beside residential landscaping

A brick mailbox does more than hold your mail. It also shows people where you live. On many Fort Worth-area lots, the house sits well back from the road. When a home is set that deep, the mailbox can be the first clear marker of your address. That only helps when the numbers read clearly from the street. Plenty of things can get in the way. The spot you pick for the numbers, their color against the brick and even your front plants all shape how fast a driver or carrier can find you.

Why a Long Driveway Changes the Address-Visibility Problem

A long driveway puts distance between your front door and the street. On a deep lot, the house number on the wall may sit too far back to read from a passing car. The brick mailbox usually stands right by the road. That makes it the closest and clearest place to show your address.

Some properties sit on larger lots with generous setbacks. Not every lot is like this, but many older and rural-edge parcels are. On those lots, a visitor slows at the curb and looks for a number. If the house sits far back, they look at the mailbox first, not the front wall.

There is a difference between a number that exists and a number that gets noticed. A small plate tucked on the side of the door still shows your address. But a delivery driver moving at 20 miles per hour can miss it. You want a number someone catches in a glance. When the home is hard to see, the mailbox becomes your main address sign.

Choose a Number Location That Reads From the Approaching Side

Numbers work best when they face the way people come. A brick mailbox often has more than one side. If the numbers sit on the wrong side, drivers pass before they can read them.

The United States Postal Service asks that curbside mailbox numbers go on the side the carrier sees on their normal approach. The numbers should read easily from that direction. That same setup helps anyone else looking for your home, from guests to emergency crews.

A brick mailbox has features that can fight readability. A raised brick pattern can throw shadows across the numbers. A column, a planter or a decorative cap can hide them from certain angles. Numbers set too low can drop behind a shrub or a mounded bed. Before you settle on a spot, picture the view from a slowing car. Pick the face that opens toward that direction.

Contrast Matters More Than Decorative Numbering

A number only reads if it stands apart from the brick behind it. Fancy numbers can look great up close and still vanish from the street. Contrast is what makes them show up.

Brick is a busy background. It comes in mixed tones of red, brown and tan. Mortar joints break the surface into lines. Many bricks have a rough or textured face. A dark bronze number on dark brick can blend right in. A number close to the brick color fades at a distance.

Postal guidance also calls for address numbers in a contrasting color on curbside mailboxes. It sets a size floor too, with numbers at least one inch high on city delivery boxes. That is a national standard, not a local one, so it gives you a baseline. Choose a number color that clearly parts from your brick. Light numbers on dark brick read well, and dark numbers on pale brick do too. Step back to the street and try it. If you cannot read the numbers fast, the contrast is too weak.

Keep Landscaping From Turning the Brick Mailbox Into a Hidden Marker

Plants grow. A brick mailbox that reads clearly in spring can sit half-hidden by late summer. Landscaping is the slow, quiet reason many numbers stop being seen.

Owners often plant around the base of a brick mailbox to dress it up. Over a season or two, that greenery can climb right over the numbers. This matters even more on a long, deep lot. If the mailbox is already your main address marker, a shrub across the numbers leaves nothing for a driver to read.

A few common plantings tend to creep into the sightline:

  • Shrubs that spread wider than expected as they fill in
  • Ornamental grasses that shoot up tall by late summer
  • Low tree branches that droop over the mailbox
  • Climbing vines trained onto the brick
  • Mounded flower beds that rise up in front of the numbers

The fix is regular trimming. Keep an open line between the street and the numbers. You do not need a bare mailbox. You just need the numbers to stay clear. Look from the road now and then. If a plant has crept in front, cut it back.

Design the Numbering Before the Brick Mailbox Is Built

The best time to plan the numbers is before the first brick goes down. Number placement is easy to forget during a build. When it turns into an afterthought, the numbers often end up squeezed into an odd spot.

Talk through the number location while the mailbox is still a drawing. Think about where the mail door sits and how the brick courses stack up. A decorative band or a stone cap can take the very space you wanted for numbers. Planning early lets the mason leave a clean, flat area at the right height and on the right face.

Good placement also looks better. Numbers centered on an open panel read as part of the design. Ones crammed by the door or split around a column look like a last-minute add-on.

Before you build or change a brick mailbox, check the rules that apply to you. The Postal Service sets its own mailbox standards. Fort Worth points property owners to its current zoning and development regulations for local requirements. Those rules can shift over time and can depend on the property. A quick check up front saves a rebuild later.

Fireplace Repair for Crumbling Mortar Inside the Firebox

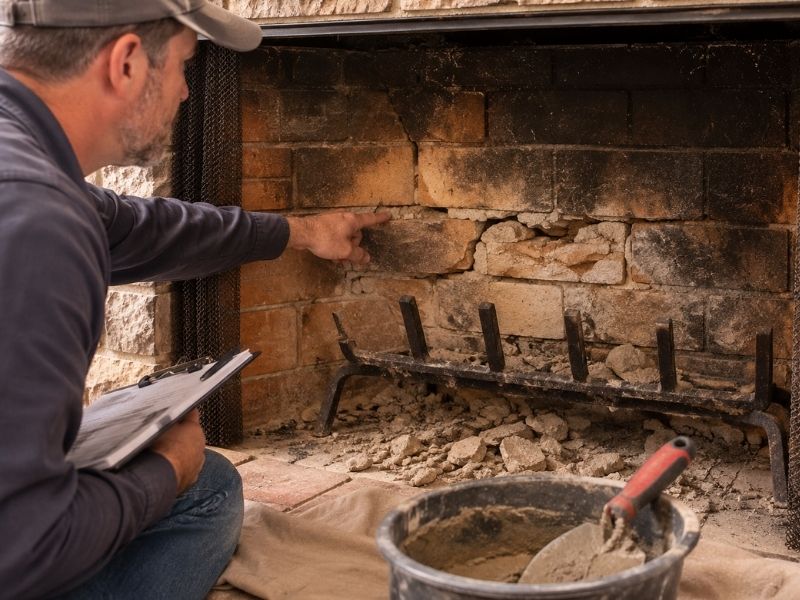
Fireplace repair for crumbling mortar inside an aging brick firebox in Tarrant County, Texas

The mortar inside your firebox does a hard job. It sits right where the fire burns, holding the firebricks together while it takes the full force of the heat. Over the years that mortar can start to crumble, and many homeowners only notice once small bits show up on the firebox floor. This kind of fireplace repair deals with the mortar joints inside the combustion chamber, not the outer brick or the chimney above it. Plenty of older houses still have their original fireboxes, so the problem shows up often here. Knowing how that mortar wears out, and what it takes to fix it right, helps you catch the trouble while it’s still small.

How Crumbling Firebox Mortar Develops in Older Tarrant County Homes

Firebox mortar breaks down because it lives through more heat and stress than any other mortar in the house. Every time you light a fire, the joints heat up fast and then cool back down once the flames die. That constant expanding and shrinking works the mortar loose a little at a time. A working wood fire can push past 1,000 degrees, and few materials shrug that off year after year.

Age plays a big part too. Builders of many older Tarrant County homes used lime-based or standard mortar in the firebox, and that mortar can’t stand up to that kind of heat. Decades of use slowly bake and weaken those joints. Moisture makes it worse. Rain and damp air travel down an open flue, soak into the joints, and speed up the crumbling even between fires. So heat, age and water team up on the same joints until the mortar gives out.

Signs the Mortar Inside the Firebox Has Deteriorated

You can spot failing firebox mortar with a simple look inside, usually with a flashlight. Healthy joints sit firm and even between the firebricks. Worn ones pull back, break apart, or leave gaps you can see.

Watch for these signs when you check the firebox:

  • Mortar that feels powdery or sandy when you touch it
  • Joints that have sunk back below the face of the firebricks
  • Small chunks or grit collecting on the firebox floor
  • Open gaps or cracks running along the joint lines
  • Firebricks that feel loose or shift when pressed

Any one of these means the mortar has started to fail. That matters because the joints are what keep heat and flame inside the firebox where they belong. Once gaps open up, hot gases can reach the brick and framing behind the firebox. Checking these signs before you light another fire is a smart move, since a small mortar problem is far easier to handle than what it can grow into.

Why Firebox Mortar Requires Heat-Resistant Repair Materials

Firebox joints need refractory mortar, a special mix built to survive direct fire. Ordinary masonry mortar, the gray stuff used on outside brick walls, starts to break down under repeated high heat. Inside a firebox it would crack, crumble and fail fast, sometimes within a season or two.

Refractory mortar works differently. It’s rated to handle heat far beyond what standard mortar can take, often well over 2,000 degrees. It also grips the smooth face of firebricks better and stays stable while the joints heat and cool over and over. Some types come premixed and air-cure, while others need heat from a fire to fully set. A mason picks the right one for your firebox and lays it in thin, even joints the way firebrick is meant to be set. Regular mortar might look fine at first, but it puts you right back to crumbling joints in short order.

When Fireplace Repair Can Focus on Mortar Joints

Sometimes fireplace repair only needs to address the mortar joints, and sometimes the firebricks themselves have to come out. A mason figures out which by looking closely at the firebox once it’s cleaned out. If the firebricks are still solid and only the joints between them have worn away, fresh refractory mortar can often bring the firebox back.

The firebricks get a closer look next. Cracked, flaking or crumbling bricks usually need replacing, because new mortar can’t hold a broken brick in place. The mason also checks whether the damage stays inside the firebox or points to a bigger issue behind it, like water coming in from above. Starting with the visible mortar tells you a lot, and a full look confirms whether the joints are the whole story or just the part you can see. That way the repair matches what the firebox actually needs instead of guessing at it.

Why Aging Fireboxes in Tarrant County Deserve Early Attention

Older fireboxes across Tarrant County are worth checking early, because firebox mortar rarely fails all at once. It gives way slowly, one joint at a time, and each open joint lets heat work deeper into the masonry. Catch it while only the mortar is worn, and the fix usually stays small and simple.

Wait too long, and the damage spreads. Failed joints leave the firebricks exposed to more direct heat, and those bricks start to crack and loosen. What could have been a mortar touch-up grows into brick replacement or larger firebox work. Homes built decades ago tend to have the most worn joints, so their fireboxes reward an early look the most. A quick check of the firebox each year keeps a minor mortar issue from turning into a much bigger repair down the road.

Frequently Asked Questions

How do I know if the mortar inside my firebox needs repair?

Look inside the firebox with a flashlight and study the joints between the firebricks. Mortar that turns to powder, pulls back from the brick faces, or leaves open gaps has started to break down. Bits of grit or small chunks sitting on the firebox floor are another clear clue. If you notice any of that, the joints are ready for a closer look before your next fire.

Can regular mortar be used to repair a fireplace firebox?

No, standard mortar can’t handle the heat inside a firebox. The mix used on outdoor brick walls breaks down quickly when it sits right next to flames. Firebox repairs call for refractory mortar, which is made to stay solid through the high temperatures a fire creates. Using the wrong product just leads back to crumbling joints in a short time.

Is crumbling firebox mortar dangerous?

Crumbling firebox mortar is more than a cosmetic flaw. The joints keep heat and flame contained inside the firebox, so once they open up, hot gases can reach the brick and framing behind it. That’s why the condition deserves a real assessment rather than a shrug. Having it checked before you keep using the fireplace is the safe path.

Does old fireplace mortar deteriorate even if the fireplace is rarely used?

Yes, firebox mortar can weaken even in a fireplace that rarely sees a fire. Age alone softens older lime-based joints over the decades. Moisture from rain or damp air moving down the flue soaks the mortar and wears it away between fires. Past heating cycles and old patch repairs add to the toll, so a little-used firebox can still show worn joints.

When should I call a professional for fireplace repair?

Call a mason when you see mortar breaking apart, firebricks that feel loose, or gaps opening along the joints. Those signs mean the firebox needs materials and skills built for high heat. It’s also worth a call when you simply aren’t sure how bad the wear is, since a firebox is hard to judge from a quick glance. A professional can confirm whether the joints alone need work or the firebricks do too.

Stone Fireplace Mantels Need Support Before the Finish Goes On

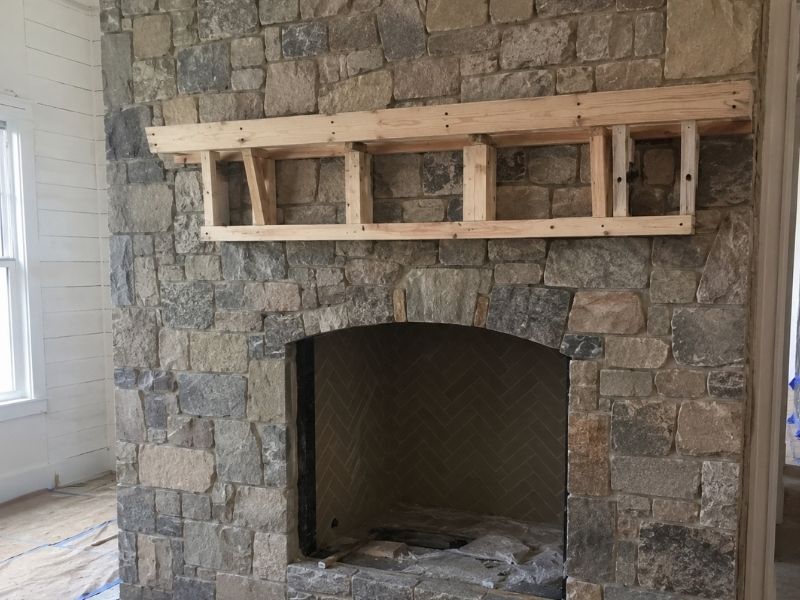
Stone fireplace with a wood mantel support frame installed during a custom interior renovation project.

A stone fireplace can turn a plain wall into the best part of a room. But the mantel on that fireplace is often heavy, and it needs real support long before the stone finish goes on. Once the veneer covers the wall, you can’t easily reach behind it to add a bracket or anchor. So the smart move is to plan the support first, while the wall is still open. This matters most during custom renovations, where the mantel, the stone and the framing all have to work together from the start.

Determine How the Stone Mantel Will Transfer Its Weight

A stone mantel pushes its weight down into the wall behind it, and a heavy one can put real strain on that masonry or framing. A solid stone shelf a few feet long can weigh well over a hundred pounds. When it sticks out from the wall, it also pulls down at the outer edge, so the load is not just straight down. Because of that, you want to decide how the mantel will carry its weight before the stone finish hides the structure. On a custom renovation, this choice shapes what the crew builds behind the surface. Skip it, and you may end up with a mantel that sags, cracks the stone or pulls loose over time.

Match Mantel Support to the Existing Fireplace Structure

The support has to tie into something solid, like the firebox masonry, a block core or the wall framing, not the thin stone on the surface. So before anyone picks the hardware, look at what the wall is really made of. A brick or block fireplace can often hold anchors on its own. A framed wall may need blocking or a steel piece added between the studs first. The finished stone is only a facing, and it should never carry the mantel by itself.

Then choose a support method that fits that structure. Common options include:

  • A steel angle or bracket bolted into the masonry
  • A ledger board anchored to solid framing
  • Threaded rods or anchors set into block or brick
  • A stone corbel built right into the wall

Each one works only if the wall behind it can take the load. Match the method to the structure, and the mantel stays put.

Plan Anchors and Attachment Points Before Stone Installation

Mark and set the anchor points while the wall is still bare, because drilling into finished stone later is risky. A drill bit can crack a stone face or blow out a joint, and a patched hole rarely blends in. So the mason and the rest of the crew should agree on where the anchors go before the veneer covers anything.

That planning takes a few minutes on paper and saves hours of trouble. Once everyone knows the mantel height and the anchor spots, the mason can leave those areas ready. After the stone goes up, the support is already there. This kind of coordination keeps the job moving and cuts down on messy fixes later.

Account for Stone Thickness and Mantel Projection

A thicker, deeper mantel weighs more and reaches farther out, so it needs stronger support than a thin decorative shelf. A slim stone cap over a wood core is light. A full slab of natural stone is a different story, since stone can weigh a lot per square foot. The bigger the piece, the more the support has to handle.

Projection matters just as much as weight. The farther a mantel sticks out from the wall, the harder it pulls down at the front edge. A deep mantel with a heavy stone top puts far more stress on its anchors than a shallow one. So the design and the support plan should be settled together. That way the crew sizes the brackets or rods for the real mantel, not a guess.

Coordinate the Support System With the Finished Interior Design

Good support should disappear once the room is done, so plan it around the look you want, not against it. Brackets and rods can hide inside the wall or behind the stone, as long as the crew places them before the finish goes on. When the crew sets the support early, nothing bulky has to show later.

Think through the mantel height, the stone pattern around it and any trim while the wall is still open. A mantel that sits at the right height reads well and clears the firebox safely. The stone courses above and below it should line up with the mantel, not fight it. When the structure and the design get planned together, you get a clean stone fireplace that looks simple and holds up for years.

Frequently Asked Questions

Does a stone fireplace mantel always need additional support?

Not always. A light decorative mantel can sometimes rest on the existing masonry with little more than an anchor or two. Heavier solid-stone mantels usually need dedicated support built into the wall first. The weight and depth of the piece decide the answer.

How much weight can a stone fireplace mantel add to a wall?

It depends on the size and the type of stone. A small stone shelf might add only a few dozen pounds. A long, thick slab of natural stone can reach several hundred. Knowing the real weight up front lets the crew size the support correctly.

Can a stone mantel be attached directly to the fireplace masonry?

Often yes, if the brick or block is sound. Anchors set into solid masonry can hold a mantel well. What you should avoid is hanging it on thin veneer alone, since the facing can’t carry that load on its own.

Should mantel supports be installed before the stone finish?

Yes. Setting the supports first keeps you from drilling into finished stone, which can crack or chip it. It also lets the hardware stay hidden behind the surface. Planning the anchors early is the cleanest path.

What type of support is used for a heavy stone mantel?

Heavy mantels usually ride on steel. A steel angle or bracket, embedded threaded rods or a ledger tied to the structure behind the wall can all work. The right choice depends on the wall behind it and the weight it has to hold.

When a Brick Fireplace Damper No Longer Seals Properly

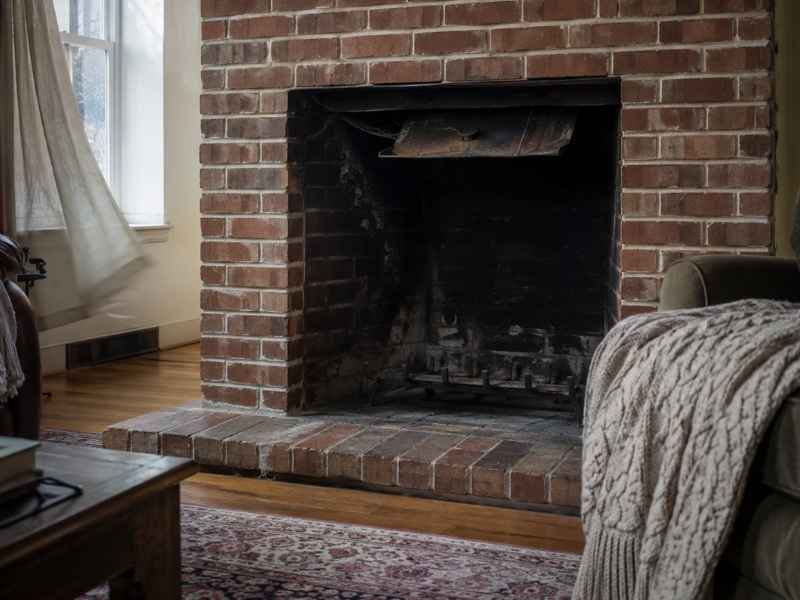
Older brick fireplace with a partially open metal damper in a Fort Worth home

A brick fireplace can look solid and still let air slip through when it sits unused. The part doing the sealing is the damper, a metal plate up in the throat of the chimney. When it stops closing tight, you might feel cold air near the hearth on a chilly night or catch a faint chimney smell in the room.Winters bring sudden cold fronts, and a damper that no longer seals turns those temperature swings into a draft you can feel from the couch. The good news is that a failing damper leaves clues. 

Signs a Brick Fireplace Damper Is No Longer Sealing

The clearest sign of a bad seal is air moving when it shouldn’t. A damper that closes tight should block the chimney like a lid on a jar. When the seal fails, outside air slips past the plate and into your living space. You might notice a steady draft near the fireplace, a room that never quite warms up or a musty chimney smell on windy days.

These are the signs that point to a damper seal problem:

  • Cold air drifting from the fireplace when no fire is burning
  • A spot near the hearth that stays cooler than the rest of the house
  • A smoky or musty odor from the firebox, often stronger in damp weather
  • A whistling or fluttering sound as air squeezes past the plate
  • Heating and cooling bills that creep up without another clear cause

One of these alone might mean something minor. Several together usually point back to the damper, so the seal is the thing to check first.

How an Aging Damper Affects an Older Wood-Burning Fireplace

An older wood-burning fireplace puts its damper through years of heat, smoke and moisture, and the metal wears down. Most older fireplaces use a throat damper, a steel or cast iron plate that sits just above the firebox. Every fire heats that plate, and every cool-down lets it contract. After enough seasons, the metal can warp just enough that it no longer sits flat when closed.

Rust adds to the problem. Moisture drifts down the chimney and settles on the plate and hinge, and that rust roughens the edges where the damper should meet its frame. A pitted edge can’t form a clean seal. Years of soot and grit around the pivot make the plate catch or sit crooked.

Simple wear matters too. Opening and closing the damper hundreds of times loosens the hinge and bends the handle. Throat dampers rarely seal perfectly even when new, and age only widens those gaps. That’s why a fireplace that sealed fine years ago can feel drafty now.

Draft Problems Caused by Gaps Around the Damper

A gap of even a quarter inch around the damper can pull a surprising amount of air through the chimney. Warm air inside your home rises, and a chimney gives it a straight path up and out. When the damper won’t close all the way, that rising air escapes through the flue and drags cold outside air in to replace it. That’s why a leaky damper feels worse on cold, windy days.

The draft runs the other way in summer. Hot, damp Fort Worth air can slide down a gappy chimney and settle near the firebox, and that brings a musty smell into the room.

What makes this tricky is that the fireplace can look completely shut. The handle sits in the closed position and the plate looks down, yet air keeps moving. A seal that’s off by a small margin still leaves a real gap, and air always finds it. An open or leaky damper works like a window you forgot to close.

Checking Damper Movement Before Fireplace Use

You can learn a lot about a damper just by working it a few times with a flashlight in hand. Reach up into the throat, find the handle, and open the damper fully. It should swing open without grinding, sticking or dropping loose. A handle that flops, jams or needs a hard shove is telling you the mechanism is worn.

Next, close it and look at how the plate sits. With the fireplace cool and clean enough to see, shine the light up and check whether the plate rests flat against its frame all the way around. Daylight past the edges means the seal isn’t complete. A plate that sits crooked or wobbles when you nudge it points to warping or a bent hinge.

Do this only when the fireplace is cold and you haven’t burned anything for a while. These are simple looks, not repairs, and they help you decide whether the damper is fine or worth a closer inspection.

When a Damper Problem Calls for Professional Fireplace Evaluation

Some damper problems go past what a flashlight can settle. A plate that’s badly warped, an edge eaten by rust, a seized hinge or a handle that snapped off all call for a trained eye. A qualified chimney professional can judge whether the damper can still be sealed or whether the mechanism has reached the end of its life.

This matters more in an older wood-burning fireplace, where the damper has to fit an aging throat and flue. A pro checks how the plate meets its frame and whether corrosion has spread to parts you can’t see from below. When a throat damper can’t seal anymore, some older systems get a top-sealing damper at the chimney top, which closes with a rubber gasket for a much tighter fit.

The National Fire Protection Association standard, NFPA 211, recommends a professional inspection at least once a year, whether or not you use the fireplace much. A yearly check catches a failing damper before it grows into a bigger draft or moisture problem.

Frequently Asked Questions

Why won’t my brick fireplace damper close completely?

Age is usually behind it. The metal plate can warp after years of heating and cooling, while rust and soot around the edges and hinge keep it from seating flat. A bent handle or a worn hinge can also stop the plate from swinging fully shut. In older fireplaces, several of these often add up at once.

How can I tell if my fireplace damper is sealing properly?

Feel for air first. A cold draft near the hearth on a still, cold day, or a room that stays chilly no matter the thermostat, usually means the seal is leaking. A musty chimney smell in damp weather is another tip-off. You can also shine a flashlight at the closed plate and look for daylight around its edge.

Can a damaged damper cause drafts from an unused fireplace?

Yes, and it’s common. Even with no fire going, warm air in your home rises and slips out through any gap in the flue, and it pulls cold air in behind it. A damper that won’t close tight leaves exactly that gap. The draft can run downward too, so an unused fireplace can still feel like an open window.

Should an old fireplace damper be replaced or repaired?

The right move depends on the damper’s condition. A plate that’s just sticky or slightly out of line can often be cleaned, adjusted and resealed. One that’s heavily rusted, cracked or warped past sitting flat usually needs replacing. When a throat damper can’t hold a seal, some homeowners switch to a top-sealing damper for a tighter close.

Is it safe to use a wood-burning fireplace when the damper does not close properly?

A stuck damper is a bigger deal than a draft. If it won’t open fully, smoke and gases like carbon monoxide can back up into the room during a fire. Even a damper that opens fine but won’t seal points to worn parts a professional should check. Have the mechanism looked at before you keep burning.

Brick Masonry Around Commercial Sign Openings Needs Careful Patching

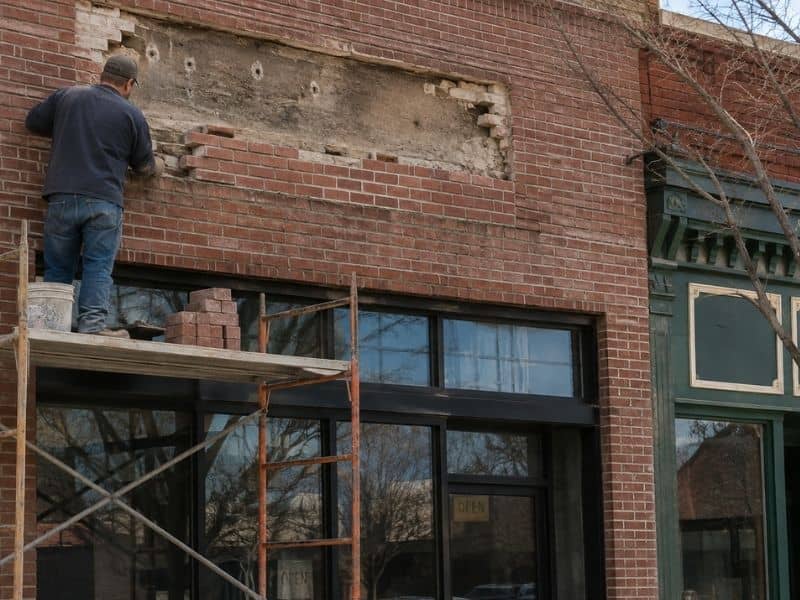
Brick masonry patching around a former commercial sign opening on an older Fort Worth retail building.

When an old storefront sign comes down, the wall behind it rarely looks clean. Brick masonry around that spot often shows holes, chipped edges or bare patches where the sign used to hang. It has plenty of older retail buildings with this exact problem, especially along its historic commercial streets. Patching one of these openings takes more care than most people expect. A rushed fix stands out, and it can even weaken the wall. 

Identifying Damage Left by Removed Commercial Signs

Crews bolt, screw or anchor signs straight into brick. When they pull those signs off, the fasteners tear out small chunks of the surface. You’ll often find rows of drilled holes, cracked brick faces or spots where a whole brick pulled loose. A backlit box sign or a projecting blade sign might hide a full cut opening, so once it’s gone you can see raw block, old framing or exposed wall backing.

The damage also hides in less obvious places. Rust stains bleed from old steel anchors left in the wall. Sealant and adhesive pull away paint and the top layer of brick with them. Sometimes the sign covered years of weathering, so the patch area looks newer than everything around it. All of this shapes how the repair should go.

Assessing the Opening Before Brick Masonry Patching

A good patch starts with a close look, not a bag of mortar. Measure the opening first, both how wide it runs and how deep it goes. A shallow surface ding needs far less work than a hole that punches through to the backup wall. Check the brick around the edges too, since loose or cracked units near the gap have to come out before new brick goes in.

Before patching, a mason usually runs through a short list:

  • The size and depth of the opening
  • The condition of the surrounding brick
  • Whether the old mortar is soft, crumbling or still sound
  • If the sign sat near a lintel or another piece that holds weight above it

That last point matters most. Many storefront signs hang right over windows or doors, where a steel or brick lintel carries the load. If the opening reaches that support, someone needs to confirm it’s solid before closing things up. Older Fort Worth commercial guidelines lean toward keeping and repairing the original storefront materials, which makes this careful check even more worthwhile.

Matching Replacement Brick in Older Retail Facades

Filling a former sign opening drops new brick right into the middle of an old, weathered wall. That’s a tough spot to hide. Brick from decades ago rarely matches what’s sold today. Size is the first hurdle, because older brick often runs taller, shorter or thinner than modern units. Set a mismatched brick next to the original and the whole patch reads as a scar.

Color and texture come next. Old facades pick up soot, sun fading and a soft worn surface that fresh brick just doesn’t have. A dead-on factory color can still look wrong once it sits in daylight. Good masons hunt for salvaged brick from the same era, or they tumble and stain new brick to soften it. Orientation counts too, so the new brick should sit the same way the old ones do, with joints that line up across the patch. When the goal is to erase a former sign opening, these small choices decide whether the repair vanishes or draws the eye.

Rebuilding the Opening Without Creating New Masonry Stress

A patch has to move with the wall around it, not fight it. Brick walls expand and shrink a little with heat and cold, and a stiff repair jammed into a soft old wall tends to crack at the edges. To avoid that, masons tooth the new brick into the opening. They weave it into the existing courses instead of stacking a flat block inside the hole. This ties the patch to the wall so loads spread evenly.

Mortar choice plays a big role here. Masons usually laid old brick with soft lime mortar. Fill the gap with hard modern Portland mortar and the mismatch can crack the older brick as the wall shifts. A mortar close to the strength of the original keeps stress low. Fresh mortar should also match the color and joint style of the surrounding wall, so the repair blends instead of standing out. When it’s built right, the filled opening carries weight the same way the rest of the facade does.

Preserving the Character of Older Fort Worth Retail Buildings

Older storefronts tell you when they were built. The brick pattern, the sign band above the windows and the worn surface all carry that story. Yank down a sign and slap in a rough patch, and you chip away at that character. On a historic commercial block, that loss adds up fast across a street of similar buildings.

Fort Worth preservation guidance leans toward keeping historic signs where it can and repairing original facade features with care. Even when a sign has to come down, a thoughtful patch respects what the building was. Matching the brick, using compatible mortar and toothing the repair in cleanly all protect the look that gives these older retail buildings their pull. A wall that hides its former sign opening keeps the storefront honest to its age.

Frequently Asked Questions

Why can removing a commercial sign damage surrounding brick masonry?

Signs anchor into the wall with bolts and screws that grip the brick. Pulling them out rips away surface chunks and leaves drilled holes, cracked faces and loose bricks. Larger sign boxes can sit inside a cut opening, so taking them down exposes a bare backup wall.

How is an old sign opening prepared before brick masonry is patched?

A mason measures the width and depth, then checks the brick and mortar around the edges. He removes loose or damaged units and pulls out old rusted anchors. Cleaning the area back to sound material lets fresh brick and mortar bond well.

Can replacement bricks be matched to an older Fort Worth retail building?

Often yes, though it takes work. Salvaged brick from the same period gives the closest match for size, color and texture. When none turns up, masons tint or lightly age new brick and set it in the same orientation to blend the patch in.

Should a lintel be checked before patching a former sign opening?

Yes, especially when the sign sat above a window or door. A lintel carries the wall above that opening, so it has to stay sound. Confirming it’s solid before patching keeps the finished repair from settling or cracking later.

How can a patched sign opening blend with an older storefront facade?

Blending starts with matching brick, mortar and joints, then toothing the new brick into the old courses. Compatible mortar and careful color choices help the patch settle into the surface. Over time a well-built patch reads as part of the original wall.

Stone Masonry Caps That Protect Low Walls From Rain

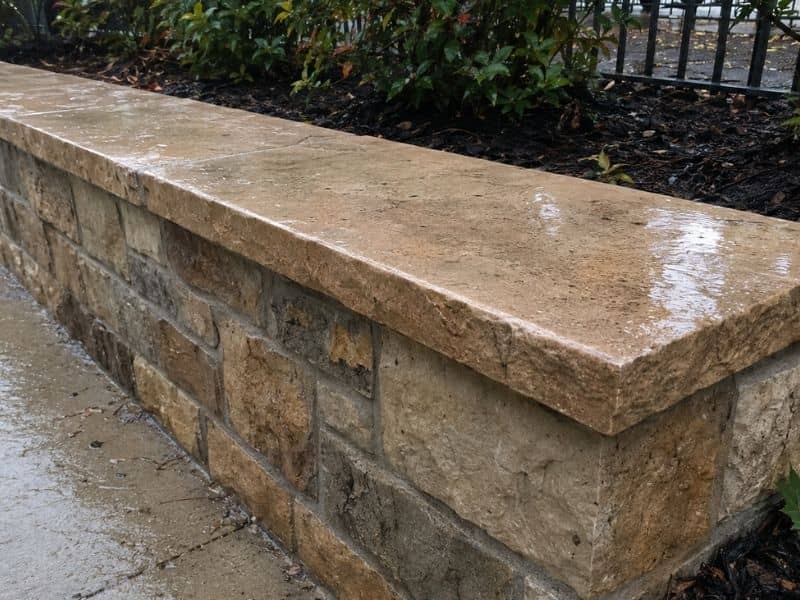
Stone wall caps protecting a low masonry wall from rain in Fort Worth, Texas.

Wall caps do quiet work on top of a low masonry wall, and most people never notice them until rain starts causing trouble. A cap is the finished top piece that covers the exposed masonry, and its main job is keeping rain from soaking into the wall. A calm afternoon can turn into a hard downpour within minutes, that job matters more than it looks. When a cap sheds water well, the wall below stays cleaner and drier for years. When a cap fails, water finds its way in and slowly wears the wall down. What follows covers how caps move water, why overhang and slope help, how to pick the right stone and how to spot a cap that’s stopped doing its job.

How Wall Caps Shed Rainwater From Low Masonry Walls

A well-shaped cap pushes rain off the top of the wall instead of letting it pool there. The top of a low wall is flat and open, so without a cap the masonry drinks in water every time it rains. A cap seals that surface and gives the water a path to run off. That simple change keeps moisture from settling into the joints and the block below.

The shape of the cap decides how fast water leaves. A gently pitched or slightly rounded top sends rain toward the edges and off the wall. A dead-flat cap lets water sit and soak through tiny cracks over time. A good cap does more than cover the top. It covers it so water keeps moving.

Wall Cap Overhangs That Keep Water Off Masonry Faces

An overhang is the part of the cap that reaches past the wall face, and it keeps runoff from sliding straight down the sides. Without it, water rolls right off the top and clings to the masonry below. Over many storms, that constant wetting stains the wall and works into the joints. A small lip changes the water’s path so it drops clear of the face instead.

Fort Worth storms make this detail count. When heavy rain comes down fast, a lot of water hits the cap in a short time. An overhang with a drip edge underneath gives that water a place to fall away from the wall. Even a modest overhang keeps the front and back of a low wall much drier during a hard downpour.

Choosing Cap Materials for Fort Worth’s Changing Weather

The right cap material stands up to sun, sudden rain and the odd winter freeze without breaking down. Fort Worth weather swings a lot, so a cap has to handle heat one week and a cold snap the next. Dense, low-absorption stone takes in less water, which helps it last through wet spells. A softer, more porous stone soaks up more and wears faster.

Thickness and surface finish matter too. A thicker cap resists cracking and holds its shape under weight and weather. A smooth, tight surface sheds water better than a rough, open one that traps moisture. When water gets into a stone and then freezes, it expands and pushes the stone apart, so lower absorption also means fewer freeze problems. Picking a cap built for these conditions saves repairs down the road.

How Joint Placement and Slope Guide Where Rain Goes

Cap joints and slope decide where rainwater travels, and getting them wrong leaves the wall open to leaks. The joints are the seams between cap pieces, and they turn into weak spots when water pools nearby. When the cap slopes the right way, rain runs toward the edge and off the wall before it reaches a seam. When the slope is flat or tilts the wrong way, water gathers at the joints and finds a way through.

Joint placement should keep seams out of the low spots where water collects. A joint sitting in a puddle takes on water with every storm. During heavy rain, a poorly sloped cap can send water straight into those seams instead of away from them. Good slope and smart joint spacing work together to keep the top of the wall draining, not holding.

Signs Wall Caps Are No Longer Protecting a Low Wall

You can usually spot a failing cap by looking for water that lingers where it shouldn’t. Caps wear out slowly, so the early clues are easy to miss until a stain or a soft joint shows up. Catching these signs early keeps a small cap issue from turning into wall damage.

Watch for these warning signs:

  • Damp patches on the wall that stay wet long after the rain stops
  • Dark staining just below the cap edges
  • Cracked, crumbling or open joints between cap pieces
  • Water sitting in puddles on top of the cap after a storm
  • Loose or shifted cap pieces that no longer sit flush

Any one of these means water is reaching the masonry instead of running off. The longer it goes, the deeper the moisture works into the wall. A quick look after a heavy Fort Worth rain is often all it takes to catch a cap that’s slipping.

Frequently Asked Questions

What are wall caps used for?

Wall caps cover the open top of a low masonry wall and steer rain away from it. The top is the most exposed part of the wall, so a cap shields it and gives water a clear path off the surface. That keeps moisture out of the joints and the block underneath.

Should wall caps extend beyond the edge of a wall?

Yes, a cap should reach a little past the wall face so runoff drops clear instead of clinging to the sides. That small overhang breaks the water’s path down the masonry. It keeps the front and back of the wall drier and cleaner over time.

Why should wall caps be sloped?

A sloped cap lets rain drain off quickly rather than pooling on top. Water that sits on a flat surface has time to soak through small cracks and seams. A gentle pitch sends it to the edge and off the wall, which is what you want.

What happens when wall caps allow water to sit on top?

Standing water raises how much moisture the cap and wall take in, and that leads to trouble over time. The longer water pools, the more it works into joints and pores. Repeated soaking can wear the masonry and shorten the life of both the cap and the wall.

Are stone wall caps suitable for Fort Worth weather?

Stone caps work well in Fort Worth when you match the stone to the climate. A dense, low-absorption stone with enough thickness handles hot sun, fast rain and winter freezes better than a soft, porous one. The right pick sheds water and holds up through the seasons.

Brick Mason Work for Rebuilding Damaged Porch Columns

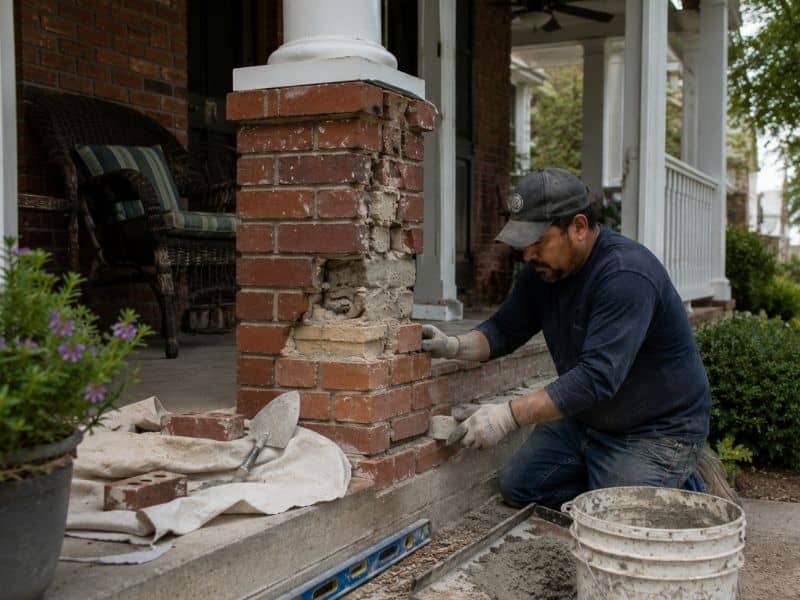
Brick mason rebuilding a damaged brick column on a traditional porch in Fort Worth, Texas.

Porch columns take a beating that most homeowners never think about. They hold up the roof, sit exposed to weather on every side and often get bumped by lawn equipment or ladders over the years. A lot of older homes still have their original brick columns, and a construction survey of these porches usually turns up the same story: cracked bricks in one section while the rest of the column looks fine. A brick mason does not treat every damaged column the same way. Some just need a patch. Others need a full rebuild. 

Assessing Damage in Existing Brick Columns

Before any repair work starts, a mason walks the column from top to bottom, checking a few specific things. Cracked or chipped bricks are the most obvious sign, but they are rarely the whole story. Mortar joints tell a lot too. Soft, crumbling mortar means water has been getting in for a while, and that weakens the bond holding everything together.

Leaning is the detail that gets the most attention. A column that tilts even slightly is often dealing with more than surface damage. It may point to a shifting foundation, a failed footing or years of gradual settling underneath the porch. A mason checks this with a level, not just a glance, because a lean that looks small from the yard can be a real problem up close. Once all of this gets mapped out, the decision about how much to rebuild starts to make sense.

When Brick Columns Need Partial Rebuilding

Not every damaged column needs to come down. If the trouble is limited to one section, say the base where water tends to splash and pool, a mason can often remove just that portion and rebuild it in place. This keeps the rest of the original column intact, which matters a lot on older Fort Worth homes where the brick has aged in a way that is hard to copy exactly.

Partial rebuilding works best when the damage has stayed contained. If cracks run the full height of the column, or if the top and bottom sections both show separate problems, patching one spot and leaving the rest is a short term fix at best. A mason has to judge whether the undamaged brick above and below the repair is still structurally sound enough to carry the column’s load once the new section goes in.

Matching Brick for Traditional Fort Worth Porches

Fort Worth has plenty of homes built decades ago, and the brick on those porches often does not match anything sold today. Older brick was fired differently, and the color, texture and even the exact size can be slightly off from modern batches. A mason working on a rebuild has to track down brick that comes close, whether that means sourcing reclaimed brick, finding a supplier who stocks older styles or hand selecting pieces that blend well next to the original.

Mortar color matters just as much as the brick itself. A rebuilt section with the right brick but the wrong mortar tone will still stand out from ten feet away. Getting both right, brick and mortar together, is what makes a rebuilt column disappear into the rest of the porch instead of announcing itself as new work.

Rebuilding Brick Columns for Proper Load Support

A porch column is not just decoration. It carries real weight from the roof above, so a rebuild has to hold up structurally, not just look right. Each course of brick needs to sit level, with joints staggered the way the original wall was built so the load spreads evenly through the column instead of concentrating in one weak line.

Alignment gets checked constantly during the rebuild, not just at the end. A column that drifts even a small amount off plumb while it is going up will keep drifting as more courses get added on top. Mortar needs time to cure properly between stages too, since rushing that step can leave joints weaker than they should be. None of this is visible once the work is finished, but it is the difference between a column that lasts another fifty years and one that starts cracking again within a few seasons.

Finishing Rebuilt Brick Columns to Match the Porch

Once the structural work is done, the last stretch of the job is about appearance. Mortar joints get tooled to match the style used on the rest of the porch, whether that is a concave joint, a flush finish or something rougher and older looking. Small details like this are easy to overlook, but they are usually what someone notices first when they look at the finished column.

Cleanup matters here too. Fresh mortar can leave a haze on brick if it is not cleaned off carefully, and that haze is stubborn once it dries. A mason wipes down the new work as it goes and does a final cleaning pass so the rebuilt section reads as part of the original porch, not a patch stuck onto it. On a historic home, this final step is what protects the character of the porch while quietly fixing what was actually broken underneath.

Frequently Asked Questions

When should damaged brick columns on a porch be rebuilt? 

Rebuilding often makes sense once there is significant cracking, loose or missing bricks, a visible lean or mortar that has deteriorated enough to weaken the joints. These signs suggest the column can no longer support the porch safely on its own.

Can a brick mason rebuild only part of a damaged porch column? 

Yes, when the damage stays limited to one section and the rest of the column is still structurally sound. If cracking or deterioration runs through most of the column, a more complete rebuild is usually the safer approach.

How can new brick match an older porch column? 

A mason looks for brick close in size, color and texture to the original, often through reclaimed materials or specialty suppliers. Matching the mortar color and joint style is just as important as matching the brick itself.

How long does rebuilding a brick porch column take?

Timelines vary based on how much damage there is, the size of the column, how easy it is to find matching brick and how long the mortar needs to cure between stages. A small partial rebuild moves faster than a full column replacement.

Can damaged brick columns affect the rest of a porch? 

Yes, especially since columns often carry structural weight from the roof. Damage should get looked at soon, particularly if there is any leaning or movement, since delays can let a contained problem spread further into the porch structure.