Fireplace Repair for Crumbling Mortar Inside the Firebox

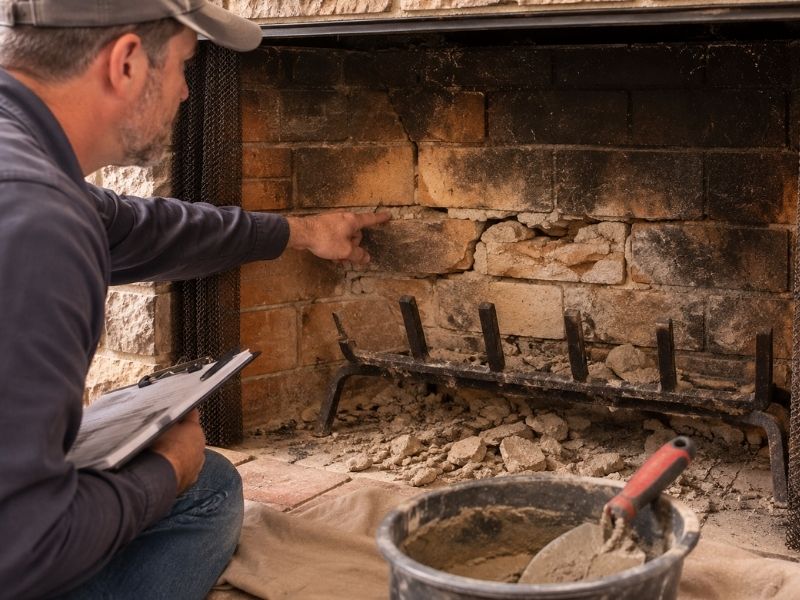
Fireplace repair for crumbling mortar inside an aging brick firebox in Tarrant County, Texas

The mortar inside your firebox does a hard job. It sits right where the fire burns, holding the firebricks together while it takes the full force of the heat. Over the years that mortar can start to crumble, and many homeowners only notice once small bits show up on the firebox floor. This kind of fireplace repair deals with the mortar joints inside the combustion chamber, not the outer brick or the chimney above it. Plenty of older houses still have their original fireboxes, so the problem shows up often here. Knowing how that mortar wears out, and what it takes to fix it right, helps you catch the trouble while it’s still small.

How Crumbling Firebox Mortar Develops in Older Tarrant County Homes

Firebox mortar breaks down because it lives through more heat and stress than any other mortar in the house. Every time you light a fire, the joints heat up fast and then cool back down once the flames die. That constant expanding and shrinking works the mortar loose a little at a time. A working wood fire can push past 1,000 degrees, and few materials shrug that off year after year.

Age plays a big part too. Builders of many older Tarrant County homes used lime-based or standard mortar in the firebox, and that mortar can’t stand up to that kind of heat. Decades of use slowly bake and weaken those joints. Moisture makes it worse. Rain and damp air travel down an open flue, soak into the joints, and speed up the crumbling even between fires. So heat, age and water team up on the same joints until the mortar gives out.

Signs the Mortar Inside the Firebox Has Deteriorated

You can spot failing firebox mortar with a simple look inside, usually with a flashlight. Healthy joints sit firm and even between the firebricks. Worn ones pull back, break apart, or leave gaps you can see.

Watch for these signs when you check the firebox:

  • Mortar that feels powdery or sandy when you touch it
  • Joints that have sunk back below the face of the firebricks
  • Small chunks or grit collecting on the firebox floor
  • Open gaps or cracks running along the joint lines
  • Firebricks that feel loose or shift when pressed

Any one of these means the mortar has started to fail. That matters because the joints are what keep heat and flame inside the firebox where they belong. Once gaps open up, hot gases can reach the brick and framing behind the firebox. Checking these signs before you light another fire is a smart move, since a small mortar problem is far easier to handle than what it can grow into.

Why Firebox Mortar Requires Heat-Resistant Repair Materials

Firebox joints need refractory mortar, a special mix built to survive direct fire. Ordinary masonry mortar, the gray stuff used on outside brick walls, starts to break down under repeated high heat. Inside a firebox it would crack, crumble and fail fast, sometimes within a season or two.

Refractory mortar works differently. It’s rated to handle heat far beyond what standard mortar can take, often well over 2,000 degrees. It also grips the smooth face of firebricks better and stays stable while the joints heat and cool over and over. Some types come premixed and air-cure, while others need heat from a fire to fully set. A mason picks the right one for your firebox and lays it in thin, even joints the way firebrick is meant to be set. Regular mortar might look fine at first, but it puts you right back to crumbling joints in short order.

When Fireplace Repair Can Focus on Mortar Joints

Sometimes fireplace repair only needs to address the mortar joints, and sometimes the firebricks themselves have to come out. A mason figures out which by looking closely at the firebox once it’s cleaned out. If the firebricks are still solid and only the joints between them have worn away, fresh refractory mortar can often bring the firebox back.

The firebricks get a closer look next. Cracked, flaking or crumbling bricks usually need replacing, because new mortar can’t hold a broken brick in place. The mason also checks whether the damage stays inside the firebox or points to a bigger issue behind it, like water coming in from above. Starting with the visible mortar tells you a lot, and a full look confirms whether the joints are the whole story or just the part you can see. That way the repair matches what the firebox actually needs instead of guessing at it.

Why Aging Fireboxes in Tarrant County Deserve Early Attention

Older fireboxes across Tarrant County are worth checking early, because firebox mortar rarely fails all at once. It gives way slowly, one joint at a time, and each open joint lets heat work deeper into the masonry. Catch it while only the mortar is worn, and the fix usually stays small and simple.

Wait too long, and the damage spreads. Failed joints leave the firebricks exposed to more direct heat, and those bricks start to crack and loosen. What could have been a mortar touch-up grows into brick replacement or larger firebox work. Homes built decades ago tend to have the most worn joints, so their fireboxes reward an early look the most. A quick check of the firebox each year keeps a minor mortar issue from turning into a much bigger repair down the road.

Frequently Asked Questions

How do I know if the mortar inside my firebox needs repair?

Look inside the firebox with a flashlight and study the joints between the firebricks. Mortar that turns to powder, pulls back from the brick faces, or leaves open gaps has started to break down. Bits of grit or small chunks sitting on the firebox floor are another clear clue. If you notice any of that, the joints are ready for a closer look before your next fire.

Can regular mortar be used to repair a fireplace firebox?

No, standard mortar can’t handle the heat inside a firebox. The mix used on outdoor brick walls breaks down quickly when it sits right next to flames. Firebox repairs call for refractory mortar, which is made to stay solid through the high temperatures a fire creates. Using the wrong product just leads back to crumbling joints in a short time.

Is crumbling firebox mortar dangerous?

Crumbling firebox mortar is more than a cosmetic flaw. The joints keep heat and flame contained inside the firebox, so once they open up, hot gases can reach the brick and framing behind it. That’s why the condition deserves a real assessment rather than a shrug. Having it checked before you keep using the fireplace is the safe path.

Does old fireplace mortar deteriorate even if the fireplace is rarely used?

Yes, firebox mortar can weaken even in a fireplace that rarely sees a fire. Age alone softens older lime-based joints over the decades. Moisture from rain or damp air moving down the flue soaks the mortar and wears it away between fires. Past heating cycles and old patch repairs add to the toll, so a little-used firebox can still show worn joints.

When should I call a professional for fireplace repair?

Call a mason when you see mortar breaking apart, firebricks that feel loose, or gaps opening along the joints. Those signs mean the firebox needs materials and skills built for high heat. It’s also worth a call when you simply aren’t sure how bad the wear is, since a firebox is hard to judge from a quick glance. A professional can confirm whether the joints alone need work or the firebricks do too.

Stone Fireplace Mantels Need Support Before the Finish Goes On

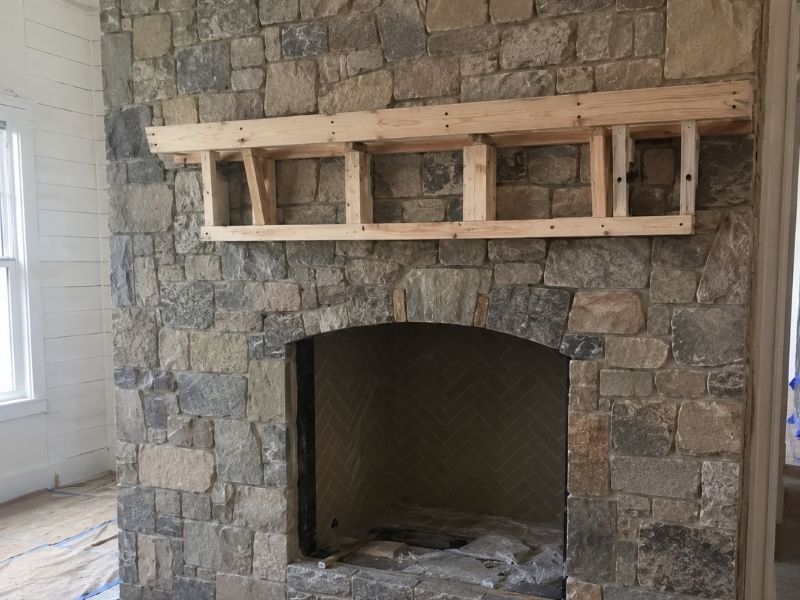
Stone fireplace with a wood mantel support frame installed during a custom interior renovation project.

A stone fireplace can turn a plain wall into the best part of a room. But the mantel on that fireplace is often heavy, and it needs real support long before the stone finish goes on. Once the veneer covers the wall, you can’t easily reach behind it to add a bracket or anchor. So the smart move is to plan the support first, while the wall is still open. This matters most during custom renovations, where the mantel, the stone and the framing all have to work together from the start.

Determine How the Stone Mantel Will Transfer Its Weight

A stone mantel pushes its weight down into the wall behind it, and a heavy one can put real strain on that masonry or framing. A solid stone shelf a few feet long can weigh well over a hundred pounds. When it sticks out from the wall, it also pulls down at the outer edge, so the load is not just straight down. Because of that, you want to decide how the mantel will carry its weight before the stone finish hides the structure. On a custom renovation, this choice shapes what the crew builds behind the surface. Skip it, and you may end up with a mantel that sags, cracks the stone or pulls loose over time.

Match Mantel Support to the Existing Fireplace Structure

The support has to tie into something solid, like the firebox masonry, a block core or the wall framing, not the thin stone on the surface. So before anyone picks the hardware, look at what the wall is really made of. A brick or block fireplace can often hold anchors on its own. A framed wall may need blocking or a steel piece added between the studs first. The finished stone is only a facing, and it should never carry the mantel by itself.

Then choose a support method that fits that structure. Common options include:

  • A steel angle or bracket bolted into the masonry
  • A ledger board anchored to solid framing
  • Threaded rods or anchors set into block or brick
  • A stone corbel built right into the wall

Each one works only if the wall behind it can take the load. Match the method to the structure, and the mantel stays put.

Plan Anchors and Attachment Points Before Stone Installation

Mark and set the anchor points while the wall is still bare, because drilling into finished stone later is risky. A drill bit can crack a stone face or blow out a joint, and a patched hole rarely blends in. So the mason and the rest of the crew should agree on where the anchors go before the veneer covers anything.

That planning takes a few minutes on paper and saves hours of trouble. Once everyone knows the mantel height and the anchor spots, the mason can leave those areas ready. After the stone goes up, the support is already there. This kind of coordination keeps the job moving and cuts down on messy fixes later.

Account for Stone Thickness and Mantel Projection

A thicker, deeper mantel weighs more and reaches farther out, so it needs stronger support than a thin decorative shelf. A slim stone cap over a wood core is light. A full slab of natural stone is a different story, since stone can weigh a lot per square foot. The bigger the piece, the more the support has to handle.

Projection matters just as much as weight. The farther a mantel sticks out from the wall, the harder it pulls down at the front edge. A deep mantel with a heavy stone top puts far more stress on its anchors than a shallow one. So the design and the support plan should be settled together. That way the crew sizes the brackets or rods for the real mantel, not a guess.

Coordinate the Support System With the Finished Interior Design

Good support should disappear once the room is done, so plan it around the look you want, not against it. Brackets and rods can hide inside the wall or behind the stone, as long as the crew places them before the finish goes on. When the crew sets the support early, nothing bulky has to show later.

Think through the mantel height, the stone pattern around it and any trim while the wall is still open. A mantel that sits at the right height reads well and clears the firebox safely. The stone courses above and below it should line up with the mantel, not fight it. When the structure and the design get planned together, you get a clean stone fireplace that looks simple and holds up for years.

Frequently Asked Questions

Does a stone fireplace mantel always need additional support?

Not always. A light decorative mantel can sometimes rest on the existing masonry with little more than an anchor or two. Heavier solid-stone mantels usually need dedicated support built into the wall first. The weight and depth of the piece decide the answer.

How much weight can a stone fireplace mantel add to a wall?

It depends on the size and the type of stone. A small stone shelf might add only a few dozen pounds. A long, thick slab of natural stone can reach several hundred. Knowing the real weight up front lets the crew size the support correctly.

Can a stone mantel be attached directly to the fireplace masonry?

Often yes, if the brick or block is sound. Anchors set into solid masonry can hold a mantel well. What you should avoid is hanging it on thin veneer alone, since the facing can’t carry that load on its own.

Should mantel supports be installed before the stone finish?

Yes. Setting the supports first keeps you from drilling into finished stone, which can crack or chip it. It also lets the hardware stay hidden behind the surface. Planning the anchors early is the cleanest path.

What type of support is used for a heavy stone mantel?

Heavy mantels usually ride on steel. A steel angle or bracket, embedded threaded rods or a ledger tied to the structure behind the wall can all work. The right choice depends on the wall behind it and the weight it has to hold.

Fireplace Repair After Water Intrusion Should Begin at the Source

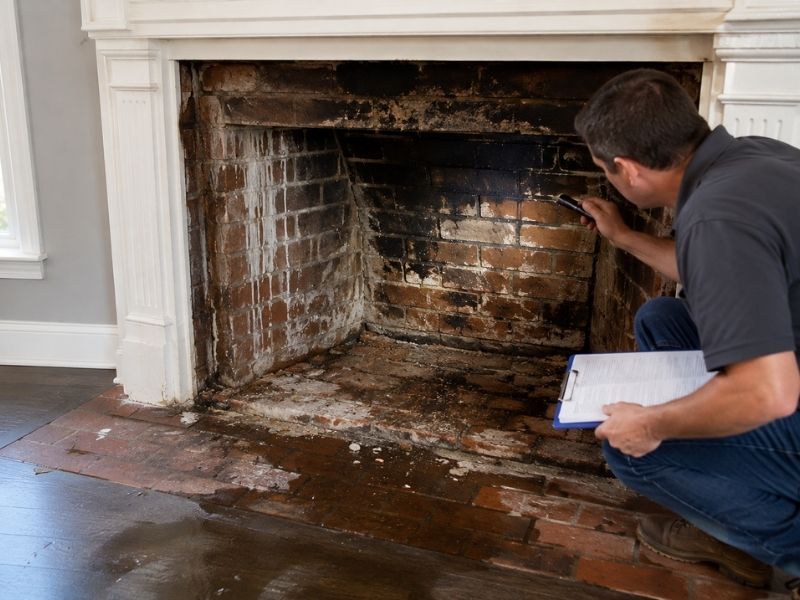
Water-damaged brick fireplace undergoing a professional inspection in Fort Worth, TX.

Water stains on a fireplace almost always start somewhere you can’t see. When you plan fireplace repair after a leak, the smart move is to trace the water back to where it got in. Fix that entry point first, then fix the damage inside. Skip that order and the stains return, often worse than before. Most fireplace water trouble begins at the top of the chimney or along the roof, not down at the hearth where the marks show up.

Identify the True Entry Point of Water Before Repairing Fireplace Materials

The real source of a fireplace leak sits above the firebox nearly every time. Water sneaks in through a cracked chimney cap, worn flashing where the chimney meets the roof, crumbling mortar joints, or a damaged crown. From there it travels down through the masonry until it shows up inside as a stain or soft spot. Because water follows the easiest path, the mark you see rarely lines up with the spot where it entered.

So chasing the stain alone gets you nowhere. A mason follows the water uphill instead, checking each part of the chimney to learn how rain slips past the outer shell. Once that path is clear, the interior fix finally holds.

Inspect Chimney Caps, Flashing, and Crown Components Before Interior Restoration

A full exterior check should come before anyone touches the brick or finishes inside. The parts that keep rain out sit on top of the chimney and along the roofline, so that’s where a good inspection starts. Here’s what a mason looks at up there:

  • The chimney cap covers the flue opening and blocks rain, debris, and animals. A missing or rusted cap lets water pour straight down the flue.
  • Flashing is the metal seal where the chimney meets the roof. Loose or cracked flashing ranks as one of the most common leak points on any home.
  • The chimney crown is the sloped top that pushes water away from the flue. Cracks in the crown soak water right into the structure.
  • Mortar joints are the lines between the bricks. Worn or open joints act like tiny cups that hold moisture against the masonry.

When any of these fail, rain gets into the brick and heads for the firebox. Replacing bricks inside before sealing the outside just wastes the effort, because the next storm undoes it.

Evaluate Masonry Condition After Moisture Exposure

Long exposure to water weakens brick, mortar, and firebox parts in ways you can’t always spot at a glance. Trapped moisture softens mortar, and freeze-thaw swings can crack and flake the brick face, a problem masons call spalling. So a pro checks how deep the damage runs before starting any repair.

They look for loose or powdery mortar, rust stains that hint at corroded metal, white salt marks where water dried on the surface, and cracks in the firebox itself. If moisture reaches structural parts, those come first, ahead of any cosmetic patch. Rushing the surface fix only hides the real trouble underneath, and it tends to fail fast.

Improve Exterior Drainage to Reduce Future Fireplace Water Problems

Good drainage around the house keeps water away from the chimney base long after the repair is finished. Grading, gutters, and downspouts all decide how much moisture ends up near the masonry and foundation. When the ground slopes toward the home, rain pools against the base and works into the lower brick over time.

Clogged gutters spill water down the walls, and short downspouts dump it right beside the foundation. Fixing these keeps the whole system drier. Slope the soil away from the house, clear the gutters, and run downspouts well past the base so storms have somewhere to go besides your chimney.

Why Fort Worth Homes Benefit From Source-First Fireplace Repair

Fort Worth weather is rough on the parts that keep a chimney dry. Heavy spring downpours, hail, and big temperature swings wear down caps, flashing, and mortar faster than a mild climate would. Hail can dent or crack a cap and crown in a single storm.

Sharp jumps between hot afternoons and cold nights make brick and mortar expand and shrink, which opens small gaps that invite water in. When repairs skip the source, the next round of Texas weather reopens the same leak within a season. Starting at the water’s entry point gives you a fireplace repair that survives the local climate instead of one you redo every year.

Frequently Asked Questions

What usually causes water to leak into a fireplace?

Most fireplace leaks trace back to the top of the chimney and the roofline. A cracked cap, worn flashing, a damaged crown, open mortar joints or poor roof drainage all give rain a way into the masonry, and gravity carries it down to the firebox.

Can I repair fireplace stains without fixing the water source?

You can, but the fix won’t last. Cover a stain or swap a brick while water still gets in, and the mark comes back after the next rain. Correcting the entry point first is the only way the inside repair stays clean and dry.

How do professionals find where fireplace water intrusion begins?

A mason inspects the whole chimney from the top down. That means checking the cap, crown, flashing, mortar joints, roof connections and nearby drainage to trace the exact route rain takes into the structure. Following the water uphill points to the true source.

Why should exterior drainage be checked during fireplace repair?

Drainage decides how much water sits near the chimney base and foundation. Poor grading and clogged gutters push moisture into the lower masonry, where it slowly breaks down brick and mortar. Better drainage protects both the repair and the rest of the system.

How often should a Fort Worth chimney be checked for water problems?

Once a year works as the general rule, and a look after any major hail or rainstorm makes sense in this area. An annual check catches small cracks and worn seals early, before water turns them into bigger fireplace or chimney repairs.

Fireplace Changes That Improve Daily Living

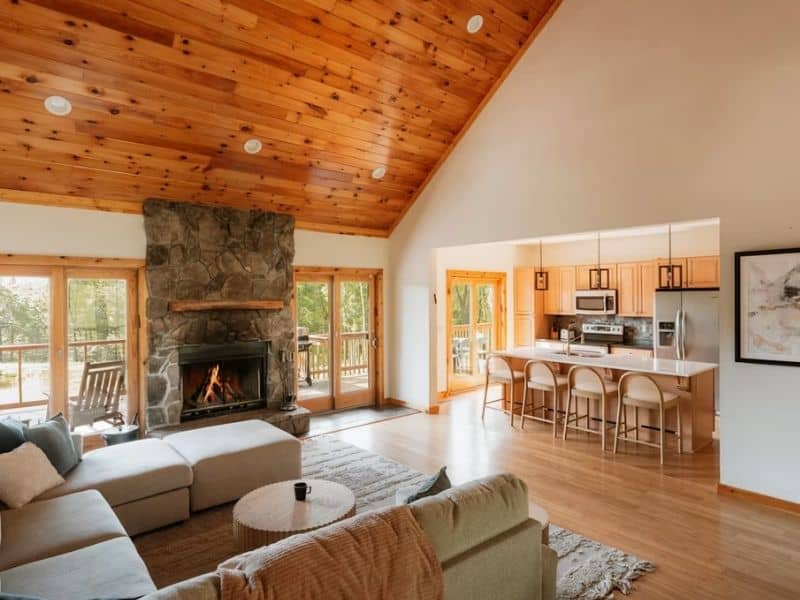
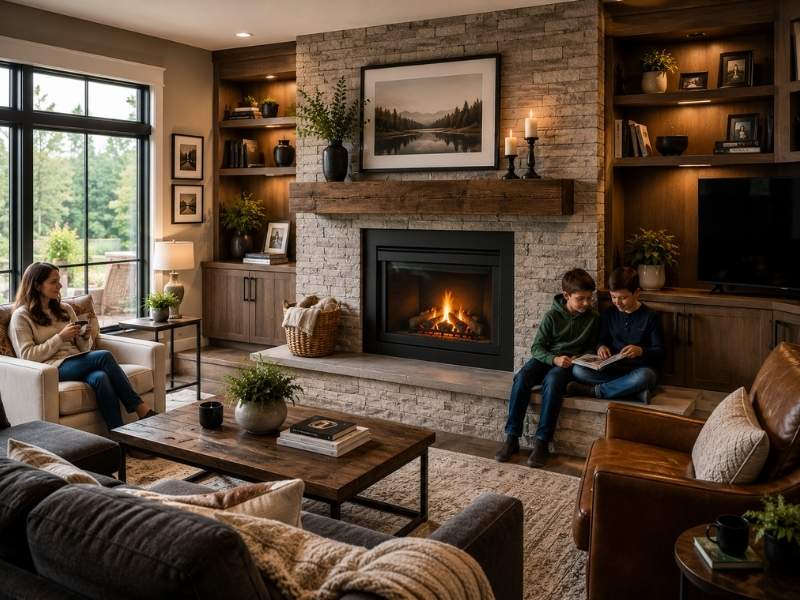
Fireplace changes featuring a modern fireplace insert, built-in shelving, updated mantel, and a cozy family living room designed for daily comfort.

A fireplace often sits unused for most of the year. Then it becomes the center of the house once the weather turns cold. Small fireplace changes can shift how that space gets used the rest of the year too, not just during the coldest months.

Small Updates Can Reshape How a Fireplace Gets Used

Most homeowners think of a fireplace as fixed. They think it stays the same until it gets replaced. That’s rarely true anymore. A handful of updates can turn a fireplace from a seasonal feature into a space the household uses all year.

These changes don’t always mean a full renovation. Sometimes one update, like a more efficient insert or a bit of added storage, changes how often a family gathers around the fireplace. Small shifts like these tend to add up over time.

Swapping to a More Efficient Insert

An older wood fireplace often loses more heat than it makes. A lot of warm air escapes straight up the chimney. Swapping in a modern insert changes that. Gas inserts and high-efficiency wood inserts both hold heat in the room instead of losing it. A fireplace can then help warm a space, not just decorate it.

Gas inserts also cut down on daily hassle. There’s no wood to haul. There’s no ash to clean. Nobody has to build a new fire every time someone wants warmth. For a family that uses the fireplace often, that ease alone can be worth the upgrade.

An insert swap also tends to improve safety. Older fireplaces can grow cracks or buildup inside the flue that go unnoticed for years. A new insert usually comes with an inspection. That check catches problems before they grow bigger and cost more.

Some homeowners hold off on this kind of swap, thinking it costs too much for what it’s worth. But the ongoing savings on heating bills, plus fewer repair calls down the road, often make the upfront cost worth it within a few years.

Updating the Mantel and Surround for a Fresh Look

The mantel and surround shape how a fireplace fits the room more than almost any other single feature. A dated mantel can make an updated living room feel stuck in an earlier decade, even when nothing else in the space has changed.

Updating a mantel doesn’t require touching the firebox itself. A new mantel shelf, a fresh coat of paint, or a different surround material can shift the whole feel of the room. It does this without the cost or mess of a full rebuild. That makes it one of the easier fireplace changes to take on.

Surround materials have grown well past the old choices too. Tile, stone, and even plaster finishes now show up around fireplaces alongside more classic options. Picking a surround that matches the rest of the room’s style keeps the fireplace from feeling cut off from everything around it.

Adding Storage and Built-Ins Around the Fireplace

A fireplace wall often has unused space on either side that could work harder for the household. Built-in shelves or cabinets added around a fireplace turn dead space into storage or display room. This doesn’t take up any extra floor space elsewhere in the room.

This kind of addition works well in smaller homes, where every bit of storage counts. Built-ins next to a fireplace can hold books, media gear, or family photos. This gives the room a finished look while solving a real storage need at the same time.

Adding built-ins also tends to make a fireplace feel like a lasting part of the room’s design, rather than a stand-alone feature. That shift alone can make the whole living space feel more pulled together.

Zone Heating Changes That Cut Energy Costs

A fireplace that only warms the room it sits in isn’t doing much for the rest of the house. Some fireplace changes focus on stretching that heat further. They use it to cut heating costs in nearby rooms instead of leaning only on a furnace or central system.

Zone heating changes help push warm air further into a home. Adding a blower to an insert is one option. Sealing an older firebox better is another. A family that uses this kind of setup during cooler months can lower their overall heating bill. The fireplace is doing real work, not just adding a nice glow.

These changes tend to pay for themselves over a few heating seasons. This holds true in homes where the living room or den sees heavy daily use during colder months. A fireplace built to actually add heat becomes part of the home’s daily routine, not just a weekend feature.

Taken together, these updates show how much a fireplace can offer beyond looks. A well planned set of changes turns a once-a-year feature into a space the whole household leans on through most of the colder half of the year.

Frequently Asked Questions

What counts as a fireplace change?

A fireplace change is any update made to a fireplace or the area around it. This can range from a new insert to a mantel refresh to added storage nearby. These changes can improve how a fireplace looks, works, or performs day to day.

Does upgrading a fireplace insert save money?

In most cases, yes. Modern inserts hold heat in the room better than older, open fireplaces. This can lower a household’s overall heating costs during the months a fireplace gets regular use.

Can a fireplace mantel be updated without a full renovation?

Yes. A new mantel shelf, a paint refresh, or a new surround material can update a fireplace’s look without touching the firebox itself. This makes it one of the simpler updates a homeowner can take on.

Are built-ins around a fireplace a good use of space?

Yes. Built-in shelves or cabinets next to a fireplace turn unused wall space into storage or display area. This works well in homes where extra storage space is tight.

Do fireplace changes affect a home’s daily energy use?

Yes. Updates like adding a blower or sealing an insert better help push warm air further into a home. This can lower how much a household relies on a furnace or central heating system during colder months.