Stone Patio Drainage That Keeps Heavy Rain Away From the Foundation

Stone patio in Fort Worth, TX with proper drainage, grading, and runoff control directing heavy rain away from the home's foundation.

A stone patio adds real comfort and value to a Fort Worth backyard, but heavy rain can turn it into a problem fast. When water has nowhere to go, it runs toward the house and pools against the foundation. Over time, that water can crack slabs, shift soil and lead to costly repairs. Good drainage stops this before it starts. The way a patio gets graded, built and edged decides whether rain flows safely away or sits where it does the most harm.

Why Proper Stone Patio Grading Matters in Fort Worth’s Heavy Rainfall

Grading matters because a flat or poorly sloped patio sends rainwater straight toward your home. Fort Worth gets about 37 inches of rain a year, and storms here often come hard and fast. North Texas clay soil swells when it’s wet and shrinks when it dries, which puts steady stress on foundations. So when a patio sits level or tilts back toward the house, water collects near the walls and soaks into that moving soil. A patio should drop at least 1/4 inch for every foot it runs, which works out to about a 2% slope away from the home. Over a 10-foot patio, that’s roughly 2.5 inches of fall. That small tilt still feels level underfoot while it moves water where it belongs.

Designing Drainage Paths That Move Water Safely Across the Landscape

Planned drainage paths guide rain across the yard instead of letting it pile up near the house. The best time to map these paths is before the patio goes in, not after. A shallow swale, which is a gentle low channel in the lawn, can carry runoff toward a garden bed or the street. Channel drains set at the patio’s low edge catch water and pipe it away underground. Smooth transitions between the patio, the grass and nearby planting beds keep water flowing in one clear direction. When all of these paths connect as one system, rain leaves the patio and never circles back to the foundation.

Choosing a Stone Patio Base That Supports Drainage Performance

A strong, well-built base lets water drain through and under the patio instead of trapping it. Under every good stone patio sit layers of crushed aggregate and sand. Crews compact each layer so the stones stay level and the ground below stays firm. A base that drains well moves water down and out, so it never sits under the pavers and softens the soil. That same base fights settling, which is when stones sink and create low spots that hold puddles. In North Texas clay, this step matters even more, since clay grabs water and moves as it dries. The right base keeps the surface even and the drainage steady for years.

Preventing Water From Collecting Along Patio Edges and Foundation Walls

Water tends to gather at patio edges and foundation walls, so those spots need the most attention. The outer edge of a patio often becomes a trap for runoff. Where the stones meet the house, water can slip into the gap and sit against the wall. Along retaining edges and low corners, puddles form when the slope runs out too soon. A well-designed patio holds a steady pitch all the way to its outer edge, so water never stalls near the foundation. Adding a drain or a planted strip at the base of the wall gives that water somewhere to go. Keeping soil and mulch a few inches below the brick helps too, because piled material traps moisture against the house.

Long-Term Drainage Planning for Stone Patios in North Texas Landscapes

Long-term planning protects both the patio and the foundation as seasons and yards change. Fort Worth weather swings from dry spells to sudden downpours, so drainage has to handle both. A good plan looks at how the whole yard sheds water, not just the patio surface. It also watches the ground beyond the patio, since building code calls for soil to drop about 6 inches within the first 10 feet from the house. Nearby trees, new flower beds and future projects like a pool or shed can all change how water flows. Planning ahead means the patio still drains right years later, even as the landscape grows and shifts around it.

Frequently Asked Questions

Why should a stone patio slope away from the house?

A patio should slope away from the house so rain runs toward the yard instead of the foundation. Water that pools against the walls can seep into the soil, crack the slab and cause foundation trouble over time. A slope away from the home keeps that water moving in a safe direction.

How much slope is recommended for proper patio drainage?

Most patios should drop about 1/4 inch for every foot of length, which equals a 2% grade. On a 10-foot patio, that comes to roughly 2.5 inches of fall. A minimum of 1/8 inch per foot can work on very flat, sunny spots, but 1/4 inch gives more reliable drainage.

Can poor patio drainage contribute to foundation problems?

Yes. When a patio sends water toward the house, that water collects near the foundation and soaks the soil. In North Texas, clay soil swells and shrinks with moisture, which moves the foundation and can lead to cracks. Good drainage keeps that water away and lowers the risk.

What drainage solutions work best for stone patios in Fort Worth, TX?

A correct slope away from the house comes first. Swales, channel drains and planted beds then carry runoff across the yard. A well-compacted, free-draining base rounds out the system. Together these handle Fort Worth’s heavy storms without letting water reach the foundation.

How can I tell if my existing patio is draining water correctly?

Watch the patio during a heavy rain. If water runs off within a few minutes and heads away from the house, the slope is working. Puddles that linger, water flowing toward the walls or damp spots near the foundation all point to a drainage problem worth checking.

Fireplace Repair After Water Intrusion Should Begin at the Source

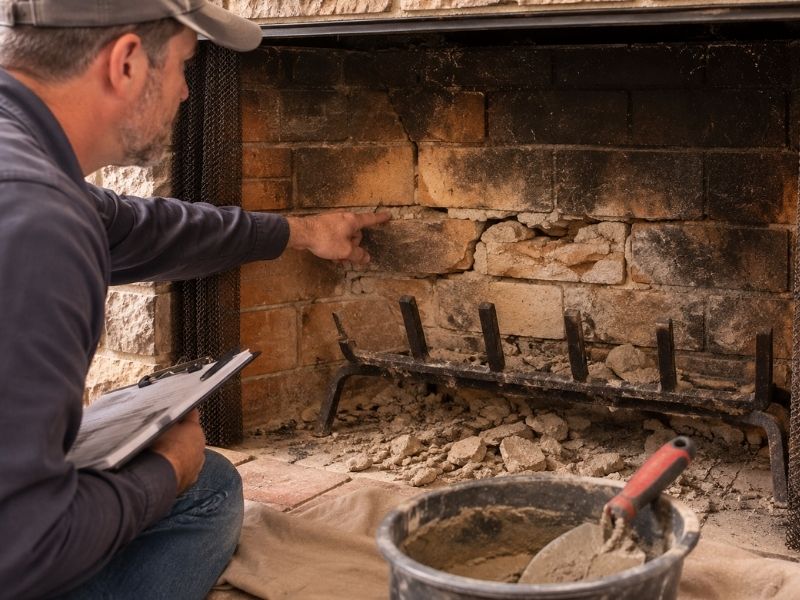
Water-damaged brick fireplace undergoing a professional inspection in Fort Worth, TX.

Water stains on a fireplace almost always start somewhere you can’t see. When you plan fireplace repair after a leak, the smart move is to trace the water back to where it got in. Fix that entry point first, then fix the damage inside. Skip that order and the stains return, often worse than before. Most fireplace water trouble begins at the top of the chimney or along the roof, not down at the hearth where the marks show up.

Identify the True Entry Point of Water Before Repairing Fireplace Materials

The real source of a fireplace leak sits above the firebox nearly every time. Water sneaks in through a cracked chimney cap, worn flashing where the chimney meets the roof, crumbling mortar joints, or a damaged crown. From there it travels down through the masonry until it shows up inside as a stain or soft spot. Because water follows the easiest path, the mark you see rarely lines up with the spot where it entered.

So chasing the stain alone gets you nowhere. A mason follows the water uphill instead, checking each part of the chimney to learn how rain slips past the outer shell. Once that path is clear, the interior fix finally holds.

Inspect Chimney Caps, Flashing, and Crown Components Before Interior Restoration

A full exterior check should come before anyone touches the brick or finishes inside. The parts that keep rain out sit on top of the chimney and along the roofline, so that’s where a good inspection starts. Here’s what a mason looks at up there:

  • The chimney cap covers the flue opening and blocks rain, debris, and animals. A missing or rusted cap lets water pour straight down the flue.
  • Flashing is the metal seal where the chimney meets the roof. Loose or cracked flashing ranks as one of the most common leak points on any home.
  • The chimney crown is the sloped top that pushes water away from the flue. Cracks in the crown soak water right into the structure.
  • Mortar joints are the lines between the bricks. Worn or open joints act like tiny cups that hold moisture against the masonry.

When any of these fail, rain gets into the brick and heads for the firebox. Replacing bricks inside before sealing the outside just wastes the effort, because the next storm undoes it.

Evaluate Masonry Condition After Moisture Exposure

Long exposure to water weakens brick, mortar, and firebox parts in ways you can’t always spot at a glance. Trapped moisture softens mortar, and freeze-thaw swings can crack and flake the brick face, a problem masons call spalling. So a pro checks how deep the damage runs before starting any repair.

They look for loose or powdery mortar, rust stains that hint at corroded metal, white salt marks where water dried on the surface, and cracks in the firebox itself. If moisture reaches structural parts, those come first, ahead of any cosmetic patch. Rushing the surface fix only hides the real trouble underneath, and it tends to fail fast.

Improve Exterior Drainage to Reduce Future Fireplace Water Problems

Good drainage around the house keeps water away from the chimney base long after the repair is finished. Grading, gutters, and downspouts all decide how much moisture ends up near the masonry and foundation. When the ground slopes toward the home, rain pools against the base and works into the lower brick over time.

Clogged gutters spill water down the walls, and short downspouts dump it right beside the foundation. Fixing these keeps the whole system drier. Slope the soil away from the house, clear the gutters, and run downspouts well past the base so storms have somewhere to go besides your chimney.

Why Fort Worth Homes Benefit From Source-First Fireplace Repair

Fort Worth weather is rough on the parts that keep a chimney dry. Heavy spring downpours, hail, and big temperature swings wear down caps, flashing, and mortar faster than a mild climate would. Hail can dent or crack a cap and crown in a single storm.

Sharp jumps between hot afternoons and cold nights make brick and mortar expand and shrink, which opens small gaps that invite water in. When repairs skip the source, the next round of Texas weather reopens the same leak within a season. Starting at the water’s entry point gives you a fireplace repair that survives the local climate instead of one you redo every year.

Frequently Asked Questions

What usually causes water to leak into a fireplace?

Most fireplace leaks trace back to the top of the chimney and the roofline. A cracked cap, worn flashing, a damaged crown, open mortar joints or poor roof drainage all give rain a way into the masonry, and gravity carries it down to the firebox.

Can I repair fireplace stains without fixing the water source?

You can, but the fix won’t last. Cover a stain or swap a brick while water still gets in, and the mark comes back after the next rain. Correcting the entry point first is the only way the inside repair stays clean and dry.

How do professionals find where fireplace water intrusion begins?

A mason inspects the whole chimney from the top down. That means checking the cap, crown, flashing, mortar joints, roof connections and nearby drainage to trace the exact route rain takes into the structure. Following the water uphill points to the true source.

Why should exterior drainage be checked during fireplace repair?

Drainage decides how much water sits near the chimney base and foundation. Poor grading and clogged gutters push moisture into the lower masonry, where it slowly breaks down brick and mortar. Better drainage protects both the repair and the rest of the system.

How often should a Fort Worth chimney be checked for water problems?

Once a year works as the general rule, and a look after any major hail or rainstorm makes sense in this area. An annual check catches small cracks and worn seals early, before water turns them into bigger fireplace or chimney repairs.

Brick Repair Above Garage Openings Starts With the Crack Pattern

Stair-step cracks in brick masonry above a residential garage opening in Fort Worth, Texas.

A crack over the garage door looks small at first. Then it grows, and the brick starts to step or bulge. Good brick repair above a garage opening starts with one thing, and that is reading the crack. The shape and the spot tell you what went wrong. For developers working on Fort Worth homes, where clay soil swells and shrinks with the seasons and the garage is the widest hole in the wall, that spot cracks before anywhere else. Fill it too soon and it comes right back. Read it first, and you fix the real problem once.

Why the Brick Above a Garage Door Cracks First

The garage door is the widest opening in most walls. Brick cannot span that gap on its own. It rests on a beam called a lintel that carries the load across the top. All that weight funnels down to the two top corners of the opening. So when the wall moves, or the lintel gives, the stress lands right there. That is why cracks show up over the garage long before the rest of the wall says a word.

Read the Crack Pattern Before You Fix Anything

The crack is a clue, and its shape points to the cause. Look at where it starts, which way it runs, and whether the brick has moved.

  • Diagonal cracks from the top corners of the opening often mean the lintel is sagging or the steel behind it is rusting and swelling.
  • A flat crack along the lintel line, with the brick above pushed up or out, points to a rusting steel lintel as the rust swells and lifts the course.
  • Stair-step cracks climbing through the mortar from a corner usually mean the ground under the opening is moving.
  • A straight up-and-down crack over the middle of the opening can mean the lintel is too weak or barely resting on the wall at its ends.
  • Cracks that open in one season and close in another point to clay soil swelling when wet and shrinking when dry.

Snap a few photos over a couple of months. A crack that keeps growing is telling you the cause is still active.

The Two Things Usually Behind It

Rusted steel lintel exposed during brick repair above a residential garage door in Fort Worth, Texas.

Most cracks over a garage door trace back to a bad lintel or moving ground. Sorting out which one saves you from the wrong repair.

A steel lintel fails in a few ways. It can sag if it was too small or the span was too long. It can rust, and this is the sneaky one. Water gets past bad flashing or blocked weep holes, sits on the steel, and the steel rusts. Rust takes up far more room than the metal it came from, up to several times as much. That swelling steel pushes the brick up and out, and cracks the joints. The ends of the lintel also need enough wall to rest on. Too little, and it slips or sags.

Ground movement is the other cause. Clay soil holds water, swells up, then shrinks as it dries. That lifts and drops the foundation over the year. The garage opening is wide and weak, so it cracks first. This kind of movement needs a look at the foundation, not just the brick.

What to Do About It

Never just fill the crack and walk away. Find the cause and stop it first, or you will pay twice. Start with water, since water drives most lintel rust. Check the flashing above the lintel, clear the weep holes, and aim downspouts away from the wall. Then deal with the lintel itself. A rusted or sagging lintel needs to come out and get replaced with one sized right and set with enough bearing on each end. That job needs the brick above held up with temporary support while the old steel comes out. If the cause is ground movement, get the foundation checked before any brick work.

Wide garage spans carry a lot of weight. Anything over about twelve feet should be sized by a structural engineer, not guessed. Once the cause is fixed and the wall is stable, then you repoint the joints or replace the cracked brick to match.

One safety note. Loose, bulging, or dropping brick over an opening is a falling hazard. Keep people and cars clear, and call a mason or engineer. Do not knock 

brick out from over a door without proper support, because the whole course above can come down.

Frequently Asked Questions

Are cracks above my garage door serious?

They can be. A thin hairline may be simply settling. A crack that widens, steps, or comes with pushed-out or sagging brick usually means the lintel or the ground is moving. Get those looked at soon, since the brick above an opening can loosen and fall.

What makes the brick over a garage door crack in the first place?

Two causes lead the list. The steel beam over the door can rust and swell or sag under the load, which cracks the brick around it. The ground can also shift, since clay soil swells and shrinks with moisture and drops the widest part of the wall first.

Can I just caulk the crack or add new mortar?

Only after the cause is fixed. Sealing a crack while the lintel still rusts or the soil still moves just hides the problem for a few months. The crack returns, often wider. Stop the water or the movement first, then patch.

Why does the crack keep coming back after every repair?

Because the repair treated the crack and not the cause. If water still reaches the steel, or the foundation still lifts and drops, the same stress reopens the same crack. A lasting fix removes the source, whether that is a rusted lintel or a moving base.

Do I need an engineer or just a mason?

That comes down to the cause and the span. A mason can handle flashing, repointing, and many lintel swaps. Wide garage openings and any sign of foundation movement call for a structural engineer to size the beam or check the base before repairs.

Painted Brick With White Stains May Be Signaling Trapped Moisture

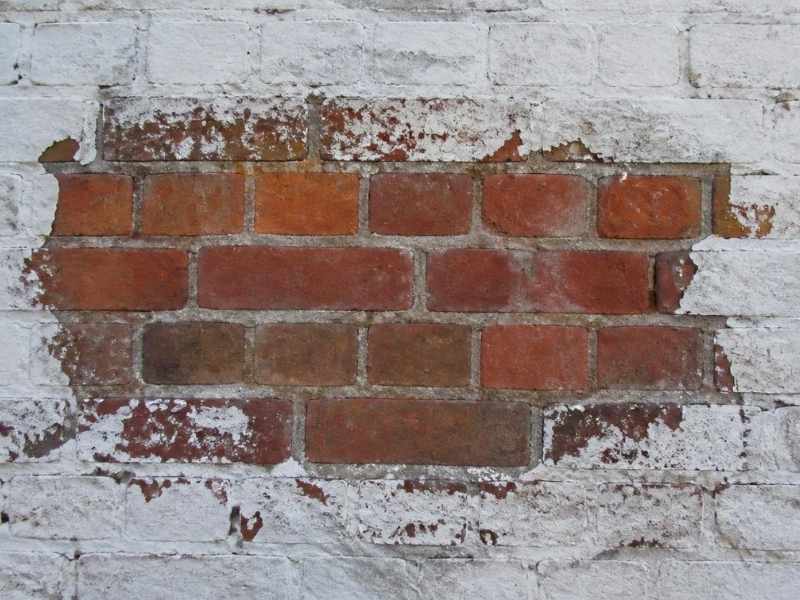
White moisture stains and peeling paint on an exterior brick wall in Fort Worth, Texas.

That chalky white haze on painted brick is easy to wipe at and forget. On a painted wall, it means more than dust. White stains on painted brick often show that water is stuck inside the wall with no way out. For developers working in homes and buildings, where painted and whitewashed brick is a popular look and the weather swings from wet spells to winter freezes, that trapped water can quietly damage the brick under the coat. Here is the short version. The stain is a symptom. The real problem sits behind the paint, and painting over it makes it worse.

What the White Stains Are Telling You

The white marks are salt left behind by water. Water moves through brick and mortar, picks up natural salts, and carries them toward the surface. As the water dries, the salt stays behind as a pale, powdery film. On bare brick you can often brush it off. On painted brick the story shifts. The paint blocks the surface, so the salt and the water get stuck, and the stain becomes a warning that the wall is not drying. If you see it come back again and again, the wall is holding water it cannot release.

Why Paint Changes Everything About Moisture

Brick was made to breathe. A raw brick wall soaks up some water and then lets it dry back out through its face. Many common paints seal that face shut. Water still finds ways in, from rain, from the ground, from leaks, or from humid air inside. Once it is in, a sealed face traps it. Breathable masonry coatings let vapor pass through, but standard latex and heavy elastomeric paints hold it back. So the paint that looks clean and fresh can turn the wall into a sponge with a lid on top.

The Damage You Cannot See Under the Coat

Mason checking white moisture stains on a painted brick exterior wall in Fort Worth, Texas.

Trapped water does its worst work out of sight. It sits in the brick, freezes on cold nights, expands, and pops small pieces off the face. That is called spalling. When the paint finally peels, chunks of brick face can peel with it. Vapor pressure also pushes the paint off from behind, which shows up as bubbles and blisters. Mortar joints soften and crumble as they stay damp. By the time the surface looks bad, the brick behind it may already be losing its face.

Watch for these signs on a painted brick wall:

  • Paint that bubbles, blisters, or peels in patches
  • White chalky stains that keep coming back after cleaning
  • A damp or musty smell near the wall
  • Mortar joints that feel soft or crumble when touched
  • Flaking paint that pulls bits of brick off with it

Find the Water Before You Touch the Paint

Fixing the paint first is a waste of money. Water has to be getting in from somewhere, and that source needs to go first. Check the roof, gutters, and downspouts for leaks or overflow that soak the wall. Look at the ground next to the brick. Soil and mulch piled high, or a slope tilting water toward the wall, both push moisture into the base. Watch where sprinklers spray, since a head that hits brick every morning keeps it wet. Inside, high humidity and poor airflow can drive vapor into the wall from behind. Track down the real source, fix it, and the wall gets a chance to dry.

What to Do About Painted Brick That Keeps Staining

Start by stopping the water, then give the wall time to dry fully before any new coating goes on. Do not paint over the stain to hide it, because a fresh coat seals the moisture in and speeds up the damage. Have a mason check the brick under the paint for spalling, soft spots, and failed mortar, since those need repair before anything else. If the paint is a sealing type and the wall stays wet, taking the paint off may be the only way to let the brick breathe again. Use gentle removal, not sandblasting, which chews up the brick face. On any building from before 1978, treat the old paint as possible lead paint and use safe removal steps. When you do repaint, pick a breathable masonry coating so the wall can dry through its face.

A quick word on timing. Wet brick will not hold new paint or repairs well, so plan this work for a dry stretch. Rushing a coating onto a damp wall just restarts the cycle.

Frequently Asked Questions

Does white staining always mean the brick is damaged?

Not always, but it is a signal you should not ignore. A light haze can be simple surface salt. Repeat stains on painted brick point to water that stays trapped, and that trapped water is what harms the brick and mortar over time. Have it checked before it spreads.

Can I just clean the stain off and repaint?

Cleaning removes the look, not the cause. If water is still getting in and the paint still seals the face, the stain returns and the brick keeps taking damage. Fix the water source, let the wall dry, and only then decide on a coating.

Is painted brick a bad idea in a wet or freezing climate?

It can be, if the wrong paint is used. Sealing paints trap water, and freezing water breaks brick from the inside. A breathable masonry coating lowers that risk by letting the wall dry, though no paint replaces good drainage and sound flashing.

How do I know if my paint is breathable?

Check the product type or the old records if you have them. Mineral and silicate masonry coatings are made to pass vapor. Standard latex and thick rubber-like elastomeric paints usually do not. A mason can also test how the wall handles water and tell you what is on it.

Should I strip all the paint off my brick?

Only if the wall stays wet and the paint is sealing it in. Stripping is slow, costly, and can harm brick if done roughly. Many walls do fine once the water source is fixed and a breathable coating goes on. Get a mason’s read before you commit.

A Masonry Mailbox Needs Conduit Planning Before Lighting Is Added

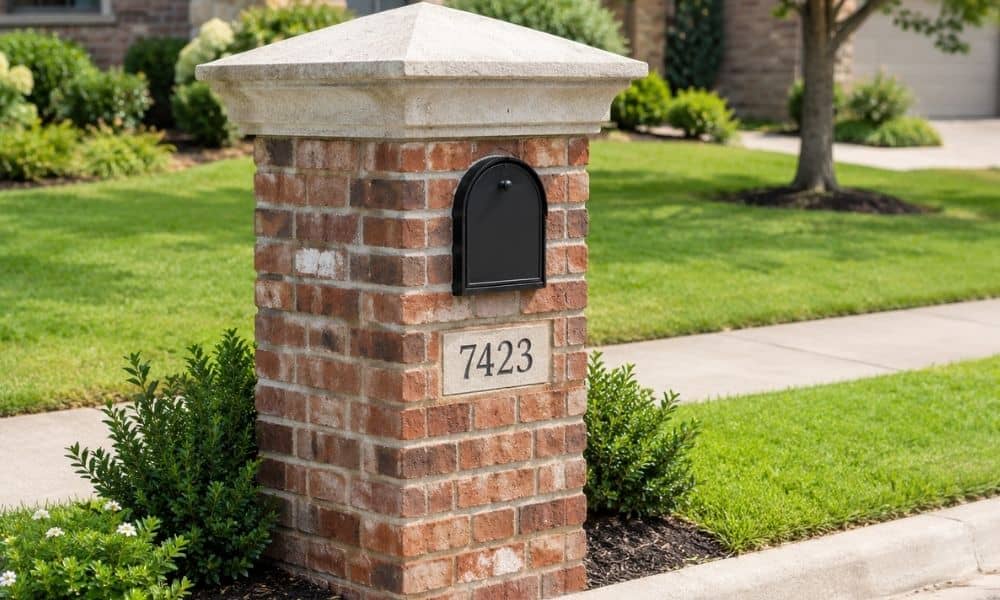
Masonry mailbox with landscape lighting beside a driveway entrance in Fort Worth, Texas

A masonry mailbox looks heavy and stays put for decades, so any wiring inside it should last just as long. That’s why the plan for lights belongs on paper before the first block goes down. Conduit is the hollow pipe that carries and guards the electrical wire, and its path runs through or around the stone. Once the masonry sets, moving that path means cutting into finished work. A little planning up front saves a lot of drilling later, and it keeps the light looking like part of the build instead of a bolt-on.

Plan the Lighting Route Before the Masonry Is Built

The lighting route should be settled before any masonry work starts, because the wire path shapes how the mailbox gets built. When you know where the light will sit, the mason can leave a clean channel for the conduit instead of guessing. Guessing usually means cutting stone later, and that rarely looks good.

Three choices drive the whole plan, so lock them down first:

  • Where the light will go, such as a lamp on top, a fixture on the side or a small light near the address numbers
  • Where the power comes from, whether that’s a nearby outdoor outlet, a low voltage transformer or a fresh line from the house
  • The route the wire takes to get there, through the center of the masonry, along the back or beside the base

Once those three are clear, the conduit can follow a straight, protected path. After that, the mason builds around it. This order keeps the wiring hidden and the finish clean.

Choose Conduit Locations That Keep Wiring Protected

Good conduit placement shields the wire from water, knocks and later masonry work, all without eating into the mailbox’s usable space. Rain and sprinkler spray are the biggest threats, so the conduit should sit where moisture can’t pool or seep in. Weatherproof conduit and sealed fittings handle damp spots, and a slight downward slope lets any water drain out rather than sit on the wire.

Physical impact matters too. A conduit run buried inside the stone or tucked behind a solid face stays safe from lawn tools, car doors and stray bumps. You also want the path clear of spots a future repair might disturb, like the mortar joints someone may need to open. Keep the conduit off the mail slot area and the newspaper box as well, since those parts need their full space to work.

Coordinate Light Fixtures With the Mailbox Design

A light looks built-in when you pick its size, mounting spot, wire exit and access point alongside the stone mailbox design, not after the stone is done. A big fixture on a small pillar looks off, so match the scale to the mailbox first. The mounting surface should be flat and solid where the light attaches, which the mason can plan while laying the stone.

The wire exit is easy to forget, yet it decides where the conduit ends and the fixture begins. Line up that exit with the back of the fixture so no bare wire shows. Plan a small access point nearby too, hidden in a joint or behind the fixture base, so the connection stays reachable. When the fixture, the exit and the stone all line up, the finished light reads as one piece.

Leave Access for Future Lighting Repairs

Conduit planning should leave a way to pull new wire, service the fixture and check for problems without tearing out finished stone. Wires fail, bulbs and fixtures wear out and connections loosen over the years. When the conduit runs as one continuous pipe with smooth bends, a repair tech can pull fresh wire straight through and skip the demolition.

Sharp turns and crushed sections are what trap wire and force someone to break into the masonry. A gentle sweep at each corner keeps the pull easy. Leave a junction or access point at the fixture and at the base, and size the conduit a step larger than the wire needs. That extra room lets a future upgrade, like a brighter light or a smart fixture, go in without a fight.

Plan a Driveway Entrance Upgrade Around Utilities

A driveway entrance upgrade goes smoother when you map the masonry mailbox, its lighting, the conduit and any buried utilities before digging starts. Entrances are crowded underground. Water lines, gas, cable and electric service often run near the road, and a new footing or trench can hit them.

Plan the lighting trench in the same pass as the footing work, since one open trench beats digging twice. When the mailbox, the conduit and the buried lines all share one clear plan, the crew avoids surprises and the entrance comes together in one clean go.

Frequently Asked Questions

Can conduit be installed inside a masonry mailbox?

Yes. Conduit can run right inside the stone or block core, which hides the wire and protects it from weather. The catch is timing. The path has to be set before the mason lays the courses, so the pipe ends up where you want it without any later cutting.

Where should conduit enter a masonry mailbox for lighting?

The entry point follows the fixture and the wire route, so there’s no single right spot. A top lamp wants the conduit rising through the center, while a side light wants it closer to that face. Pick the fixture location first, and the entry point falls into place.

Can a masonry mailbox be retrofitted for lighting?

Yes, though it takes more planning when no conduit went in during the build. Surface conduit or a shallow chase can carry the wire, and a low voltage line often runs with less digging. A pro can map the cleanest path that keeps the cutting to a minimum.

Should conduit planning happen before building a masonry mailbox?

It should. Deciding the electrical route first lets the mason build the channel in, which prevents drilling and cutting into finished stone. Planning after the fact means breaking into solid work, and that costs more and rarely comes out as clean.

What should homeowners consider before adding lights to a masonry mailbox?

Think through fixture placement, the conduit route and a way to reach the wiring later. Get the buried lines near the driveway located before any digging so a footing or trench misses them. Then line up the masonry and electrical work so both trades plan around each other.

Outdoor Kitchen Masonry That Protects Heat Zones and Utility Openings

Light stone outdoor kitchen with built-in grill, ventilation openings, utility access panels, and electrical outlets in Fort Worth, Texas.

Outdoor kitchen masonry has to do more than look good in a listing photo. In Fort Worth, summer surface temperatures on stone and brick climb fast. A poorly planned masonry shell around a grill or pizza oven can crack. It can scorch. It can even trap gas or electrical lines in places that fail inspection. For developers building outdoor kitchens into new construction, getting the heat zones and utility openings right the first time saves a costly redo later.

This guide covers how to plan masonry around heat sources and utility lines. Get this part right and the structure holds up. Get it wrong and it fails inspection.

Why Heat Zones Need Their Own Plan

A grill island is not one solid block. It’s a masonry shell built around appliances that push out serious heat. That heat does not stay on the cooking surface. It spreads.

Where Heat Actually Travels

Grills, side burners, and pizza ovens push heat sideways and down, not just up. That heat hits the walls around the appliance. It hits the countertop above. Sometimes it reaches the cabinet below. Standard brick or block was not built for that kind of close, steady heat.

Use Heat-Rated Materials Near Appliances

Appliance makers list required clearances in their install guides. They also list which backing materials to use. Cement board should back any masonry near a heat source, not drywall and not plywood. Skipping this step is one of the top reasons outdoor kitchens fail inspection. It’s also a top reason veneer cracks within the first year.

Ventilation Prevents Heat and Gas Buildup

Enclosed grill islands need vents or louvers built into the base. Without airflow, heat and leftover gas can build up inside the cabinet. That’s a fire risk. It also makes the space uncomfortable to stand near.

Planning Utility Openings Before the First Block Goes Down

Outdoor kitchen masonry installation with reinforced block walls, utility openings, ventilation, and stone veneer in Fort Worth, Texas.

Gas lines, electrical wires, and sometimes water lines need a path through the masonry shell. Plan these openings before the mason starts building. Cutting into finished masonry later weakens it and looks messy.

Coordinate With Trades Early

Bring the gas fitter and electrician to the site before the mason lays the first block. Mark the exact spots for gas stub-outs, electrical boxes, and water shutoffs on the base layout. This one step prevents most of the conflicts that pop up mid-build.

Size Openings for Access, Not Just the Line Itself

A gas line only needs a small opening. But the space around it should allow for future access. If a valve ever needs service, a mason should reach it without breaking out brick or stone. Build in an access panel or a removable stone section near shutoff valves.

Seal Penetrations Correctly

Every opening in the masonry needs a seal against water and pests. Use fire-rated sealant near any heat source. An unsealed gap around a gas line is a common issue that stalls final inspection.

Choosing Masonry Materials for Fort Worth’s Climate

Fort Worth summers push surface temperatures on dark stone and brick well above the air temperature. That heat cycling, plus the occasional winter freeze, puts stress on masonry joints over time.

Light-Colored Veneer Reduces Surface Heat

Dark stone and brick soak up more heat and hold it longer. That raises the surface temperature near cooking appliances even more. Lighter veneer cuts that heat load. It also stays cooler to the touch on countertop edges and nearby walls.

Mortar Choice Matters Near Heat Sources

Standard mortar can wear out faster when it heats and cools again and again next to a grill or oven. Ask your mason about mortar rated for higher heat in the zones closest to the appliance. The rest of the structure can still use a standard mix.

Structural Base Requirements

An outdoor kitchen is not a patio decoration. It’s a permanent structure that carries real weight. That includes countertop stone, appliances, and anything stored inside the cabinet base.

Footing Depth for Fort Worth Soil

Fort Worth’s clay soil expands and shrinks as moisture changes. A shallow footing can shift over just a few seasons. A proper footing, sized for local soil conditions, keeps the base from cracking as the ground moves.

Don’t Skip the Reinforcement

Block walls in an outdoor kitchen base need vertical steel and grout fill. Dry-stacked block with a veneer skin is not enough. This matters more here than on a decorative wall, since the structure carries appliance weight and takes daily heat cycles.

Coordinating Design With Inspection Requirements

Outdoor kitchens with gas appliances often need a permit and inspection separate from general landscaping work. Confirm what your local jurisdiction requires before construction starts. That includes appliance clearance specs and gas line pressure testing. Build this step into your schedule early. It helps you avoid delays from a failed first inspection.

Frequently Asked Questions

What material should back masonry near a grill or pizza oven? 

Use cement board rated for heat exposure, not drywall or plywood. It should cover any masonry surface inside the appliance maker’s clearance zone. This step prevents heat damage and lowers fire risk behind the finished surface.

Why do outdoor kitchens need ventilation built into the masonry base? 

Enclosed cabinet spaces trap heat and leftover gas without airflow. Vents or louvers in the base let that heat and gas escape. Without them, you get a fire hazard and an uncomfortably hot space.

When should utility lines be planned in an outdoor kitchen build?

 Plan them before the mason lays the first block. Mapping out gas, electrical, and water lines early stops you from cutting into finished masonry later. That kind of cutting weakens the structure and looks unfinished.

Does masonry color affect outdoor kitchen performance in Fort Worth? 

Yes. Dark stone and brick soak up more heat and hold it longer. That raises the surface temperature near cooking zones. Lighter veneer stays cooler to the touch and cuts down on added heat in already hot weather.

Do outdoor kitchens with gas appliances need a separate inspection? 

Often, yes. Many cities require permits and inspections just for gas line work and appliance clearances. These are separate from standard patio or landscaping permits. Check your local rules before construction begins.

Stone Pavers Around Pools Need Surface Choices That Work Barefoot

Stone pavers around a swimming pool in Fort Worth, TX with a textured, barefoot-friendly surface that provides traction, comfort, and effective drainage.

Bare feet decide whether a pool deck works. A stone that looks perfect in the showroom can scrape your soles, turn slick when it’s wet or burn too hot to cross on a summer afternoon. Choosing stone pavers for a pool means judging them by feel, not just by looks. The right surface grips a wet foot, stays bearable in summer sun and holds together where water hits it all day. This article covers how to test paver texture by touch, how summer heat changes what’s comfortable underfoot, how to drain the deck without slopes your feet notice and how to keep joints tight so nobody catches a toe. Get these right, and the deck feels good every time someone steps out of the water.

Choosing Stone Pavers With a Barefoot-Friendly Texture

Stone pavers around a pool get walked on by bare feet all day, so texture matters more here than almost anywhere else in a yard. The surface needs enough grip to hold a wet foot without feeling rough or sharp. Too smooth and it turns slick when it’s splashed. Too coarse and it scrapes and stings the soles of your feet.

The finish is where that balance lives. Lightly textured, tumbled, brushed and naturally cleft stone all give traction without a harsh bite. A heavily ridged or jagged surface might look like it grips well, yet feel awful to stand on. The only honest test is touch. Run your hand and bare foot across a sample before you decide, because a finish that photographs beautifully can feel like sandpaper in person.

Appearance still counts, but it can’t be the only thing you shop for around a pool. A stone you’d love on a patio wall might be miserable underfoot when it’s the deck. Feel each option the way your feet will, wet and dry, before it goes anywhere near the water.

How Summer Heat Affects Poolside Stone Surfaces

Summer sun is hard on poolside stone surfaces. The surface bakes all day, and the wrong stone can get too hot to cross without shoes. Since the whole point of a pool is walking out barefoot, surface heat is a comfort problem you plan around, not one you discover in the middle of the season.

Color and material drive how much heat a paver holds. Dark, dense stone soaks up sunlight and radiates it back at your feet. Lighter surfaces stay cooler because they reflect more of the sun instead of storing it. Denser materials also hold heat longer, so they stay hot well after you’d expect them to cool.

Finish plays a smaller part, but it’s real. A surface with some texture and a lighter tone tends to feel more bearable at midday than a smooth, dark slab in full sun. If part of your deck sits in afternoon shade and part bakes, you can even mix placement to your advantage. Test a sample in direct summer sun for an hour, then stand on it, before you trust it around the pool.

Planning Drainage Without Creating Uncomfortable Slopes

Water has to leave a pool deck fast, but the slope that moves it shouldn’t be something your feet notice. A paved pool surround needs to shed splash-out and rain away from the pool and the walking zones. Done right, that drainage happens under a grade so gentle you never feel like you’re walking downhill.

The trick is a steady, even slope instead of sharp dips. Standard practice pitches a deck a small amount per foot, just enough to pull water off without ponding. Trouble starts when the grade gets uneven. Low spots collect puddles you step into, and abrupt changes in height catch bare feet that aren’t watching the ground.

Around a pool, comfort and drainage go hand in hand. A surface that drains well stays drier, which means better grip and fewer slick patches for bare feet. A surface with awkward slopes and standing water gives you both a wet foot and a stumble risk. Plan the fall of the deck so water disappears while the walking stays flat and easy.

Keeping Paver Joints Stable Near Constant Water Exposure

Joints are where a poolside paver surface gets dangerous for bare feet. Constant splashing, pool chemicals and rain all work at the sand and base under the stone. When that support washes out, pavers start to shift, and a shifting paver is a stubbed toe waiting to happen.

Three things keep the stones locked in place. A solid, compacted base gives the whole surface something firm to sit on. Edge restraints around the perimeter stop the field from spreading outward over time. Full joints between the stones let them work as one surface instead of loose pieces. Skimp on any of the three near a pool, and water finds the weak spot fast.

You feel a failing joint before you see it. Gaps open up between stones, and a bare toe can catch the raised edge. A paver that’s lost its base rocks under your weight, which is startling and unsafe next to water. Wide, uneven joints also trap grit that scratches at your feet. Tight joints and firm edges keep the surface smooth and predictable, which is exactly what you want when nobody’s wearing shoes.

Comparing Poolside Stone for Comfort, Grip, and Maintenance

No single stone wins on every measure, so choosing a poolside paver means trading one strength against another. Surface temperature, slip resistance, durability, stain resistance and upkeep all pull in slightly different directions. A stone that stays cool might stain easily. One that resists stains might run hot or feel slick.

For a pool deck, weight the comfort and safety factors first. Heat underfoot and wet grip affect every single person who uses the pool, every time. Durability and cleaning matter too, but a gorgeous, low-maintenance stone that burns your feet or turns slick has failed at its main job. Rank the barefoot experience at the top, then sort the rest.

Testing beats guessing here. Take samples home and check them the way you’ll live with them. Wet each one and feel the grip. Leave it in the sun and touch it at the hottest part of the day. Splash a little and see how fast it dries. A stone that passes those tests in real sun and water is worth far more than one that only looks good in a showroom.

Brick Pavers for Driveways Need Edge Restraint Before the First Tire Rolls In

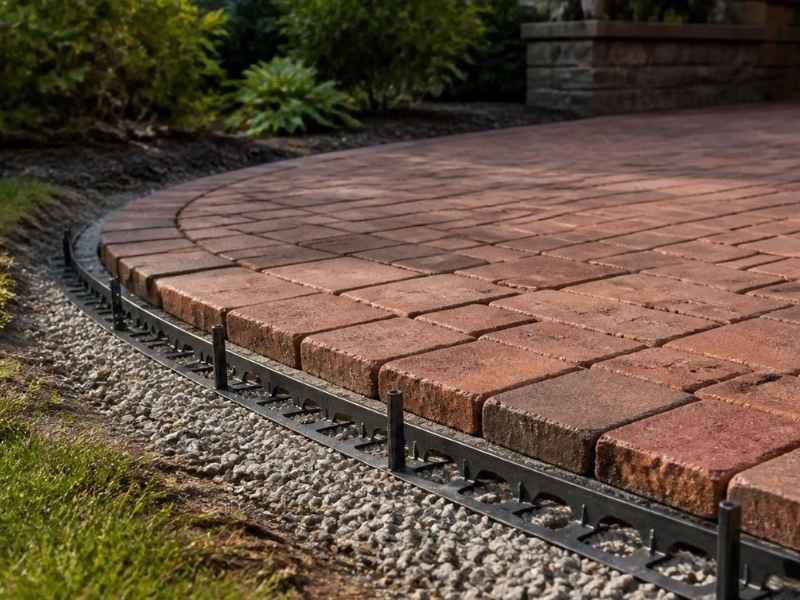
 Brick pavers for driveways showing anchored edge restraint along a curved driveway before vehicle traffic begins

A driveway takes more punishment than almost any other paved surface at a home. Brick pavers can handle that load for decades, but only when the edges get locked down before any weight rolls across them. Vehicles push pavers sideways every time a tire turns or stops. Without a firm edge holding the field together, that push slowly spreads the pavers apart until gaps and ruts show up. The work that goes into the border decides whether the middle stays tight for years or starts drifting after the first season.

Read Where the Tires Push Hardest

Not every part of a driveway feels the same force. Turning tires grind against the surface with a twisting motion that flat driving never creates. Braking near the garage sends weight forward into the same few rows again and again. Curves, the apron where the driveway meets the street, and the garage entrance all take extra strain.

These high-stress spots should guide how the base and the edges get built. A section that only sees straight, slow travel needs less reinforcement than a tight turn or a steep entry. Planning around the hardest-working zones puts the strongest support exactly where the driveway will try to fail first.

Treating the whole surface as equal wastes effort in calm areas and leaves the busy ones short. A mason who studies how cars actually move across the driveway can match the prep to the real pattern of wear. That kind of reading turns a generic install into one built for the way this driveway gets used.

Build the Base Past the Edge of the Pavers

The prepared foundation under a driveway has to reach beyond the pavers you can see. Borders and perimeter restraints need solid ground under them too, not soft fill that gives way. When the base stops right at the last visible paver, the outer row has nothing firm to lean on.

That unsupported strip becomes a weak seam. The center of the driveway can look flawless while the edges sink, tilt, or creep outward under repeated traffic. Once the border starts to move, the failure works its way inward toward the pavers that seemed fine.

Extending the compacted base under the full paved area, edges included, keeps the whole system sitting on stable ground. A base that runs a bit wider than the pavers gives the restraint something real to grip. That extra reach costs little during the dig and saves a major repair down the road.

Anchor the Perimeter Against Sideways Movement

Edge restraint exists to fight one specific thing, the horizontal shove a tire creates when it turns or halts. Without that anchor, pavers drift outward a fraction at a time until gaps open across the field. The restraint holds the outer pieces in line so the rest stay packed together.

Several details decide whether that restraint actually holds. The type of restraint matters, along with how deep it sits and how it connects to the ground. Curves and the driveway opening need extra attention, since those are the exact places where sideways force peaks. Spikes or anchors set too shallow pull loose over time and let the edge wander.

A restraint that’s secured well around the tricky spots keeps the perimeter honest for years. The connection between the restraint and the base is where many jobs quietly fail. Done right, the edge and the field act as one piece and share the load a driveway throws at them.

Fill the Joints So the Pavers Act as One

Joint sand does more than fill the gaps between bricks. When the paver joints are packed full, the pavers lock against each other and share load like a single surface. That shared strength is what lets a driveway carry a car without any one brick taking the full hit.

Trouble starts when the joints sit half empty. Incomplete filling, sand that washes out early, or traffic that rolls on before the joints are set can all break the connection. Once that happens, individual pavers rotate, separate, or slide under the weight of a tire, and the smooth surface starts to feel loose.

Filling every joint completely, then keeping vehicles off until the surface is ready, protects the interlock that makes the whole driveway work. Full joints also help keep water and grit from working down into the base. A tight, connected surface simply holds up better against everything a driveway faces.

Plan Sections You Can Lift for Future Repairs

Someday part of a driveway will need to come up. A utility line might need service, drainage might need a fix, or a settled spot might need to be reset. Installers who think ahead leave those areas easy to reopen instead of building one solid slab of interlocked brick.

Smart planning keeps a few habits in play. The paver pattern gets documented so a repair crew can put it back the same way. A handful of matching units get stored for later, since dye lots change and an exact match gets harder to find over time. Repair boundaries get chosen at natural break points, so a small section can lift out without disturbing large runs of the driveway. That foresight turns a future repair into a neat patch rather than a full tear-out that never quite matches again.

Frequently Asked Questions

Where does a brick paver driveway experience the most movement?

The heaviest movement shows up wherever tires twist or stop. Sharp turns, the garage approach, curved runs, and the apron at the street all take strong sideways force. Those areas shift first when the edges aren’t locked down, so they deserve the most support during the build.

Should edge restraint continue across a driveway entrance?

Yes. The entrance is one of the highest-stress points on the whole driveway, since tires cross it constantly and often turn there. Stopping the restraint short of the opening leaves the busiest edge free to spread. The anchor should carry through that transition, not quit before it.

How is driveway edge restraint secured around curved sections?

Curves need closer anchoring and careful placement, because the outward push builds up along the bend. Restraint on a curve usually calls for more frequent anchor points set at the right depth, plus tight connections that follow the shape of the arc. Loose or widely spaced anchors let the curve drift outward under traffic.

Why must the joints be completely filled before vehicles use the driveway?

Full joints are what tie the pavers into one connected surface. Until the sand fills every gap, each brick sits more or less on its own and can rock or slide under a tire. Driving on partly filled joints lets pavers shift out of place before the surface ever settles.

How soon can a vehicle drive over newly installed brick pavers?

That depends on the joint material and the install method, so the installer sets the timing. The core rule stays the same, wait until the joints are filled and set. Rolling weight onto fresh pavers too early can loosen the edges and knock the surface out of line before it stabilizes.

Stone Mason Material Planning Can Prevent Mid-Project Substitutions

Stone mason material planning showing stone samples, project plans, and matching pallets prepared before installation

Material planning is one of the quietest parts of a stone job, and it prevents some of the biggest headaches. A good stone mason thinks about the material long before the first piece gets set. When a supply gap shows up halfway through a build, the fix usually means dropping in a stone that never matched the first choice. That kind of rushed swap shows in the finished wall or patio for years, and it’s rarely a change anyone would have picked on purpose. Careful planning at the start keeps the whole project on one clear material path from the first delivery to the last cut.

Where the Stone Goes Decides What Works

The spot where a stone lands changes what it has to do. A piece meant for a patio floor takes foot traffic and weather in a way a fireplace face never will. Wall veneer, steps, coping, and hearths each ask for their own thickness, finish, and strength. A stone that looks perfect on a sample board can still be wrong for the actual job once it goes into service.

A stone mason reads the use first and the look second. Steps carry weight and repeated wear, so they need a dense, thick surface with some grip underfoot. Coping caps a wall and throws off rain, so it needs the right shape and a finish that stands up to weather and frost. Load-bearing areas need stone that holds force without cracking under it.

Choosing by color alone skips the part that decides how long the work holds up. A soft, thin stone in a high-wear spot will chip and wear out fast, no matter how good it looked on the shelf. Matching the material to its real demands is the difference between a surface that ages well and one that starts failing in a season or two.

Confirm Stock and Lead Times Before You Commit

A catalog photo, a website image, or an old showroom sample can all be out of date. Color runs shift between batches. A product gets discontinued without much notice. What sat in the supplier’s yard last season might be gone today. Picking a stone from a picture and assuming it’s ready to ship is where a lot of delays begin.

Before anyone locks in an install date, the mason or supplier should check a few real facts. That means confirming the amount on hand, the current inventory count, the next restock date, and any wait time on a special order. Natural stone moves through supply chains in ways that change often, and imported or non-stock products can carry long lead times measured in weeks.

A short check up front keeps the schedule honest and keeps the crew from standing around later. It also gives everyone time to react if the numbers don’t line up. When a stone turns out to be short or slow, the owner can pick a backup while there’s still room to plan, instead of settling for whatever the yard has on a rushed afternoon.

Natural Stone Varies From Piece to Piece

Stone comes out of the ground, so no two pieces come out exactly alike. Color, veining, texture, and thickness all shift across a single pallet. A homeowner who expects every stone to copy one small chip is going to be surprised when the pallets arrive. That surprise often turns into a complaint that was never really a defect at all.

The smarter habit is to review the true range before signing off on anything. That can mean looking at several fresh samples, a range sample that shows the lightest and darkest ends, or a full pallet opened up in daylight. A small mockup on site helps even more, since it shows how the pieces read together rather than one at a time.

When people see the natural spread ahead of time, the delivered stone reads as normal instead of wrong. Setting that expectation early protects the mason too. A clear conversation about variation up front keeps a natural feature of the material from turning into a dispute after the wall is already up.

Count Every Piece the Job Needs

A finished order covers far more than the square footage of the main face. The mason has to add corners, caps, sills, step treads, and all the cuts those pieces require. Breakage and waste count too, since some stone cracks or gets trimmed away during setting. A quick guess at the front end often turns into a shortfall at the back end.

Running short partway through a build causes two problems at once. The work stops while more material comes in, and the new batch may not match the first pour of stone. A mason who maps the full piece count early, including the odd specialty units, keeps the color and texture even across the whole surface. That complete tally protects the timeline and the appearance at the same time.

Keep a Written Record of the Chosen Stone

Once everyone agrees on a stone, that choice belongs on paper. A clear record removes the guesswork if a question comes up mid-build. It also gives the property owner a real say if the material ever has to change for reasons outside anyone’s control.

A useful record spells out the details that define the exact product:

  • The quarry or manufacturer and the product name
  • The stone type, finish, and dimensions
  • The approved range of natural variation
  • The mortar color and any matching accessories

No substitute goes in without the owner’s approval. When a specified stone runs out, the proposed replacement gets weighed for fit, size, install needs, durability, appearance, cost, and delivery timing. A written baseline makes that comparison quick and fair instead of a rushed call on the job site. It turns a stressful moment into a simple side-by-side check, with the owner deciding rather than finding out after the fact.

Brick Masonry Details That Help New Buildings Respect Established Streetscapes

Brick masonry details helping a new commercial building complement an established historic streetscape

Brick masonry plays an important role in how a new building fits within an established streetscape. The color, texture, brick size, bond pattern, and detailing around doors and windows all influence how the building relates to the surrounding neighborhood. In areas with a well-defined architectural character, these design decisions can help new construction complement nearby buildings while maintaining its own identity. Careful brick masonry detailing supports a cohesive streetscape and creates a transition between new development and the existing built environment. 

Start by Reading the Street You’re Building On

The most useful design research happens on foot. Walking the block reveals what the existing buildings actually share, and the pattern is often narrower than photographs suggest. One street may run heavily toward warm red brick with tight mortar joints, while the next favors buff tones and wider joints that make walls look softer from a distance.

Scale carries as much weight as color. Older commercial blocks often use a standard modular brick that gives walls a fine grain, so a large format brick on the same street can look coarse even in a matching color. Window proportions, storefront height and the rhythm of openings tell you how the buildings around you divide their facades. Noting all of this before selecting materials gives the design team a real reference instead of a guess, and it usually shortens design review with a planning department that cares about compatibility.

Details Do the Work Most People Notice

Broad choices set the direction, and the details decide whether a wall looks considered or careless. Bond pattern is the clearest example, since running bond, common bond and stack bond each produce a different surface even with identical brick. A common bond with header courses every sixth row reads as older and heavier, while stack bond reads modern and flat.

Mortar deserves more attention than it usually gets, because joints can occupy close to a fifth of a brick wall’s visible surface. A dark mortar makes each brick stand out and a light mortar softens the whole field, so the same brick can produce two very different walls. Joint profile matters too, and a concave joint casts a shadow line that a flush joint doesn’t. Corners, water tables, soldier courses over windows, brick arches and simple lintel treatments all give the eye something familiar to land on. These small moves cost little compared to the wall itself and they carry most of the visual result.

Modern Buildings Using Traditional Brick Well

Contemporary architecture and traditional masonry get along better than people assume, provided the building respects the scale of its neighbors. A clean, modern form clad in brick that matches the surrounding color range often sits comfortably on an older street, because the material and the proportions do the connecting while the form stays current.

Problems appear when a new building breaks the established rhythm rather than the style. A blank brick wall running seventy feet without an opening will feel wrong on a street of twenty five foot storefronts no matter how good the brick is. Dividing long facades into bays, holding a consistent floor height at the street, and keeping ground level windows generous all preserve the pattern people recognize. Designers can then push the upper floors, the roofline or the entry in a more modern direction without the building feeling out of place. That balance gives owners a project that reads as new construction while still belonging.

Making Brick Work With Other Exterior Materials

Few buildings today use brick alone. Stone bases, metal panels, wood soffits, stucco and large glass openings all appear alongside masonry, and the transitions between them decide whether the facade looks resolved. Changing material at an inside corner, a floor line or a structural bay looks intentional. Changing it in the middle of a flat wall rarely does.

Color relationships need a decision rather than a default. Warm brick pairs comfortably with bronze, warm gray stone and natural wood, while cool gray brick sits better next to black metal and cooler stone. Keeping the material palette to three or four elements prevents a facade from turning busy, which matters on a street where neighboring buildings use one or two. Detailing at the joints has to work in the rain as well as on paper, so flashing, sealant joints and drip edges belong in the drawings before construction. Sloppy transitions collect water and stain the brick below within a few seasons.

Durable Masonry Keeps Curb Appeal Working

Good design fades quickly when the wall performs poorly. Brick selected for the local freeze and thaw exposure, mortar mixed to the right strength for that brick, and flashing installed correctly at every shelf angle and opening will keep the facade looking close to new for decades. Mortar that’s harder than the brick around it causes the brick faces to spall instead of the joints wearing, which is a repair nobody wants to fund ten years in.

Workmanship shows itself over time. Consistent joint tooling, clean brick faces, straight coursing and properly functioning weep holes are the difference between a wall that ages gracefully and one that streaks. Owners considering long term value should treat these items as part of the design conversation rather than as field decisions. A street that keeps its character tends to hold property values well, and each new building either supports that or works against it. Brick chosen and detailed with care puts a project firmly on the supporting side.