How Decorative Brick Walls Improve Front Yard Design

Decorative brick planter wall adding structure and curb appeal to a Fort Worth front yard landscape

Decorative brick walls can turn a plain front yard into something that actually looks intentional. Instead of grass running straight to the sidewalk, a low brick wall adds shape, structure, and a sense of permanence that most yards are missing.

Here is what a lot of homeowners overlook. A front yard without any defined edges tends to look flat, no matter how nice the landscaping is. A brick wall gives the eye something to rest on and ties the whole space together.

Decorative brick walls add structure, privacy, and curb appeal to a front yard, and they do it in a way that holds up for decades with almost no upkeep.

Why Brick Walls Change the Whole Feel of a Front Yard

A front yard without clear boundaries can feel open in a way that reads as unfinished rather than spacious. Adding a brick wall gives the space a defined edge, which makes the whole yard feel more designed and less like an afterthought.

Creating a Sense of Arrival

A low brick wall near the front walkway or property line signals where the private space begins. This small shift changes how a visitor experiences the approach to the house, giving the yard a clear starting point instead of one space blending into the next.

Adding Height Without Blocking the View

Unlike a tall privacy fence, a decorative brick wall can add visual interest at a lower height. This works well for homeowners who want structure in the yard without fully closing off the view from the street.

Popular Styles of Decorative Brick Walls

Not every brick wall needs to be a solid, uniform structure. Several styles work well for different yard layouts and home designs.

Low Border Walls Along Walkways

A short brick wall running alongside a front walkway adds definition without overwhelming the space. This style works especially well for smaller front yards where a taller wall would feel too heavy.

Brick Planter Walls

Brick walls built to double as raised planters combine structure with greenery. This style adds dimension to a flat yard and gives homeowners a defined space for flowers or shrubs without needing separate garden beds.

Accent Walls With Pattern Details

Some homeowners choose a brick pattern, like a herringbone or basketweave design, worked into a small accent wall near the entrance. This adds visual interest without requiring a large structure, and it works well as a focal point near a front door or mailbox area.

Seat Walls for Extra Function

A brick wall built at seat height serves two purposes at once. It defines the yard’s edge and gives people a place to sit during a gathering or while waiting at the front of the house.

How Brick Walls Add Privacy Without Full Enclosure

Many homeowners want some separation from the street without building a wall tall enough to block the whole yard from view. Decorative brick walls can strike that balance.

Partial Height Walls That Soften Street Noise

Even a wall two or three feet tall can reduce the feeling of being fully exposed to the street. It also helps soften some street noise, without requiring the homeowner to give up natural light or an open feel in the yard.

Combining Brick With Landscaping for More Coverage

Pairing a lower brick wall with shrubs or small trees behind it adds more privacy over time as the plants grow in. This combination gives homeowners more coverage without needing to build a taller, heavier wall from the start.

Why Brick Holds Up Better Than Other Yard Wall Materials

Wood fencing needs regular staining or replacement. Vinyl can crack in extreme heat. Brick handles both the sun and the occasional freeze that Fort Worth sees each winter without much trouble at all.

Low Maintenance Over Many Years

A brick wall does not need painting, staining, or yearly sealing. An occasional rinse to clear off dust and pollen is usually all it takes to keep it looking clean year after year.

Holding Color and Structure Through Weather Changes

Brick resists fading far better than painted wood or vinyl fencing. It also handles the swings between hot summers and occasional freezes without warping or cracking the way other materials can over time.

Design Choices That Affect How Long a Brick Wall Lasts

A decorative wall still needs the right construction details to stay solid for decades, not just to look good on day one.

A Proper Footing Below the Frost Line

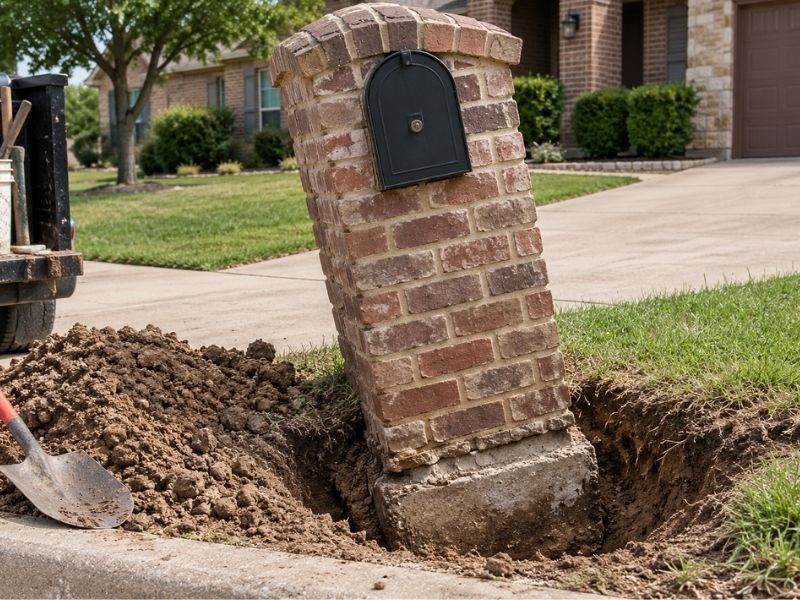
Even a low decorative wall needs a solid footing set below the frost line for the area. Skipping this step risks shifting or cracking as the ground moves slightly through freeze and thaw cycles each winter.

Weep Holes for Drainage

Small gaps called weep holes, built into the base of a brick wall, let trapped water escape instead of building up behind the structure. Without them, water pressure can slowly push a wall out of alignment over time.

Matching Mortar to the Local Climate

The mortar mix used in a decorative wall needs to hold up to the specific temperature swings and moisture levels common in North Texas. Using the wrong mix can lead to cracking well before the wall reaches the end of its expected lifespan.

Questions to Ask Before Building a Decorative Brick Wall

A few clear questions before construction begins can prevent problems down the road.

  • Will the footing be set below the local frost line?
  • Does the design include weep holes for proper drainage?
  • What brick and mortar combination is recommended for this specific yard and climate?
  • Will the wall height and style match the overall look of the home’s exterior?

Getting clear answers before the project starts helps avoid a wall that needs repair or rebuilding within just a few years.

Frequently Asked Questions

How Do Decorative Brick Walls Improve Front Yard Curb Appeal?

Decorative brick walls add structure, definition, and visual interest to outdoor spaces. They create clear borders and design features that landscaping alone may not provide.

Can a Low Brick Wall Add Privacy to a Front Yard?

Yes. A low brick wall can create a greater sense of separation from the street while helping define the space. When combined with plants or landscaping, it can improve privacy and reduce outside distractions.

How Long Can a Decorative Brick Wall Last?

With proper construction, including a strong footing, quality mortar, and proper drainage, a decorative brick wall can last for decades with minimal maintenance.

Why Are Weep Holes Important in Brick Wall Construction?

Weep holes allow trapped moisture behind a brick wall to drain away. Without proper drainage, water buildup can weaken the wall structure and contribute to shifting or damage over time.

Are Decorative Brick Walls a Good Option for Small Front Yards?

Yes. Lower brick walls, planter walls, and landscape borders can add character and organization to smaller yards without making the space feel crowded or closed off.

Why Brick Walkways Shift and How Proper Installation Prevents It

Mason installing a brick walkway in Fort Worth, Texas with a properly prepared gravel base to prevent shifting

A brick walkway that shifts and sinks a few years after installation is one of the most common complaints homeowners bring to a mason. The bricks themselves are rarely the problem. What sits underneath them almost always is.

Here is what most people do not realize. A brick walkway is only as stable as the ground it sits on. Skip the right prep work, and even the best bricks will heave, sink, or spread apart within a few seasons.

Brick walkways shift because of what happens below the surface, not because of the bricks themselves. Proper base prep and edge support are what keep a walkway flat and stable for years.

What Actually Causes a Brick Walkway to Shift

Most shifting problems trace back to the ground underneath the bricks, not the bricks on top. Once you understand what is happening below the surface, the fixes make a lot more sense.

Soil That Was Never Properly Compacted

If the soil under a walkway was not compacted before installation, it settles unevenly over time. Foot traffic and rain both push loose soil down at different rates in different spots. This creates the dips and humps that show up in older walkways.

Water Getting Trapped Underneath

Water that collects under a walkway instead of draining away causes the ground below to soften. Soft ground shifts easily under weight. Over time, this creates low spots where water keeps collecting, making the problem worse each season.

Clay Soil That Expands and Contracts

North Texas soil often has a high clay content, and clay reacts strongly to moisture changes. It expands when wet and shrinks when dry. A walkway built without accounting for this movement will crack, heave, or separate as the ground beneath it swells and shrinks throughout the year.

The Base Layer That Prevents Most Shifting Problems

The base layer under a brick walkway does more work than most people expect. Getting this step right prevents the majority of shifting issues before they start.

Why a Gravel Base Matters More Than the Bricks

A properly compacted gravel base gives water somewhere to go instead of pooling under the bricks. It also creates a stable, even surface for the bricks to sit on, instead of resting directly on soil that will shift with the seasons.

How Deep the Base Needs to Be

A shallow base cannot handle the weight of foot traffic or the pressure from expanding clay soil. A base that is too thin will compact further over time, causing the bricks above it to sink unevenly.

Compacting the Base in Layers

Adding all the gravel at once and compacting it a single time often leaves weak spots buried inside the base. Compacting in layers, a few inches at a time, creates a denser and more even base overall.

Why Edge Restraints Keep a Walkway From Spreading

A walkway does not just sink. It can also spread outward at the edges over time, which throws off the pattern and creates gaps between bricks.

What Happens Without a Solid Edge

Without a rigid edge restraint, bricks along the border have nothing holding them in place. Foot traffic and soil movement slowly push them outward, which then creates gaps that widen across the whole walkway.

Metal or Plastic Edging Versus a Mortared Border

Rigid edging, whether metal, plastic, or a mortared brick border, locks the outer bricks in place. This keeps the entire pattern tight, even as the ground beneath continues to shift slightly with the seasons.

How Fort Worth Weather Adds to the Problem

Fort Worth sees hot, dry summers followed by periods of heavy rain, and this swing puts extra stress on any hardscape project.

Long Dry Spells Followed by Heavy Rain

Extended dry periods shrink clay soil, leaving small gaps underneath a walkway. When heavy rain follows, water fills those gaps and the soil expands again. This repeated cycle of shrinking and swelling is one of the biggest reasons walkways installed without proper prep fail within just a few years.

Occasional Freeze and Thaw Damage

While freezing weather is less frequent in Fort Worth than farther north, a handful of hard freezes each winter can still cause moisture trapped in the base to expand and contract. Over several years, this adds up and contributes to slow shifting.

Questions to Ask Before Installing a Brick Walkway

A few direct questions before construction starts can save a lot of frustration later.

  • How deep will the gravel base be, and will it be compacted in layers?
  • What type of edge restraint will be used to keep the border bricks in place?
  • Has the soil type on this property been considered when planning the base depth?
  • Is there a plan for water drainage away from the walkway, not just under it?

Clear answers to these questions before the project starts help avoid a walkway that needs to be redone within a few years.

Frequently Asked Questions 

Why Do Brick Walkways Shift Even When the Bricks Are High Quality?

Brick quality is rarely the main cause of shifting. Movement usually happens because of issues underneath the surface, such as poor base preparation, drainage problems, or soil movement.

How Deep Should the Base Material Be Under a Brick Walkway?

The required base depth depends on soil conditions, walkway use, and site requirements. A properly prepared base helps prevent settling, sinking, and uneven surfaces over time.

Why Does Clay Soil Create Problems for Brick Walkways?

Clay soil expands when wet and contracts when dry. These repeated changes can move the materials above it, causing bricks to shift, rise, crack, or settle unevenly without proper installation methods.

What Is an Edge Restraint and Why Is It Important for Brick Walkways?

An edge restraint keeps the outer bricks secured and prevents the walkway from spreading outward over time. Without proper edging, gaps can develop and the walkway can lose its original shape.

Does Fort Worth Weather Affect the Stability of Brick Walkways?

Yes. Temperature changes, dry periods, and heavy rainfall can affect the soil beneath a walkway. Proper drainage and base preparation help reduce movement caused by changing weather conditions.

Why Stone Pavers Need More Than a Flat Surface to Last

Masonry contractor installing stone pavers over a prepared gravel base for a residential patio in Fort Worth, Texas.

Stone pavers look simple to install. Lay them flat, tap them level, done. That mindset is exactly why so many stone paver patios and walkways in Fort Worth start shifting, sinking, or cracking within just a few years.

A flat surface today does not mean a stable surface five years from now. What happens below the stone matters far more than how level it looks on install day.

Stone pavers need a proper base, drainage, and edge support to hold up long term. Skip any of these, and even the best looking install will start failing sooner than it should.

Why Flat Alone Doesn’t Mean Stable

A paver that sits flat on the day it’s installed can still be sitting on loose soil, poor gravel compaction, or ground that hasn’t been graded for water runoff. None of that shows up right away.

Fort Worth’s clay-heavy soil expands when wet and shrinks when dry. That constant movement puts pressure on anything sitting on top of it. A stone that looked perfectly flat in June can tilt by the following spring once the ground beneath it swells and contracts through a few wet and dry cycles.

What’s Actually Holding the Stone in Place

A stone paver installation has several layers most people never think about, all working together to keep the surface stable.

A proper setup usually includes:

  • A compacted base layer, often crushed gravel, tamped down in sections rather than all at once
  • A leveling layer of sand or fine gravel that lets each stone settle evenly
  • Edge restraints along the perimeter to stop the whole field of stones from spreading outward
  • Proper grading so water moves away from the installation instead of pooling underneath

Skip any one of these layers and the whole system becomes vulnerable, even if the stones themselves are high quality.

How Fort Worth’s Clay Soil Changes the Equation

Not every region needs the same depth of base preparation. Fort Worth sits on soil known for heavy clay content, and clay behaves very differently than sandy or rocky ground.

This soil type:

  • Swells significantly when it absorbs water after rain
  • Shrinks and cracks during dry summer stretches
  • Creates more ground movement than most other soil types common in Texas

A base that might work fine in a sandier region often isn’t deep enough here. A mason familiar with local soil conditions typically builds a thicker, better compacted base specifically to handle this movement.

Drainage Problems That Show Up Months Later

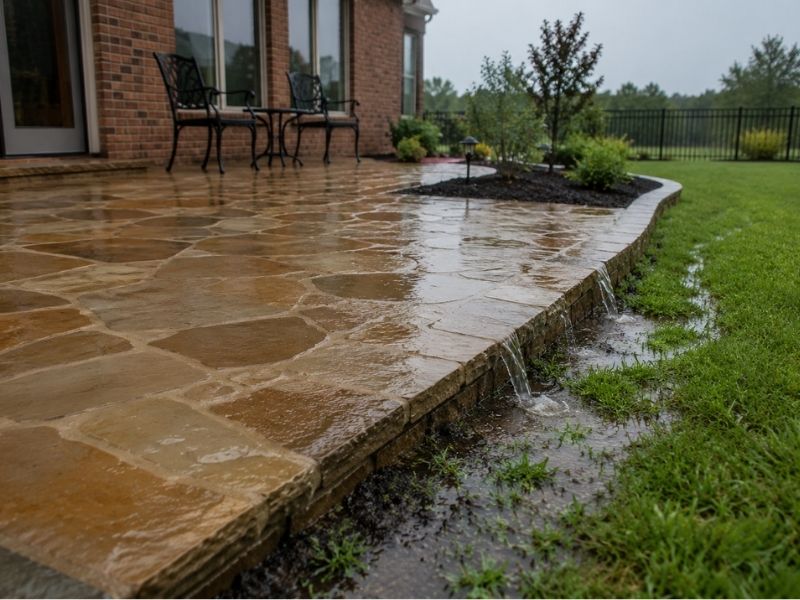
Water is one of the biggest reasons stone pavers fail early. It rarely causes an obvious problem on install day. The trouble shows up months or years later, after repeated cycles of water pooling and draining beneath the surface.

Watch for early warning signs:

  • Water sitting on the surface for more than a few minutes after rain
  • Soft or spongy footing when walking across a section
  • Stones that have started tilting toward one particular corner
  • Gaps opening up between stones near a low point in the yard

Catching these signs early usually means a smaller repair. Letting them sit often turns into replacing a much bigger section of the patio or walkway.

Why Edge Restraints Matter More Than People Expect

Stone pavers rely on pressure from neighboring stones to stay locked in place. Without a solid border holding the outer edge, that pressure has nowhere to push against, and the whole pattern can slowly drift apart.

Common edge restraint failures include:

  • Plastic edging that has cracked or come loose over time
  • Missing edge restraints entirely on older installations
  • Edging that was installed too shallow to hold against ground movement

A failing edge restraint often shows up first as small gaps widening near the border, then spreading inward across the whole surface.

Choosing the Right Base Depth for the Project

Not every stone paver project needs the same base depth. A garden path handling only foot traffic needs less than a driveway supporting vehicle weight.

General guidelines to discuss with your mason:

  1. Walkways and garden paths typically need a shallower base than heavy-use areas
  2. Patios fall somewhere in the middle, depending on furniture weight and foot traffic
  3. Driveways need the deepest, most heavily compacted base to handle vehicle loads without shifting

Skipping this step to save on cost is one of the most common reasons a driveway-style installation fails years before it should.

Signs an Existing Stone Paver Installation Needs Attention

If you already have stone pavers and want to check their condition, look for:

  • Any stone that rocks or wobbles under foot pressure
  • Noticeable dips or waves across an otherwise flat section
  • Widening gaps near the edges of the installation
  • Standing water that takes longer to drain than it used to

Spotting these early gives you options. A mason can often lift and reset a small section rather than rebuilding the entire surface.

Questions to Ask Before a New Stone Paver Installation

  • How deep will the base go for this specific project, walkway, patio, or driveway?
  • How will you handle drainage and grading around the installation?
  • What type of edge restraint will you use, and how is it installed?
  • Given Fort Worth’s clay soil, will the base need any extra compaction or depth?
  • What’s the expected lifespan of this installation with proper base prep?

Frequently Asked Questions

Why do stone pavers shift even when they were installed level?

A level surface on installation day does not always mean the base underneath is stable. Ground movement caused by clay soil, poor drainage, or inadequate compaction can lead to shifting over time.

How deep should the base be for a stone paver patio in Fort Worth?

The required base depth depends on the intended use of the patio and the site’s soil conditions. Because Fort Worth has expansive clay soils, a deeper, well-compacted base is often recommended for long-term stability.

Can I repair a small section of shifted stone pavers without replacing the entire patio?

Yes. In many cases, a mason can lift the affected pavers, correct the underlying base problem, and reinstall the stones without disturbing the rest of the patio, provided the issue is limited to one area.

Do stone pavers require a different base than brick pavers?

Both installations follow similar base preparation principles. However, because natural stone pavers often vary in size and thickness, the leveling layer may require additional adjustment to achieve a stable, even surface.

How can I tell if my stone paver patio has a drainage problem?

Common signs include standing water after rain, soft or uneven areas underfoot, and pavers that begin to tilt or settle toward one section. These issues often indicate water is collecting beneath the surface instead of draining away properly.

Brick Hearth Details That Make a Lasting Impact

Brick hearth details featuring a modern Roman brick fireplace with a floating walnut mantel, extended hearth, and precision masonry craftsmanship.

A brick hearth often gets judged on the big picture first. People look at the pattern, the color, the overall shape. But the small details are what make one hearth look custom and another look like it came off a template. Brick hearth details are where a good hearth becomes a great one.

Why the Small Details on a Brick Hearth Matter

Most of the decisions that shape a hearth happen at a fairly broad level. Which brick, which pattern, how big the hearth should be. Those choices matter, but they leave a lot of room for smaller decisions. Those small choices can change the whole feel of the final result.

Joint style, edge shape, and small add-ons rarely get much notice during planning. Yet these are often the details a homeowner sees every single day, long after the bigger design choices have faded into the background.

Mortar Joint Styles That Change the Look

The mortar joints between bricks do more work than most people realize. A concave joint, pressed into a slight curve, creates soft shadow lines that give a hearth a classic, old-world look. A flush joint sits level with the brick face. It creates a cleaner, more modern feel by removing that shadow entirely.

A raked joint takes this further. The mortar gets cut back from the brick face, creating a deeper shadow line and a rougher surface. This style tends to suit rustic or farmhouse rooms, where a bit of visible texture fits the rest of the space.

Weathered joints slope slightly outward at the bottom. This helps shed water and dust more easily on hearths that see more daily wear. Choosing the right joint style isn’t just about looks. It also affects how well a hearth holds up and how easy it is to keep clean over time.

Edge Profiles That Add a Custom Touch

Most bricks come with a plain, square edge, but that isn’t the only option for a hearth. A bullnose edge rounds off the corner. This softens the look and lowers the risk of a sharp bump for anyone walking close by.

A chamfered edge cuts the corner at an angle instead of rounding it. This gives a hearth a more geometric, modern look while still softening the sharp edge. Either option works well on a hearth platform that reaches into the room, where people are more likely to brush against the edge.

These edge choices matter more on hearths that sit low to the ground or reach further into a living space. A sharp, square edge on a raised platform can turn into a repeated stubbed toe over the years. A softened edge blends safety with style in a way that doesn’t call attention to itself.

Hearth Extensions and Wings Add Function

A hearth doesn’t have to stop right at the edges of the fireplace opening. Many hearths stretch into wings on either side. This widens the brick surface and creates a broader base for the fireplace to sit within.

These wings often serve a real job beyond looks. A wider hearth gives more room from nearby furniture, which matters for fire safety. It also creates more surface for setting down firewood, tools, or decor without crowding the fireplace opening itself.

Hearth wings also give a designer more room to try new brick detail. The wider surface offers space for a different mortar joint, a contrasting brick color, or a subtle border that ties the wings back to the main hearth surface.

Pairing Trim and Mantel Materials With Brick Details

The materials used around a hearth, especially the mantel and any trim, need to work with the brick details rather than fight against them. A heavily textured raked joint pairs well with a rustic wood mantel. A clean flush joint tends to suit a simpler, more streamlined mantel design.

Metal trim pieces, like a black steel surround or a thin metal ledge along the hearth edge, can highlight the brick’s texture through contrast rather than blending in. This kind of pairing draws attention to the brickwork itself instead of letting it fade into the background.

Getting this pairing right often comes down to matching warmth and formality. A warm-toned brick with a raked joint suits a wood mantel and casual furniture. A cooler-toned brick with flush joints tends to suit sleeker trim and a more formal room.

None of these choices happen alone either. A wing built with a raked joint should usually carry that same joint style across the rest of the hearth. That way, the whole surface reads as one connected piece instead of a patchwork of unrelated parts.

Frequently Asked Questions

What mortar joint style works best for a brick hearth?

A concave joint gives a hearth a classic, old-world look with soft shadow lines. A raked joint adds more texture for a rustic feel. Flush joints create the cleanest, most modern look by removing the shadow line entirely.

What is a hearth extension or wing?

A hearth extension, or wing, is extra brick surface built out to either side of the main fireplace opening. It widens the hearth, adding room from nearby furniture and extra space for tools, firewood, or decor.

Can hearth edge details affect safety clearance?

Yes. A rounded or angled edge on a raised hearth platform lowers the risk of injury from bumping into a sharp corner. This matters most on hearths that reach into high-traffic areas of a room.

Does trim material affect how a brick hearth looks?

Yes. Warm, textured brick details tend to pair well with wood trim, while cleaner, flush brick details often suit metal or simpler trim styles. Matching the tone and texture keeps the whole fireplace area feeling steady and whole.

Are custom hearth details expensive to add?

Not usually. Choices like joint style and edge shape get decided during construction and rarely add much cost, since they mostly involve skill rather than extra materials.

Stone Patio Ideas for Relaxing Outdoor Spaces

Stone patio ideas featuring a natural flagstone patio with cozy seating, garden landscaping, soft lighting, and a peaceful outdoor retreat.

A stone patio has a way of slowing people down. The uneven texture, the color shifts, and the quiet feel of real stone underfoot all work together. They turn a backyard corner into a place people want to sit still in.

A Stone Patio Built for Slowing Down

Most outdoor upgrades chase entertaining space or square footage. A stone patio built for relaxing works differently. It leans into stillness instead of activity. It uses stone’s natural look to make a spot that invites a slower pace, not a busy gathering.

That doesn’t mean the space can’t host people too. It just means the design starts from a different question. Instead of asking how many chairs fit, it asks what makes a person want to stay there in the first place.

Natural Stone Shapes and Irregular Layouts

Unlike brick, natural stone rarely comes in even shapes. Flagstone and other stone pieces vary in size and shape. A stone patio layout works more like a puzzle than a grid. Pieces get fitted together with narrow gaps rather than laid in strict, repeating rows.

This uneven look is part of the appeal. A stone patio built from varied shapes feels less planned than a brick surface. It feels closer to something that belongs in the yard rather than something dropped on top of it. That natural look gives a stone patio its relaxed feel.

The gaps between stones do quiet work of their own too. Filled with sand, gravel, or low groundcover, they let rain soak through instead of running off the surface. That soft, open feel adds to the sense that the patio belongs to the yard.

Comfort Underfoot: Why Stone Feels Different Than Brick

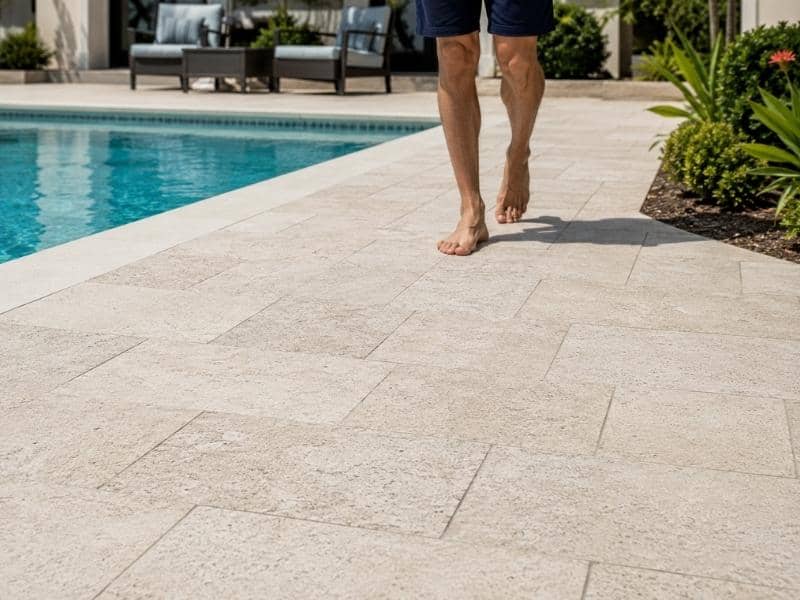
Stone holds and lets go of heat differently than brick or poured concrete. That changes how a patio feels to use. Many natural stones stay cooler underfoot during hot afternoons. They don’t trap heat the way darker, thicker paving materials often do.

That heat difference matters more than it might seem. A patio meant for bare feet and quiet evenings needs to feel comfortable. It shouldn’t send heat back at anyone who steps onto it after a sunny day.

Texture plays a role too. The slightly rough surface of most stone offers good grip, even when it’s damp. This makes it a smart choice near a pool or a garden that gets watered often. That mix of comfort and grip suits a space built for relaxing, not just walking through.

Creating Quiet Corners and Seating Nooks

A relaxing patio rarely needs to be one big open space. Some of the most inviting stone patios build in smaller pockets within the larger layout. Think of a two chair nook tucked near a garden bed, or a bench set into a curve of the stone path.

These smaller spots work because they feel set apart, even without walls or fences to divide them. A slight curve in the stone layout, or a patch of stone that narrows into a private corner, signals a shift into a quieter part of the space.

Plants play a bigger role in a stone patio than they usually do in a brick layout. Low groundcover growing between stones, or a border of taller plants along one edge, softens the hard surface. This makes a quiet corner feel like part of the garden rather than something added on later.

Low Maintenance Stone Choices That Still Look Natural

One common worry with stone is upkeep. But many natural stone choices actually need less care than people expect. Dense stones like bluestone or granite resist stains and weather damage well. They hold up through seasons of sun, rain, and shifting temperatures with little fuss.

Sealing is optional for many stone types, though it can help with stains in patios that see heavy use near a grill or outdoor kitchen. Even unsealed stone tends to grow a natural patina over time. Many homeowners see that as part of the stone’s charm, not a flaw to fix.

A little moss or slight color shift on an older stone patio often reads as character, not neglect. That’s unlike a cracked or faded brick surface, which usually looks like it needs repair. This forgiving aging is part of why stone stays popular for a low-fuss outdoor space.

Frequently Asked Questions

What is a stone patio?

A stone patio is an outdoor surface built from natural stone pieces, like flagstone, bluestone, or granite. The pieces get fitted together in an uneven pattern rather than a uniform grid. It’s often chosen for its natural texture and relaxed, organic look.

Is stone better than brick for a patio?

Neither is strictly better, since the two serve different styles. Stone tends to offer a more natural, uneven look and can stay cooler underfoot. Brick offers a more even, structured look that suits a different design goal.

Do stone patios need sealing or maintenance?

Not always. Many natural stones hold up well without sealing, though sealing can help guard against stains in high-use areas. Basic care for most stone patios means occasional cleaning and checking the joints between stones.

Can a stone patio be built around existing landscaping?

Yes. Stone patios pair naturally with landscaping, since gaps between stones can be filled with groundcover or bordered by garden beds. This helps the patio blend into the yard rather than standing apart from it.

How long does a stone patio typically last?

A well built stone patio can last many decades. Dense natural stones resist weather damage and general wear better than many other paving materials when installed on a solid base.

Fireplace Changes That Improve Daily Living

Fireplace changes featuring a modern fireplace insert, built-in shelving, updated mantel, and a cozy family living room designed for daily comfort.

A fireplace often sits unused for most of the year. Then it becomes the center of the house once the weather turns cold. Small fireplace changes can shift how that space gets used the rest of the year too, not just during the coldest months.

Small Updates Can Reshape How a Fireplace Gets Used

Most homeowners think of a fireplace as fixed. They think it stays the same until it gets replaced. That’s rarely true anymore. A handful of updates can turn a fireplace from a seasonal feature into a space the household uses all year.

These changes don’t always mean a full renovation. Sometimes one update, like a more efficient insert or a bit of added storage, changes how often a family gathers around the fireplace. Small shifts like these tend to add up over time.

Swapping to a More Efficient Insert

An older wood fireplace often loses more heat than it makes. A lot of warm air escapes straight up the chimney. Swapping in a modern insert changes that. Gas inserts and high-efficiency wood inserts both hold heat in the room instead of losing it. A fireplace can then help warm a space, not just decorate it.

Gas inserts also cut down on daily hassle. There’s no wood to haul. There’s no ash to clean. Nobody has to build a new fire every time someone wants warmth. For a family that uses the fireplace often, that ease alone can be worth the upgrade.

An insert swap also tends to improve safety. Older fireplaces can grow cracks or buildup inside the flue that go unnoticed for years. A new insert usually comes with an inspection. That check catches problems before they grow bigger and cost more.

Some homeowners hold off on this kind of swap, thinking it costs too much for what it’s worth. But the ongoing savings on heating bills, plus fewer repair calls down the road, often make the upfront cost worth it within a few years.

Updating the Mantel and Surround for a Fresh Look

The mantel and surround shape how a fireplace fits the room more than almost any other single feature. A dated mantel can make an updated living room feel stuck in an earlier decade, even when nothing else in the space has changed.

Updating a mantel doesn’t require touching the firebox itself. A new mantel shelf, a fresh coat of paint, or a different surround material can shift the whole feel of the room. It does this without the cost or mess of a full rebuild. That makes it one of the easier fireplace changes to take on.

Surround materials have grown well past the old choices too. Tile, stone, and even plaster finishes now show up around fireplaces alongside more classic options. Picking a surround that matches the rest of the room’s style keeps the fireplace from feeling cut off from everything around it.

Adding Storage and Built-Ins Around the Fireplace

A fireplace wall often has unused space on either side that could work harder for the household. Built-in shelves or cabinets added around a fireplace turn dead space into storage or display room. This doesn’t take up any extra floor space elsewhere in the room.

This kind of addition works well in smaller homes, where every bit of storage counts. Built-ins next to a fireplace can hold books, media gear, or family photos. This gives the room a finished look while solving a real storage need at the same time.

Adding built-ins also tends to make a fireplace feel like a lasting part of the room’s design, rather than a stand-alone feature. That shift alone can make the whole living space feel more pulled together.

Zone Heating Changes That Cut Energy Costs

A fireplace that only warms the room it sits in isn’t doing much for the rest of the house. Some fireplace changes focus on stretching that heat further. They use it to cut heating costs in nearby rooms instead of leaning only on a furnace or central system.

Zone heating changes help push warm air further into a home. Adding a blower to an insert is one option. Sealing an older firebox better is another. A family that uses this kind of setup during cooler months can lower their overall heating bill. The fireplace is doing real work, not just adding a nice glow.

These changes tend to pay for themselves over a few heating seasons. This holds true in homes where the living room or den sees heavy daily use during colder months. A fireplace built to actually add heat becomes part of the home’s daily routine, not just a weekend feature.

Taken together, these updates show how much a fireplace can offer beyond looks. A well planned set of changes turns a once-a-year feature into a space the whole household leans on through most of the colder half of the year.

Frequently Asked Questions

What counts as a fireplace change?

A fireplace change is any update made to a fireplace or the area around it. This can range from a new insert to a mantel refresh to added storage nearby. These changes can improve how a fireplace looks, works, or performs day to day.

Does upgrading a fireplace insert save money?

In most cases, yes. Modern inserts hold heat in the room better than older, open fireplaces. This can lower a household’s overall heating costs during the months a fireplace gets regular use.

Can a fireplace mantel be updated without a full renovation?

Yes. A new mantel shelf, a paint refresh, or a new surround material can update a fireplace’s look without touching the firebox itself. This makes it one of the simpler updates a homeowner can take on.

Are built-ins around a fireplace a good use of space?

Yes. Built-in shelves or cabinets next to a fireplace turn unused wall space into storage or display area. This works well in homes where extra storage space is tight.

Do fireplace changes affect a home’s daily energy use?

Yes. Updates like adding a blower or sealing an insert better help push warm air further into a home. This can lower how much a household relies on a furnace or central heating system during colder months.

Brick Fireplace Repair: When to Fix It and When to Call a Mason

Professional mason wearing a safety vest performing brick fireplace repair by repointing mortar joints on a residential brick fireplace.

A brick fireplace can look fine for years while damage builds quietly inside. Small cracks get ignored. Mortar crumbles a little more each winter. A smoky smell gets blamed on the weather. None of these feel urgent until the damage becomes too big to ignore, and by then the repair costs more than it needed to.

Knowing what to look for and when to act makes a real difference. The Chimney Safety Institute of America reports that deteriorating masonry is the leading cause of chimney-related home fires. Most of those situations started as small problems that went unfixed too long.

Spot the Early Warning Signs

Brick fireplace damage rarely shows up all at once. It builds slowly through small changes that are easy to miss.

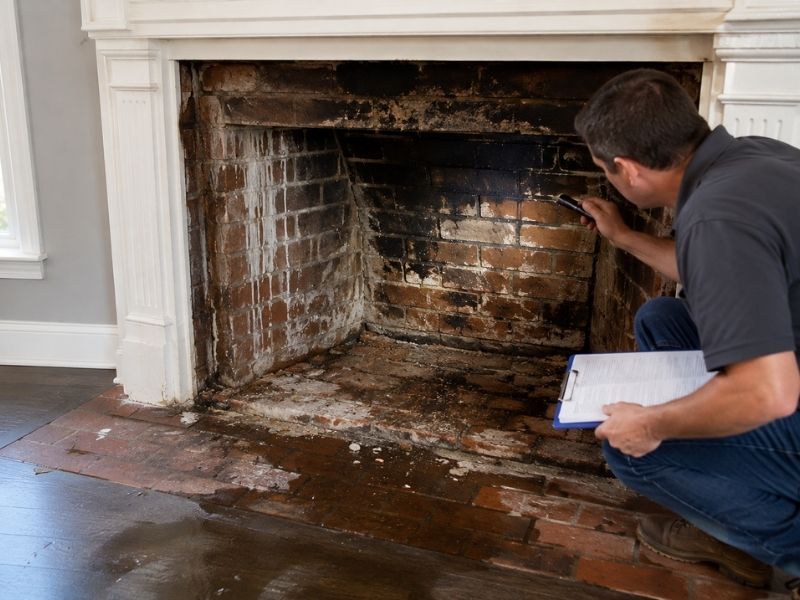
Cracks in the brick or mortar joints are the most common early sign. One small crack in an isolated spot is usually minor. Cracks that run across several rows, or show up on both the inside of the firebox and the outside of the chimney, suggest something more serious is going on.

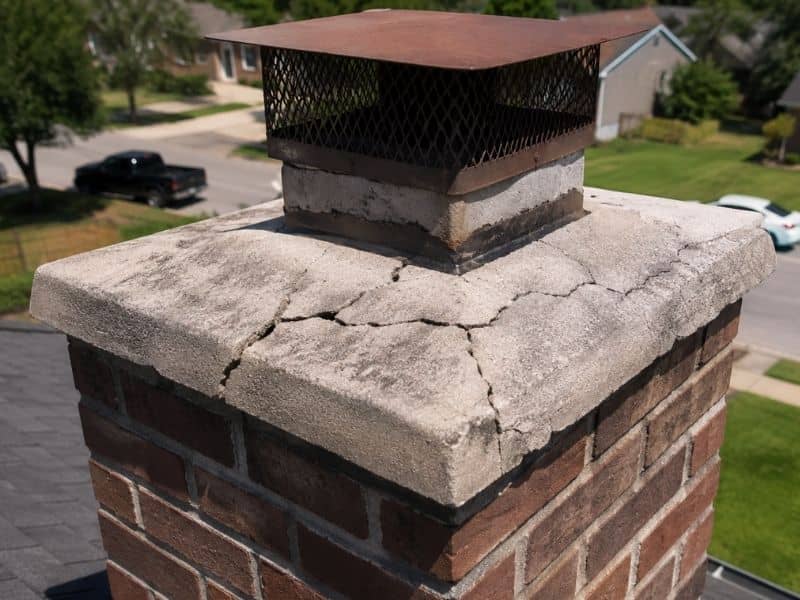
Spalling is another clear signal. That’s when the face of a brick chips or flakes off in pieces. It happens when water soaks into the brick, freezes, and expands. Once spalling starts, it spreads. Each damaged brick lets in more moisture, and the problem grows worse every winter.

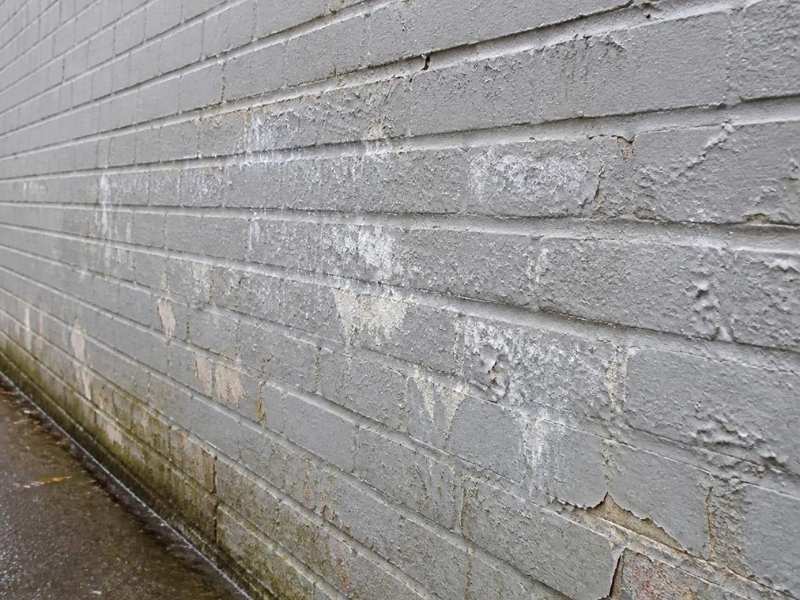
White powder on the brick surface is called efflorescence. It isn’t structural damage on its own, but it means water is moving through the masonry. That’s a sign worth paying attention to.

A smoky smell in the room when the fireplace isn’t running points to gaps in the liner or failing mortar joints. Combustion gases are seeping through the masonry instead of traveling up the flue where they belong.

Understand What Causes the Damage

Brick fireplace damage comes from a few consistent sources. Knowing which one is at work points toward the right fix.

Water causes most of the damage. Rain gets in through a cracked chimney cap, worn flashing, or open mortar joints at the top of the chimney. Once inside, water works its way down through the masonry. In cold weather it freezes, expands, and widens every crack it finds. Over several winters, small gaps become serious ones.

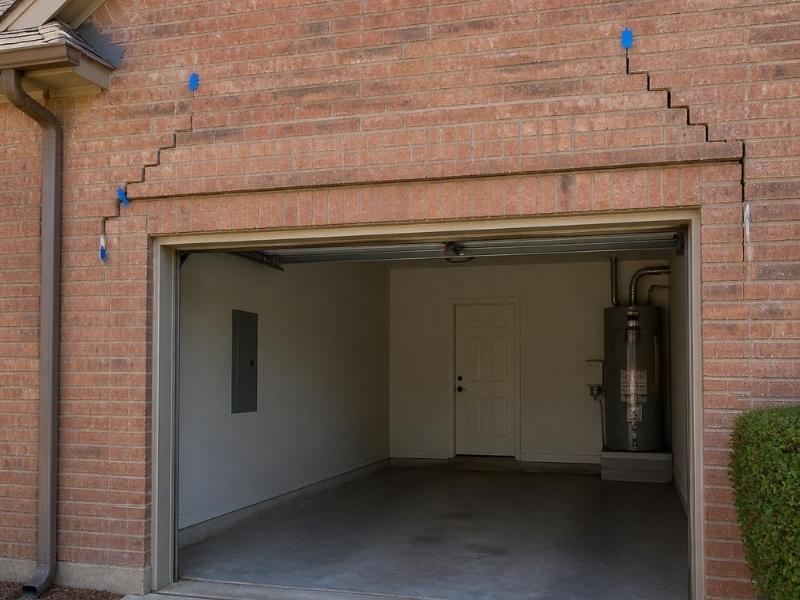
Settlement is another cause. As a home shifts slightly over decades, the fireplace and chimney move with it. That movement stresses the masonry and opens cracks, usually diagonal ones that follow the mortar joints rather than cutting through the brick itself.

Heat stress works on the inside of the firebox. The big temperature swings between a hot fire and a cold firebox cause the interior brick and mortar to expand and contract over and over. That repeated movement breaks down the firebox lining and opens gaps over time.

Know Which Repairs Are Minor and Which Are Not

Not every crack or stain needs emergency attention. But some damage is more serious than it looks.

Repointing means removing old, crumbling mortar from the joints and replacing it with fresh mortar. It’s the right fix when mortar is soft or recessed more than a quarter inch from the brick face, but the bricks themselves are still solid. A mason can repoint a damaged section without disturbing the rest of the wall.

Replacing individual spalled or cracked bricks is also a contained repair when caught early. A single brick can be cut out and replaced with a matching piece without affecting the surrounding structure.

Firebox liner damage is more serious. Cracks in the panels inside the combustion chamber let heat reach the surrounding masonry directly. The National Fire Protection Association says a damaged firebox liner is a safety issue that should be fixed before the fireplace is used again. Repair means replacing the damaged panels or sealing gaps with heat-resistant cement, depending on how bad the damage is.

A cracked chimney crown is easy to overlook because it sits at the top of the chimney and can’t be seen from the ground. The crown directs water away from the flue opening. When it cracks or crumbles, water runs straight into the chimney structure. Fixing the crown stops most of the water damage that causes problems lower down.

Know When to Call a Mason

Some fireplace problems are visible and contained. Others point to something more serious happening inside the structure.

Call a mason when cracks are wide enough to fit a coin into, when bricks are shifting or bulging out of place, or when the inside of the firebox shows heavy spalling across several rows. These are signs the structure itself is compromised, not just the surface.

A smoky room during normal fireplace use, after ruling out a blocked flue, can mean the liner has collapsed or deteriorated badly. That needs a professional look before the fireplace runs again. If a carbon monoxide detector goes off near the fireplace during use, stop using it immediately and call a mason for a full inspection.

A licensed mason can assess damage that isn’t visible from inside the room and recommend repairs that match the actual problem rather than just what’s visible on the surface.

Prevent Problems Before They Start

The most effective repair is the one that never becomes necessary. A few simple habits keep small deterioration from turning into structural damage.

Get the fireplace and chimney inspected once a year, before the heating season starts. The Chimney Safety Institute of America recommends annual inspections for any fireplace used regularly. An inspector checks the liner, mortar joints, crown, flashing, and cap in one visit and spots small problems while they’re still inexpensive to fix.

Keep the chimney cap in good shape. A properly fitted cap keeps rain, snow, and animals out of the flue. A damaged or missing cap is the fastest way to introduce water damage into the chimney.

Fix small mortar problems promptly. Waiting a season turns a repointing job into a brick replacement. Waiting longer can turn a brick replacement into a partial chimney rebuild.

Frequently Asked Questions

How do I know if my brick fireplace needs repair?

Look for cracked or chipping brick, crumbling mortar joints, white powder on the brick surface, and any smoky smell when the fireplace isn’t in use. Any of these signs point to moisture damage or failing masonry that should be checked before the fireplace runs through another winter.

Is a small crack in the firebox serious?

It depends on where it is. A hairline crack on the exterior brick is usually minor. Cracks inside the firebox are more serious because they let heat and combustion gases reach the surrounding masonry. The National Fire Protection Association recommends fixing firebox liner damage before using the fireplace again.

What is spalling and why does it happen?

Spalling is when the face of a brick chips or flakes off. Water soaks into the brick, freezes, and expands, breaking the surface apart. It tends to spread because each damaged brick absorbs even more moisture. Fixing spalled bricks early stops the problem from growing.

Can I repair brick fireplace mortar joints myself?

Minor repointing on outside joints is something a careful homeowner can handle. Repairs inside the firebox are different. The mortar used inside the combustion chamber is a specialized material, and a wrong repair can create gaps that let heat reach the structure around it. A mason handles firebox repairs more reliably.

How often should a brick fireplace be inspected?

Once a year, before the heating season starts. The Chimney Safety Institute of America recommends annual inspections for any fireplace used regularly. An inspection each year catches small problems early, before they turn into expensive repairs.

Brick mason Tips for Blending New and Old Brick

Brickmason replacing a damaged brick while matching new brick and mortar with an existing brick wall for a seamless masonry repair.

Replacing damaged brick sounds straightforward until the new brick goes in and stands out like a fresh patch on an old wall. The color is brighter, the texture looks different, and the repair draws more attention than the damage did. A skilled brick mason knows this going in and works around it. Blending new brick with old takes careful material selection, matched mortar, consistent pattern work, and a realistic understanding of how brick changes over time.

The Brick Industry Association estimates that poorly matched brick repairs are one of the most common complaints homeowners raise after masonry work is completed. Getting the match right from the start saves time, money, and the frustration of a repair that looks worse than the original problem.

Find Brick That Looks Similar

The first challenge is finding a brick that comes close to what’s already on the wall. Brick manufacturers change their formulas over time, and many older brick types are no longer in production. A brickmason starts by examining the existing brick carefully, looking at color, size, surface texture, and how much variation exists across the wall.

Most older brick walls have natural variation. Some bricks are darker, some lighter, and the surface texture shifts slightly from one brick to the next. That variation actually helps a repair because the goal isn’t to copy one brick exactly. It’s to find new brick that falls within the range of colors and textures already present on the wall.

Salvaged brick is worth considering for older homes. Reclaimed material from the same era often carries the weathering and color tone that new brick simply doesn’t have yet.

Use the Right Mortar Color

Mortar covers roughly 15 to 20 percent of any wall face on a standard running bond pattern. A mortar color that doesn’t match the existing joints makes a repair visible from across the street, even when the brick itself is a reasonable match.

Mortar comes in a range of pre-mixed colors, and a brickmason can blend pigments to get closer to an existing joint color. Matching works best on a dry wall in natural daylight. Mortar looks different when wet, and artificial lighting changes how the color reads against surrounding brick.

Mortar strength matters too. Older homes were often built with softer lime-based mortar. Using harder Portland cement mortar on an older wall can cause surrounding brick to crack over time because the two materials expand and contract at different rates. A brickmason selects mortar strength appropriate for the age and condition of the existing wall.

Follow the Same Brick Pattern

Brick walls are laid in specific patterns called bonds. The most common is running bond, where each brick is offset by half a length from the row above and below. Placing new brick in a different pattern breaks the wall’s visual rhythm immediately, even when the brick and mortar colors are close.

A brickmason studies the existing bond before removing any damaged brick and replicates it exactly in the repair area. Joint width is part of the pattern too. If existing joints are three-eighths of an inch wide, new joints should match that width. Wider or narrower joints change the visual spacing of the wall and make the repaired section look out of place.

Give New Brick Time to Blend In

New brick is brighter, cleaner, and more uniform than brick exposed to sun, rain, and temperature changes for years. That difference is normal. It doesn’t mean the repair was done poorly.

Brick weathers gradually. UV exposure fades the surface color. Mineral deposits from rainwater create subtle tone variations. Most new brick repairs become noticeably less visible within one to three years as natural weathering brings the new material closer to the surrounding wall.

Some masons apply a diluted acid wash to new brick to speed up the blending process. It removes some surface brightness and opens the texture slightly so the brick weathers faster. Not every repair needs it, but it’s a useful option when the color difference is significant.

Check the Finished Repair

A completed repair should hold up to close inspection. Check that joint lines are consistent and follow the same horizontal and vertical alignment as the surrounding wall. Joints should be smooth and fully filled with no gaps or crumbling edges. Each new brick face should sit flush with the existing wall surface, not pushed in or protruding out. Any mortar smeared onto the brick face during installation should be cleaned off completely.

Step back roughly 10 to 15 feet and look at the repair from a normal viewing distance. The eye picks up inconsistencies in line and color naturally at that range. If something looks off, it’s worth addressing before the job is considered done.

Frequently Asked Questions

Why doesn’t new brick match old brick right away? 

New brick hasn’t been exposed to weather, sunlight, or environmental buildup yet. Old brick develops its color and texture gradually over years of exposure. The difference is normal and typically fades within one to three years as the new brick weathers.

Can faded brick be matched? 

Getting close is possible, but an exact match is rarely achievable. A brickmason looks for brick that falls within the range of tones already on the wall. Salvaged brick from a similar era often provides the closest match for older homes.

Does mortar change color over time?

Yes. Fresh mortar is lighter and more uniform than aged mortar. It darkens slightly as it cures and continues shifting in tone as it absorbs moisture over time. A brickmason accounts for this when selecting mortar color, choosing a shade that will age toward the existing joint color.

How can I tell if a brick repair was done well?

Look for consistent joint width and alignment, fully filled joints with no gaps, brick faces flush with the surrounding wall, and a clean surface free of mortar smears. Step back to about 10 to 15 feet and check whether the repair blends into the wall or draws the eye.

Can one damaged brick be replaced?

Yes. The damaged brick is carefully cut out without disturbing the surrounding ones, the cavity is cleaned, and a matching replacement is set with fresh mortar. Done correctly, a single brick replacement is clean, stable, and barely noticeable once the mortar cures.

How a Stone Mason Transforms a Backyard Into a Functional Outdoor Space

Stone mason creating a functional outdoor space with natural stone retaining walls, fire pit, outdoor kitchen, steps, and patio in a backyard.

A backyard gets used differently than a front yard. It’s where people cook outside, sit around a fire, grow things, and spend real time with family and friends. That kind of daily use needs more than grass and a few potted plants. A stone mason brings the skills and materials to turn an ordinary backyard into a space that works hard and looks good doing it. Natural stone holds up to heavy outdoor use, handles weather without deteriorating, and fits naturally into almost any yard layout.

According to the American Society of Landscape Architects, built-in outdoor features like fire pits, retaining walls, and outdoor kitchens are among the most requested backyard improvements by homeowners. Stone is the material most commonly specified for all three.

Build a Retaining Wall That Does Real Work

A sloped backyard loses usable space fast. Water runs downhill, soil erodes, and large sections of the yard become too steep to use comfortably. A stone retaining wall solves all of that at once.

A retaining wall holds back soil and creates flat, level areas on a sloped lot. Those flat areas become usable space for gardens, seating, or lawn. The wall itself also controls where water flows during heavy rain, which protects both the yard and the home’s foundation from erosion damage.

Stone retaining walls are among the most durable options available. A properly built stone wall can hold its position for decades without significant maintenance. A stone mason calculates the right wall height, thickness, and drainage setup based on the specific slope and soil conditions in the yard. Getting those details right from the start is what keeps the wall stable over time.

Add a Fire Pit Area People Actually Gather Around

A fire pit changes how a backyard feels in the evening. It draws people together, extends the time spent outside into cooler months, and gives the yard a clear focal point. Stone is the most practical material for building one because it handles high heat without cracking or deteriorating the way other materials can.

A stone mason builds more than just the fire pit itself. The area around it matters just as much. A low circular seating wall around the fire pit gives guests somewhere to sit without dragging chairs across the yard every time. The ground surface between the seating wall and the pit should be level and stable, usually flagstone or compacted gravel, so nobody is shifting around on uneven ground.

The layout of the fire pit area affects how comfortable and safe it feels. A mason plans the spacing between the pit and the seating wall carefully, typically 6 to 8 feet from the fire to the inner edge of the seating, so heat stays comfortable rather than overwhelming.

Create an Outdoor Kitchen Foundation

An outdoor kitchen needs a foundation that handles heat, moisture, and the weight of appliances without shifting or cracking over time. Stone is one of the few materials that meets all three demands reliably.

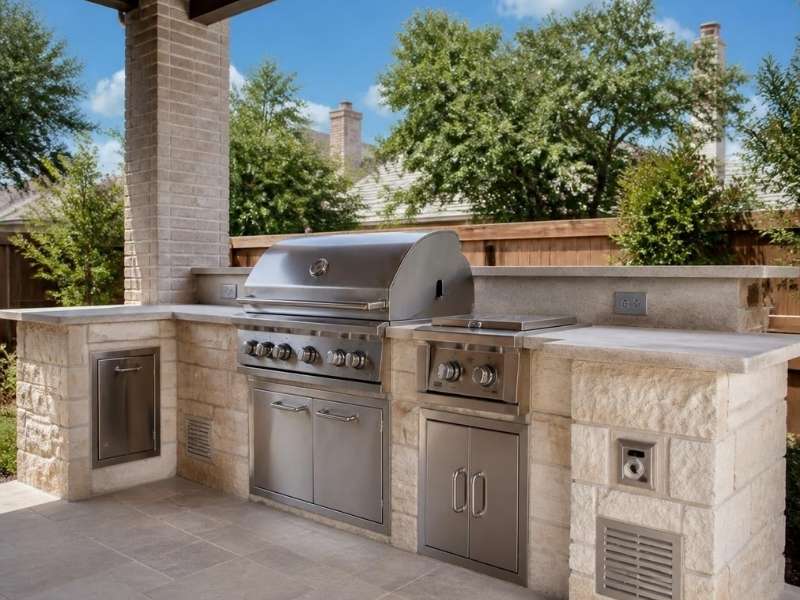
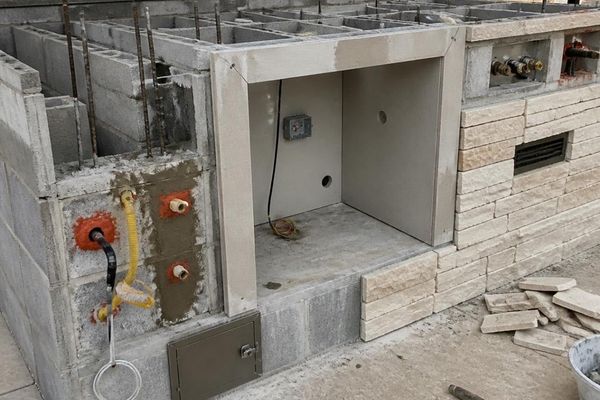
A stone mason builds the base structure, countertop surround, and side walls that hold a built-in grill, side burners, and storage in place. Stone countertops resist heat from cooking surfaces and don’t absorb stains or odors the way wood or tile grout can. The base walls, built from concrete block faced with natural stone, give the whole structure a clean, permanent look that holds up through years of outdoor use.

An outdoor kitchen built on a proper stone foundation is a long-term addition to the property. Unlike freestanding grills or prefab outdoor kitchen kits, a stone structure doesn’t rust, warp, or need replacement after a few seasons.

Use Stone Steps to Connect Different Levels

A backyard with more than one level needs safe, comfortable transitions between them. Worn dirt paths, loose gravel, or uneven timber steps all become hazards over time, especially when the ground is wet.

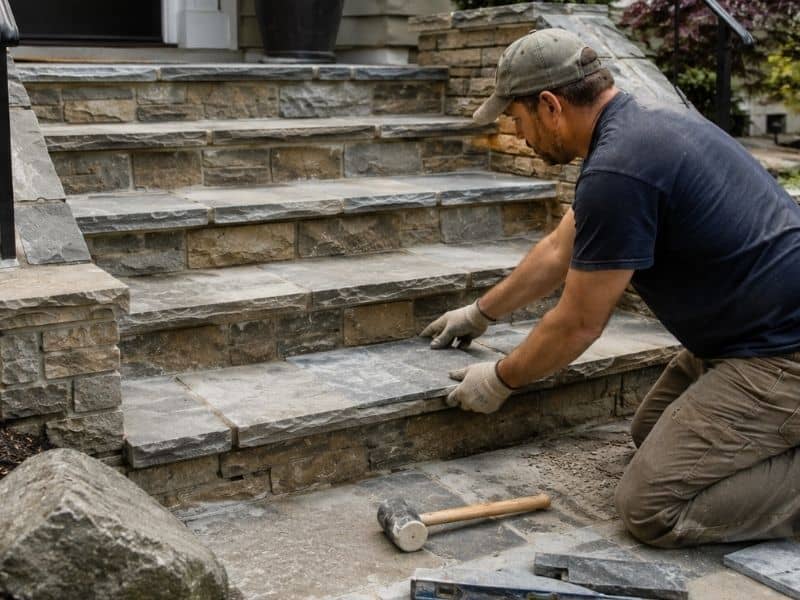
Stone steps solve the problem permanently. A stone mason sets each step into a compacted base so it stays level and stable under foot traffic and through seasonal ground movement. The right step dimensions matter too. A comfortable outdoor step typically runs 12 to 14 inches deep with a rise of 5 to 7 inches. Steps built to those proportions feel natural to walk and don’t cause people to shorten or lengthen their stride awkwardly.

Stone steps also connect visually to other stone features in the yard, tying the whole backyard design together rather than looking like a separate afterthought.

Frame the Yard with Stone Borders and Garden Walls

Stone borders and low garden walls do two things at once. They organize the backyard into clear zones and give planting beds a clean, finished edge that stays put through rain and foot traffic.

A low stone wall around a raised planting bed keeps soil in place, makes the bed easier to maintain, and adds height variation to a flat yard. Stone edging along a lawn border separates grass from garden cleanly without the plastic or metal edging strips that shift and buckle over time.

These features don’t require major construction. A mason can add stone borders and low walls around existing beds and lawn areas without disrupting the rest of the yard. The result is a backyard that looks intentional and well-organized rather than one that just happened over time.

Frequently Asked Questions

What backyard features can a stone mason build?

A stone mason builds retaining walls, fire pit surrounds, outdoor kitchen foundations, stone steps, garden walls, raised planting beds, and stone edging. These features work individually or together as part of a complete backyard design.

Can a stone mason work on a sloped yard?

Yes. Sloped yards are actually where stone masonry adds the most value. Retaining walls create flat, usable space on slopes that would otherwise be difficult to use. A mason assesses the slope, soil type, and drainage before recommending the right wall design and dimensions.

How long does a backyard stone project take to complete?

Smaller projects like garden borders or a fire pit area typically take two to four days. A retaining wall or outdoor kitchen foundation can take one to two weeks depending on the size and site preparation required. Weather and material delivery can also affect the timeline.

Does backyard stonework need a permit?

It depends on the project and local building codes. Retaining walls over a certain height, typically 3 to 4 feet, usually require a permit. Outdoor kitchens with gas connections almost always do. A licensed stone mason familiar with local requirements can advise on what approvals are needed before work begins.

Welcome to Fort Worth Brick & Stone

Fort Worth Brick & Stone specializes in stone masonry and brick masonry construction. Our expertise in masonry covers brickwork, block work, stonework, and all sorts of related products and applications. We serve the City of Fort Worth and surrounding Tarrant County communities.

Call us at (817) 204-6557 to discuss your project.

What is Masonry Work?

Seamless Masonry Stone WallsMasonry is building structures from individual units, which are often laid in and bound together by mortar. Common materials of masonry construction are brick, natural stone (such as marble, granite, travertine, and limestone,) cast stone, concrete block, stucco, tile, and glass block. Masonry is a highly durable form of construction.

The strength and durability of masonry are affected by the materials used, the quality of the mortar, the workmanship, and the pattern in which they are assembled. A person who constructs masonry is called a mason, a brick mason, stone mason, or bricklayer.

Applications of Masonry

brick stone wall landscapingMasonry is commonly used for walls and buildings, either inside or outside. Brick and concrete block are the most common types of masonry in use and may be either weight-bearing or a veneer.  Stone, both natural and man-made, is being used more and more for decorative features inside, outside and in backyards. Patios, outdoor kitchens, outdoor fireplaces, fire pits, decorative walls, decking, retaining walls, landscaping or hardscaping, and lots of other amenity applications are common place now. Natural stone masonry can provide very aesthetically pleasing projects.

Advantages of Brick or Stone in Building

  • Bricks and stone masonry increases the thermal mass of a building
  • Brick and stone masonry is non-combustible and provides fire protection
  • Brick and stone masonry walls are more resistant to projectiles, such as debris from hurricanes or tornadoes.
  • Brick and stone masonry weathers well and needs much less maintenance over time than other natural materials.
  • No painting is necessary for brick or stone. Color and finish selections are almost endless.
  • Brick and stone masonry typically lasts longer than wood products
  • Brick and stone masonry has higher compressive strength compared to wood and other natural products.
  • Brick and blockwork walls provide excellent sound insulation.
  • Stone does not warp, swell, bend, splinter, or dent.
  • Brick and stone are versatile in their aesthetic appeal and can work well with other construction materials.
  • Use of brick and stone signals a strong sense of permanence and longevity.

Call Fort Worth Brick & Stone at (817) 204-6557 for a free quote on your brick or stone masonry project. Or, fill out the contact form to the right.