Brick Arches Depend on Hidden Support Above the Opening
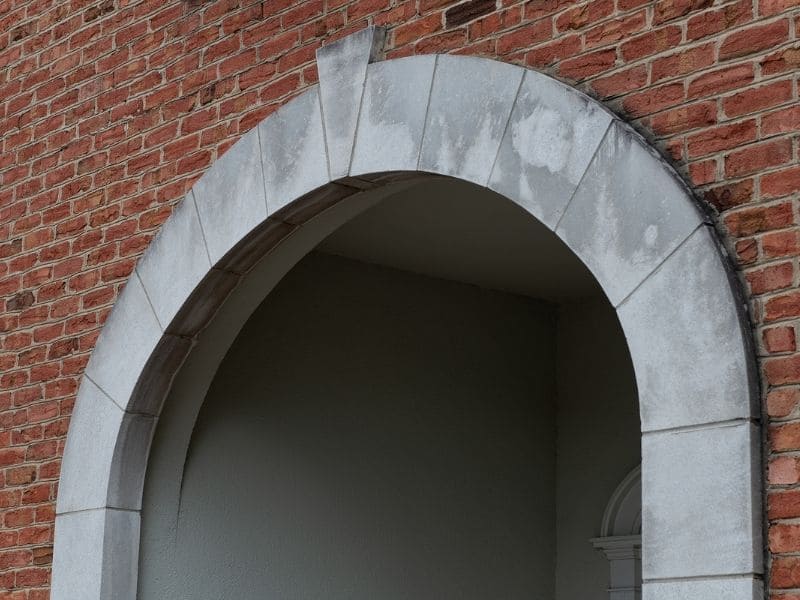
Brick arch over a doorway showing masonry support, lintel, curved opening, and surrounding brickwork.

A brick arch looks like it’s holding itself up. Sometimes it is, and sometimes a steel lintel, a backup wall, or a carefully planned load path is doing much of the work. Brick arches over doors, windows, outdoor kitchens, and garden walls stay straight and crack-free only when that support is planned, built, and maintained correctly. Know what’s above the opening before you build, repair, or buy, and you’ll avoid the most common arch failures.

This guide is for homeowners, builders, and remodelers planning or maintaining brick arches, with designers in mind. It explains how arches carry weight, what support options exist, and what to check over time. Structural details depend on the opening size, wall design, and loads, so have a qualified mason or engineer confirm the specifics.

How Hidden Support Carries the Weight of Brick Arches

Brick arches carry weight by turning the load above them into sideways and downward forces that travel into the walls on each side. Those side supports are called abutments or jambs. If they can’t resist that push, the arch spreads, sags, or cracks.

Many arches also rely on support you can’t see. A steel lintel, which is a beam spanning the opening, may sit behind or within the arch to carry the brick above. In brick veneer on a framed house, the arch is often a decorative face supported by a lintel and tied back to the structure.

During construction, a temporary wooden form called centering holds the arch shape until the mortar cures. Once it’s removed, the arch and its support take over the load. Pulling centering too early is a common cause of early sagging.

Choosing the Right Support Above a Brick Arch Opening

The right support depends on the arch type, the span, the wall construction, and what sits above. A short decorative arch in a garden wall may need different support than a wide arch carrying brick veneer and a roof load. No single option fits every opening.

A properly built arch with solid abutments can carry load on its own once the mortar has cured. Deeper arches with good proportions tend to work better this way. They still need careful design, especially over wider openings.

Steel angle lintels are common in brick veneer over doors and windows. For arched openings, the lintel may be curved to match the arch or placed behind it, depending on the design. Lintels need rust protection, the right size for the span, and enough bearing on each side. Bearing is the length of lintel that rests on the masonry at each end.

Planning the Arch Opening and Load Path

The load path is the route weight takes from the roof and wall above, through the arch and its support, and down into the foundation. Planning it means confirming each piece can carry its share. A weak link anywhere in that chain eventually shows up as cracks.

Start with the opening size and arch shape. Wide, flat arches push harder sideways than tall, rounded ones. The walls on each side need enough mass or reinforcement to resist that push. Proper masonry support becomes especially important when an opening carries significant weight from the wall or structure above.

Check what’s below too. Abutments sit on footings or foundations, and settlement there can crack an arch even if the arch itself was built well. For outdoor features like outdoor kitchens, outdoor fireplaces, or garden walls, footing design depends on soil, size, and local requirements.

How Installation Details Affect Brick Arch Stability

Installation details often decide whether a brick arch stays tight or starts to crack. A good design can still fail if mortar joints, centering, flashing, or lintel placement are handled poorly. These are the details worth discussing with your mason.

Several steps carry extra weight in arch work. Each one affects how the arch handles load and weather. Ask about these:

  • Centering that holds the exact shape and stays in place until the mortar cures
  • Fully filled mortar joints that stay consistent in width
  • Voussoir and keystone placement that keeps the curve even
  • Lintel bearing, alignment, and rust protection
  • Flashing and weep holes above the lintel to let water out

Voussoirs are the wedge-shaped bricks that form the curve, and the keystone is the center brick at the top. Flashing is a waterproof layer that directs water out of the wall above the opening. Without it, water can rust a steel lintel, and rust expands enough to crack the brick around it.

Inspecting Hidden Support for Long-Term Arch Durability

Inspecting hidden support means looking for signs that the lintel, abutments, or load path are struggling. You can’t see a lintel directly in most walls, but the brick around it tells the story. Check arches once a year and after major storms or nearby construction.

Watch for warning signs in the brick masonry around the opening. Each can point to a support problem. Look for:

  • Cracks radiating from the arch or running above the opening
  • A sagging or flattening curve, or a dropped keystone
  • Rust stains or bulging brick just above the opening
  • Gaps between the arch and the wall beside it
  • Doors or windows below the arch that start sticking

Rust jacking is when a corroding steel lintel expands and pushes brick out of place. It often starts with small cracks at the corners of the opening. Catch it early, since repairs grow quickly once brick shifts.

If you see these signs, call a mason or engineer instead of patching cracks yourself. Brick repair should address the underlying problem rather than simply covering the visible cracks. A proper assessment looks at the support, the drainage, and the foundation together.

Frequently Asked Questions

Do brick arches need a steel lintel?

Not always. A well-built arch with strong abutments can be self-supporting, while many veneer arches rely on a lintel. The choice depends on the span, the wall construction, and the loads. A mason or engineer can confirm what your opening needs.

Why is my brick arch cracking?

Common causes include a rusting lintel, settling foundations, weak abutments, or poor original construction. Water getting into the wall is often part of the problem. The crack pattern can hint at the cause. Have a professional inspect before repairing.

Can a sagging brick arch be repaired?

Many sagging arches can be repaired by resetting bricks and correcting the support. Severe cases may need the arch rebuilt. The right fix depends on what caused the sag. Repairs should address support and drainage along with the visible damage.

How long do brick arches last?

A well-built and well-maintained arch can last for generations. Lifespan depends on design, materials, drainage, and upkeep. Rusted lintels and missing flashing shorten it. Routine inspections help catch problems early.

Can I add a brick arch to an outdoor kitchen or garden wall?

Yes, brick arches can work well in outdoor kitchens, garden walls, and entries. They need proper footings, abutments, and support like any other arch. Weather exposure makes drainage and joint quality especially important. Plan the design with a mason before construction
Thin Brick Can Add Texture Without Rebuilding a Full Wall

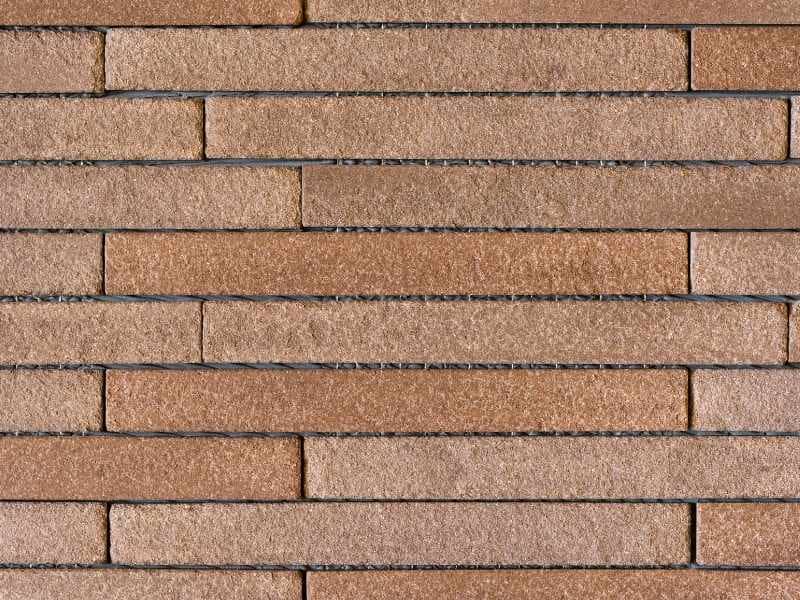
Thin brick veneer adding texture to an outdoor wall, kitchen, or fireplace.

A plain block base or a flat siding wall can make a good outdoor space feel unfinished. Plenty of homeowners want the warmth of brick masonry without tearing out a wall or pouring a wider footing. Thin brick solves that problem on a lot of projects.

Thin brick is real fired clay brick made about half an inch to one inch thick. It’s set in mortar over a prepared surface, so you get the face and texture of brick without the weight of a full unit. It only performs as well as the wall behind it and the water control around it, so plan those details before you pick a color.

Where Thin Brick Works Best Around the Home

Thin brick works best on solid surfaces that won’t flex or stay wet. The base has to carry the added weight and stay stable for years. Common spots include:

  • Outdoor kitchen islands built from block or framed with cement board
  • Outdoor fireplace surrounds and chimney faces
  • Foundation skirts and porch columns
  • Accent walls on covered patios
  • The face of a low retaining wall that’s already structurally sound

It’s a poor fit on a wood fence, a cracked block wall, or a retaining wall that’s leaning. Veneer over a structural problem only hides it for a while. If you’re unsure about a wall’s condition, have a mason or engineer check it before you choose a finish.

Choosing Thin Brick for Texture and Durability

Pick thin brick the same way you’d pick full brick, by look and by rating. For outdoor work, ask for units made for exterior exposure, since some products are meant for interiors only. Faces range from smooth and wire-cut to tumbled, sand-struck, and reclaimed styles. A rougher face reads older and hides small joint variations, while a smooth face looks cleaner and more modern.

Corner pieces matter more than most people expect. These are L-shaped units that wrap an outside corner, so the edge shows a brick end instead of a thin slice. Skipping them is the quickest way to make veneer look fake. Ask your installer whether the product line includes matching corners and how many the project needs.

Planning Transitions Between Brick and Outdoor Materials

Transitions are where thin brick projects look either custom or patched. Every spot where brick meets a stone patio, a countertop, a cap, or siding needs a plan. Decide on each edge detail before the first brick goes up.

In an outdoor kitchen, a countertop with a small overhang protects the top course and sheds water. On an outdoor fireplace, a cap or mantel ledge does the same job. Where veneer runs down to a brick patio, brick pavers, or stone pavers, leave a clean joint instead of butting it tight to the paving. That break gives each surface room to move with heat and soil changes.

Mixing materials works when there’s a reason for it. A stone retaining wall can sit comfortably beside a thin brick kitchen if the colors share a tone and the mortar ties them together. Two or three materials repeated around the yard usually look planned, while five or six start to look busy.

Managing Drainage Around Thin Brick Installations

Water is the main threat to adhered masonry. Thin brick doesn’t have the mass of a full wall, so moisture behind it has fewer places to go. Most exterior systems use a water-resistant barrier, metal lath, and a scratch coat behind the brick, with a way for water to exit at the bottom. The exact system depends on the wall type, the product, and local code, so follow the manufacturer’s instructions and your installer’s design.

Grading around the base matters just as much. Patios, walkways, and soil should slope away from veneered walls, never toward them. Keep the bottom course off the ground and out of standing water. Sprinklers that spray the wall daily will stain the mortar, and a slab that settles can crack the brick above it, so check for low spots and poor downspout drainage before work begins.

Maintaining Thin Brick for Long-Term Performance

Thin brick needs about the same care as any brick masonry. Walk the installation once or twice a year and look at the joints, the bottom edge, and the top cap. Fix hairline cracks, loose units, or missing mortar early, before water gets behind them.

Clean with a soft brush, water, and a mild cleaner made for brick. High-pressure washing can erode joints and force water behind the veneer, so keep the pressure low. White chalky residue is usually efflorescence, which means water is moving through the masonry. Brush it off dry, then track down where the water is coming from.

Sealers are optional and depend on the brick. If you use one, choose a breathable product that lets vapor escape. Ask your mason which sealers work with your specific material before applying anything.

Frequently Asked Questions

What is thin brick?

Thin brick is fired clay brick made much thinner than a standard unit, usually about half an inch to one inch thick. It’s installed in mortar over a prepared wall surface. From the front, it looks like a full brick wall with real joints and texture. It’s often used where full brick would be too heavy or would need a new footing.

Can thin brick be installed outdoors?

Yes, as long as the product is rated for exterior use and the wall is built for outdoor exposure. Outdoor kitchens, fireplaces, and column wraps are common uses. The installation needs a moisture plan, including a barrier and a way for water to drain at the base. Requirements vary by product and local code, so check both before starting.

Can thin brick go over an existing wall?

Often it can, but it depends on the wall. Concrete, block, and properly prepared framed walls usually accept it well. Painted surfaces, damaged stucco, and walls that flex need repair or a new substrate first. A mason should inspect the wall before you buy materials.

How long does thin brick last?

A well-installed thin brick wall can last for decades. The brick holds up well because it’s the same fired clay used in full brick. Most failures come from water getting behind the veneer or from a base that moves. Good drainage, a solid substrate, and early joint repair make the biggest difference.

Will thin brick match my existing brick?

It can come close, but an exact match isn’t guaranteed. Brick color varies by batch, and older brick has weathered for years. Comparing samples outside in daylight is the best way to judge. A complementary color sometimes looks more intentional than a near-match.

Brick Pavers Near Downspouts Need a Clear Drainage Path

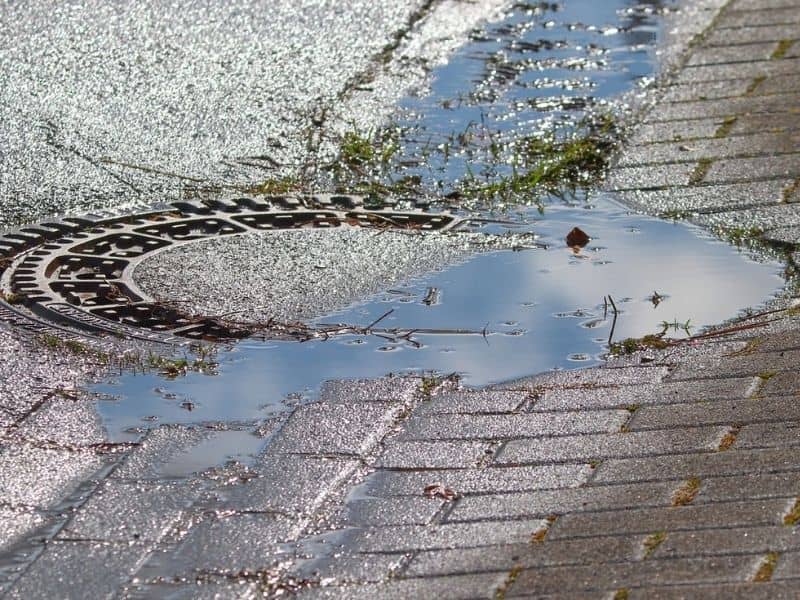
Wet paving stones surrounding a drainage cover, illustrating brick pavers near downspouts after rain

A roof sheds a huge amount of water every time it rains, and every drop funnels down to just a few spots. That’s what a downspout does. It takes water collected across the whole roof and pours it out in one narrow stream at ground level. When brick pavers sit right where that stream lands, they need somewhere for the water to go. A patio or walkway that looks great in dry weather can turn into a soggy problem the first time it gets a hard rain, and the fix almost always comes down to one thing: giving that water a clear path away from the house.

Track Roof Runoff From Downspout to Final Discharge

Before you plan anything with brick pavers, walk the path the water actually takes. Start at the gutter, follow it down the downspout, and keep going until you reach the spot where the water finally soaks into the ground or reaches a storm drain. That endpoint matters as much as the downspout itself.

Too many paver projects only look at the patch of ground right under the downspout. They fix that one spot and ignore everything past it. If the water still has nowhere to go twenty feet later, you’ve just moved the puddle instead of solving it. Map the whole route first, from roof to final discharge, then figure out where the pavers fit into that route without blocking it.

Keep Downspout Outlets From Emptying Into Paver Joints

The exact spot where a downspout empties out matters more than most homeowners realize. If that outlet sits right above the joints between brick pavers, you’re asking those joints to absorb a concentrated stream of water every time it rains.

Paver joints are usually filled with sand or fine jointing material, and that material washes out fast under repeated direct flow. Once the joint sand disappears, the base underneath starts to erode too. Pavers begin to rock, sink, or shift out of line, and what started as a drainage problem turns into a structural one. The fix is simple in concept: give the downspout a deliberate route away from the pavers instead of letting it dump straight onto one small section, over and over, storm after storm.

Coordinate Brick Pavers With Downspout Extensions and Drain Inlets

There’s more than one way to move water past a paved area, and the right choice depends on the site. Some setups use an above-ground extension, like a rigid pipe or splash block, that carries water a few extra feet before it reaches the pavers. Others run a buried pipe underneath the paved surface and pop out somewhere past it, so the connection stays hidden and the surface stays clean.

A third option ties the downspout into a drain inlet or catch basin built right into the paver layout. That inlet collects the water and routes it into an underground pipe instead of letting it spread across the surface. Any of these can work well. What matters is picking the layout before the pavers go in, not trying to squeeze a solution in afterward.

Preserve the Drainage Route When Brick Pavers Are Installed

Once the drainage plan is set, the installation itself has to protect it. This is where a lot of well-planned drainage gets ruined by accident. A crew digging out the base for new pavers can easily cut through a buried extension pipe without realizing it’s there, or grade the sub-base so it slopes the wrong way and sends water back toward the house instead of away from it.

Mark every existing downspout line and buried connection before excavation starts. Keep any pipe joints and outlets accessible rather than burying them under a solid run of pavers with no way to reach them later. And check the finished grade with a level, not just by eye, since even a small reverse slope can undo the entire drainage plan. Getting this step right during installation saves a lot of digging later.

Recheck Downspout Discharge After Heavy Rain

The real test of any drainage plan comes during and after an actual storm, when the system gets plenty of hard, fast rain to put that plan to work. Walk the discharge point once the rain lets up and look closely at what happened. A drainage path that works on paper doesn’t always hold up once the water is actually flowing.

Watch for these signs that something isn’t draining the way it should:

  • Water pooling or backing up right at the downspout outlet
  • A wet trail crossing pavers in a direction it shouldn’t be going
  • Standing water lingering where the downspout meets the paving, long after the rain stops
  • Soil or mulch washed onto the paver surface near the outlet
  • Pavers that feel soft, loose, or slightly sunken near the discharge point

Catching these signs early means a small adjustment, like repositioning an extension or clearing a blocked inlet, instead of a bigger repair down the road.

Painted Brick Removal Can Damage the Original Fired Surface

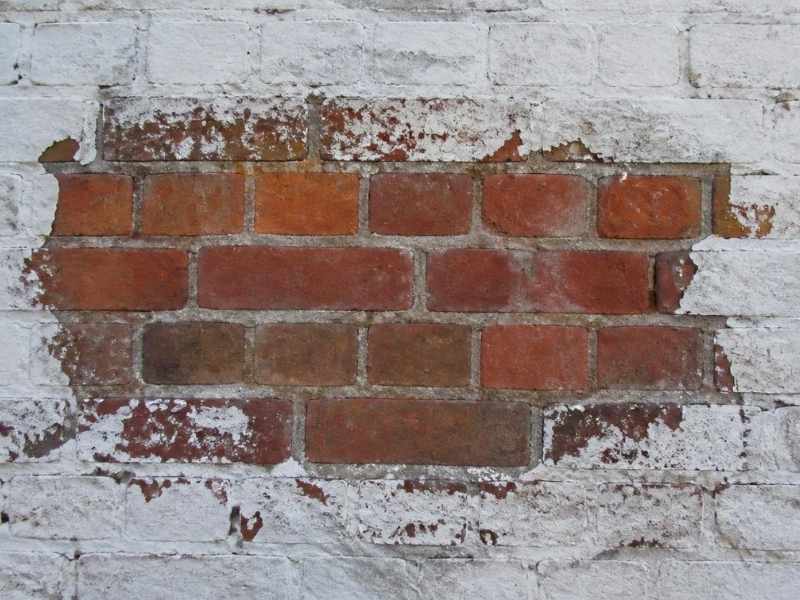
Peeling paint and a test removal area exposing the original fired brick surface in Fort Worth, Texas.

Painted brick can start to feel like a mistake. The color fades, the paint peels, and many owners want the natural brick back. So they set out to strip the paint and return the wall to its original look without causing surface damage.

That goal is understandable, but the process carries real risk. Brick has a hard outer layer that forms during firing. Strip the paint the wrong way, and you can tear off that layer along with it. Once it is gone, the brick underneath is softer, weaker, and open to damage.

Here is the takeaway. Painted brick removal can harm the original fired surface if it is done too aggressively. The fired surface is the tough outer skin that protects the brick. The sections below explain why that skin matters, how removal methods affect it, and how to protect your brick.

Why Painted Brick Removal Can Damage the Fired Face

Brick gets its strength in the kiln. High heat hardens the outer surface into a dense, weather-resistant skin. This fired face is tougher than the brick’s inner core and helps protect the brickwork from water and wear.

Paint clings tightly to that surface, sometimes soaking into the pores. Removing it means pulling against a bond that does not want to let go. Harsh methods that break the bond can also break the fired face. When the skin comes off, the soft interior is exposed.

That exposed core is the real problem. The inside of a brick is more porous than its fired skin. It soaks up water fast once the surface is gone. Over time, that moisture leads to crumbling, flaking, and decay.

How Paint Stripping Methods Affect Brick Surfaces

Not all removal methods are equal. Some are hard on brick, and some are gentler. The method you choose decides whether the fired face survives.

Abrasive methods are the most damaging. Sandblasting and aggressive grinding wear away paint by wearing away the surface. That means the fired skin goes too. Pressure washing at high force can do the same, blasting off the outer layer and driving water deep into the brick, which can leave it more vulnerable to weather exposure.

Chemical strippers work differently and can be safer when used with care. They soften the paint so it can be removed with less force. Even so, the wrong product or too much scrubbing can still harm the surface. Methods and results vary by paint type, brick age, and wall condition, so a mason should guide the approach.

Assessing Brick Condition Before Paint Removal Begins

Smart removal starts with a good look at the brick. Not every wall can handle paint stripping. Checking the condition first tells you what the brick can take.

A mason examines several things before any work begins. They look at the age of the brick, since older brick is often softer. They check for cracks, crumbling, and loose mortar that signal weakness. They also note how many layers of paint are present. Signs a mason watches for include:

  • Soft or flaking brick faces
  • Existing cracks or spalling
  • Loose or failing mortar joints
  • Multiple thick layers of old paint
  • Areas where the surface already looks worn

This check shapes the whole plan. Brick in good shape may handle careful stripping. Brick that is already weak may be better left painted or handled another way.

Testing Small Areas Before Full-Scale Brick Cleaning

Never strip a whole wall without testing first. A test patch shows how the brick and paint react. It is the safest way to avoid a costly mistake across the entire surface.

A mason picks a small, low-visibility spot to start. They apply the chosen method and watch closely. The test shows whether the paint lifts cleanly and whether the fired face stays intact. If the surface starts to damage, the plan changes before real harm is done.

This step saves brick and money. A failed method on one small patch is easy to accept. The same failure across a full wall is a disaster. Testing gives you real proof of what works before committing to the whole job.

Planning Repairs When the Original Surface Is Compromised

Sometimes the damage is already done. Maybe a past removal stripped the fired face, or the brick was fragile to begin with. When the surface is compromised, a repair plan protects what is left.

A mason has a few ways to help. They can apply a breathable masonry sealer to slow water absorption on exposed brick. They can repoint failing mortar to keep joints tight. In bad cases, they may replace individual bricks that have decayed past saving.

Sometimes the best move is to repaint or coat the brick again. A quality masonry coating can protect a surface that has lost its fired skin. A mason can weigh the options for your wall. The right choice depends on how much damage exists and what look you want.

Frequently Asked Questions

Can you remove paint from brick without damage?

It is possible, but it takes the right method and careful work. Gentle chemical strippers used by an experienced hand are safer than abrasive blasting. The brick’s condition also matters, since weak brick damages easily. A mason can test and guide the process to protect the fired surface.

Why is removing paint from brick risky?

Brick has a hard fired skin that protects it from water and wear. Paint bonds tightly to that skin and can pull it off during removal. Harsh methods like sandblasting strip the surface along with the paint. Once the skin is gone, the softer brick underneath absorbs water and decays.

What is the safest way to strip painted brick?

Careful chemical stripping is usually gentler than abrasive or high-pressure methods. The paint is softened so it lifts with less force on the surface. A test patch first confirms the method works without harm. Because results vary, an experienced mason should choose and manage the approach.

Should I remove paint from old brick?

Older brick is often softer, which makes removal riskier. In some cases the brick is better left painted or recoated. A mason can assess whether your brick can handle stripping. That check helps you avoid turning a cosmetic issue into structural damage.

What if paint removal already damaged my brick?

There are still ways to protect and repair the surface. A mason can seal exposed brick, repoint mortar, or replace badly damaged units. Recoating the wall is another option when the fired skin is gone. The best fix depends on how much damage the brick has taken.