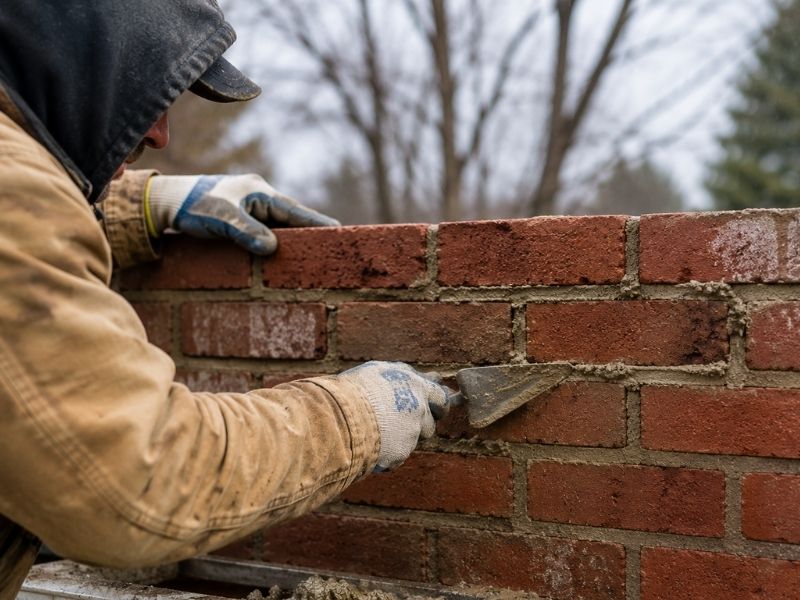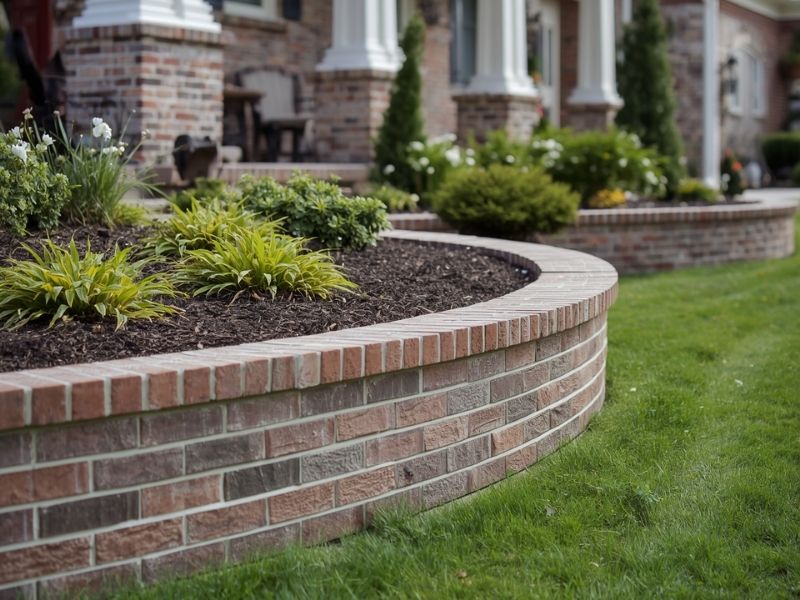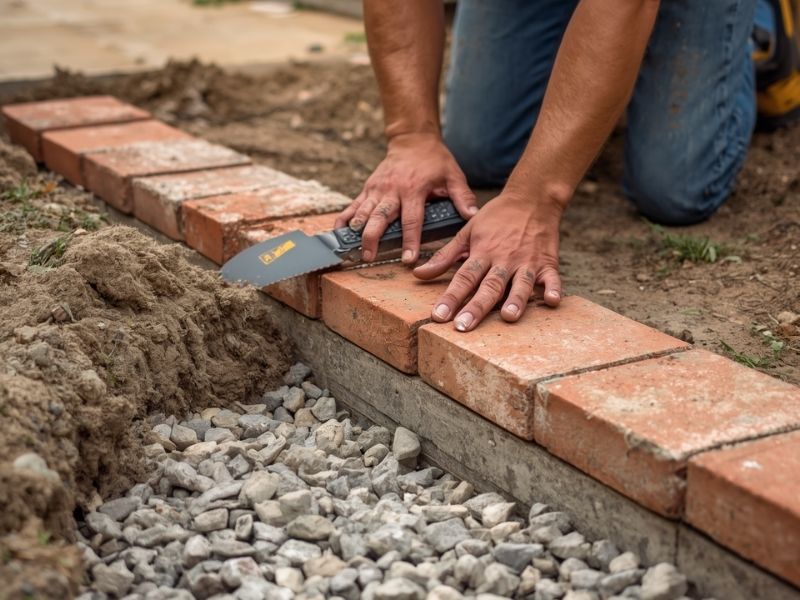
Brick Pavers for Driveways Need Edge Restraint Before the First Tire Rolls In
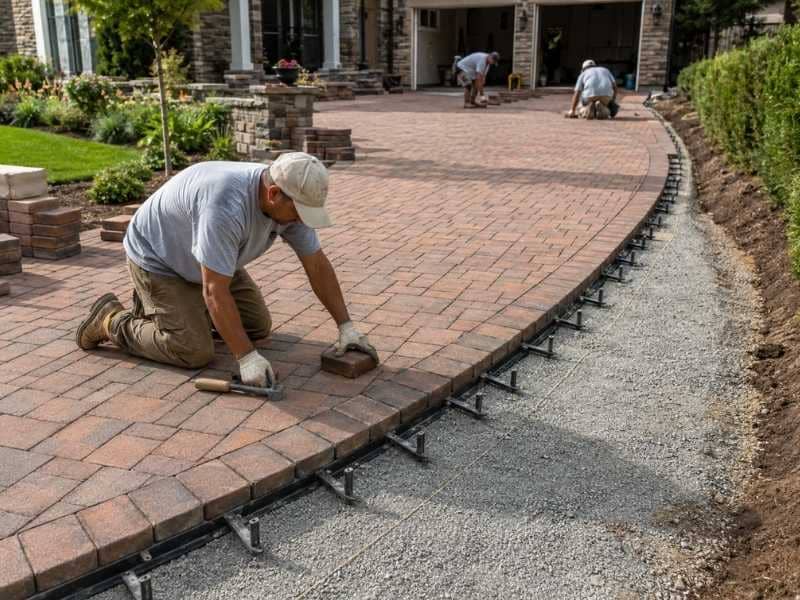
 Brick pavers for driveways showing anchored edge restraint along a curved driveway before vehicle traffic begins

A driveway takes more punishment than almost any other paved surface at a home. Brick pavers can handle that load for decades, but only when the edges get locked down before any weight rolls across them. Vehicles push pavers sideways every time a tire turns or stops. Without a firm edge holding the field together, that push slowly spreads the pavers apart until gaps and ruts show up. The work that goes into the border decides whether the middle stays tight for years or starts drifting after the first season.

Read Where the Tires Push Hardest

Not every part of a driveway feels the same force. Turning tires grind against the surface with a twisting motion that flat driving never creates. Braking near the garage sends weight forward into the same few rows again and again. Curves, the apron where the driveway meets the street, and the garage entrance all take extra strain.

These high-stress spots should guide how the base and the edges get built. A section that only sees straight, slow travel needs less reinforcement than a tight turn or a steep entry. Planning around the hardest-working zones puts the strongest support exactly where the driveway will try to fail first.

Treating the whole surface as equal wastes effort in calm areas and leaves the busy ones short. A mason who studies how cars actually move across the driveway can match the prep to the real pattern of wear. That kind of reading turns a generic install into one built for the way this driveway gets used.

Build the Base Past the Edge of the Pavers

The prepared foundation under a driveway has to reach beyond the pavers you can see. Borders and perimeter restraints need solid ground under them too, not soft fill that gives way. When the base stops right at the last visible paver, the outer row has nothing firm to lean on.

That unsupported strip becomes a weak seam. The center of the driveway can look flawless while the edges sink, tilt, or creep outward under repeated traffic. Once the border starts to move, the failure works its way inward toward the pavers that seemed fine.

Extending the compacted base under the full paved area, edges included, keeps the whole system sitting on stable ground. A base that runs a bit wider than the pavers gives the restraint something real to grip. That extra reach costs little during the dig and saves a major repair down the road.

Anchor the Perimeter Against Sideways Movement

Edge restraint exists to fight one specific thing, the horizontal shove a tire creates when it turns or halts. Without that anchor, pavers drift outward a fraction at a time until gaps open across the field. The restraint holds the outer pieces in line so the rest stay packed together.

Several details decide whether that restraint actually holds. The type of restraint matters, along with how deep it sits and how it connects to the ground. Curves and the driveway opening need extra attention, since those are the exact places where sideways force peaks. Spikes or anchors set too shallow pull loose over time and let the edge wander.

A restraint that’s secured well around the tricky spots keeps the perimeter honest for years. The connection between the restraint and the base is where many jobs quietly fail. Done right, the edge and the field act as one piece and share the load a driveway throws at them.

Fill the Joints So the Pavers Act as One

Joint sand does more than fill the gaps between bricks. When the paver joints are packed full, the pavers lock against each other and share load like a single surface. That shared strength is what lets a driveway carry a car without any one brick taking the full hit.

Trouble starts when the joints sit half empty. Incomplete filling, sand that washes out early, or traffic that rolls on before the joints are set can all break the connection. Once that happens, individual pavers rotate, separate, or slide under the weight of a tire, and the smooth surface starts to feel loose.

Filling every joint completely, then keeping vehicles off until the surface is ready, protects the interlock that makes the whole driveway work. Full joints also help keep water and grit from working down into the base. A tight, connected surface simply holds up better against everything a driveway faces.

Plan Sections You Can Lift for Future Repairs

Someday part of a driveway will need to come up. A utility line might need service, drainage might need a fix, or a settled spot might need to be reset. Installers who think ahead leave those areas easy to reopen instead of building one solid slab of interlocked brick.

Smart planning keeps a few habits in play. The paver pattern gets documented so a repair crew can put it back the same way. A handful of matching units get stored for later, since dye lots change and an exact match gets harder to find over time. Repair boundaries get chosen at natural break points, so a small section can lift out without disturbing large runs of the driveway. That foresight turns a future repair into a neat patch rather than a full tear-out that never quite matches again.

Frequently Asked Questions

Where does a brick paver driveway experience the most movement?

The heaviest movement shows up wherever tires twist or stop. Sharp turns, the garage approach, curved runs, and the apron at the street all take strong sideways force. Those areas shift first when the edges aren’t locked down, so they deserve the most support during the build.

Should edge restraint continue across a driveway entrance?

Yes. The entrance is one of the highest-stress points on the whole driveway, since tires cross it constantly and often turn there. Stopping the restraint short of the opening leaves the busiest edge free to spread. The anchor should carry through that transition, not quit before it.

How is driveway edge restraint secured around curved sections?

Curves need closer anchoring and careful placement, because the outward push builds up along the bend. Restraint on a curve usually calls for more frequent anchor points set at the right depth, plus tight connections that follow the shape of the arc. Loose or widely spaced anchors let the curve drift outward under traffic.

Why must the joints be completely filled before vehicles use the driveway?

Full joints are what tie the pavers into one connected surface. Until the sand fills every gap, each brick sits more or less on its own and can rock or slide under a tire. Driving on partly filled joints lets pavers shift out of place before the surface ever settles.

How soon can a vehicle drive over newly installed brick pavers?

That depends on the joint material and the install method, so the installer sets the timing. The core rule stays the same, wait until the joints are filled and set. Rolling weight onto fresh pavers too early can loosen the edges and knock the surface out of line before it stabilizes.
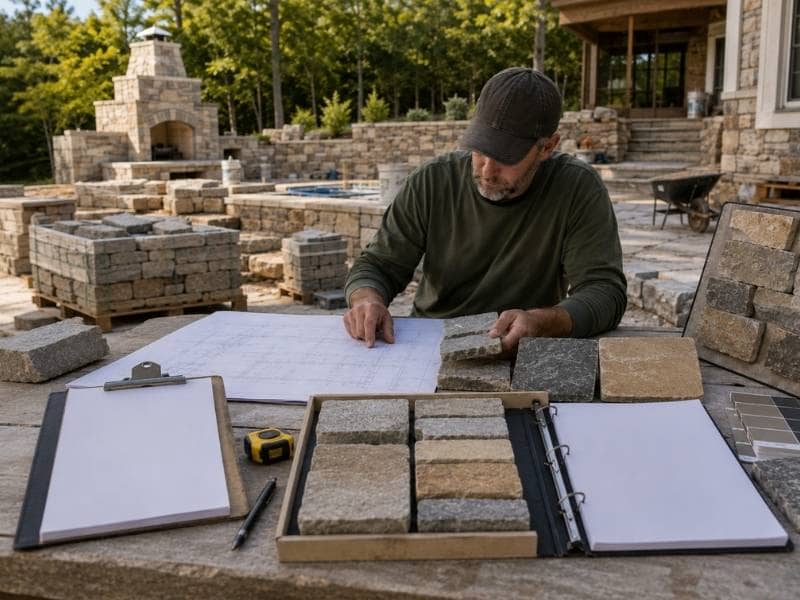

Stone Mason Material Planning Can Prevent Mid-Project Substitutions

Stone mason material planning showing stone samples, project plans, and matching pallets prepared before installation

Material planning is one of the quietest parts of a stone job, and it prevents some of the biggest headaches. A good stone mason thinks about the material long before the first piece gets set. When a supply gap shows up halfway through a build, the fix usually means dropping in a stone that never matched the first choice. That kind of rushed swap shows in the finished wall or patio for years, and it’s rarely a change anyone would have picked on purpose. Careful planning at the start keeps the whole project on one clear material path from the first delivery to the last cut.

Where the Stone Goes Decides What Works

The spot where a stone lands changes what it has to do. A piece meant for a patio floor takes foot traffic and weather in a way a fireplace face never will. Wall veneer, steps, coping, and hearths each ask for their own thickness, finish, and strength. A stone that looks perfect on a sample board can still be wrong for the actual job once it goes into service.

A stone mason reads the use first and the look second. Steps carry weight and repeated wear, so they need a dense, thick surface with some grip underfoot. Coping caps a wall and throws off rain, so it needs the right shape and a finish that stands up to weather and frost. Load-bearing areas need stone that holds force without cracking under it.

Choosing by color alone skips the part that decides how long the work holds up. A soft, thin stone in a high-wear spot will chip and wear out fast, no matter how good it looked on the shelf. Matching the material to its real demands is the difference between a surface that ages well and one that starts failing in a season or two.

Confirm Stock and Lead Times Before You Commit

A catalog photo, a website image, or an old showroom sample can all be out of date. Color runs shift between batches. A product gets discontinued without much notice. What sat in the supplier’s yard last season might be gone today. Picking a stone from a picture and assuming it’s ready to ship is where a lot of delays begin.

Before anyone locks in an install date, the mason or supplier should check a few real facts. That means confirming the amount on hand, the current inventory count, the next restock date, and any wait time on a special order. Natural stone moves through supply chains in ways that change often, and imported or non-stock products can carry long lead times measured in weeks.

A short check up front keeps the schedule honest and keeps the crew from standing around later. It also gives everyone time to react if the numbers don’t line up. When a stone turns out to be short or slow, the owner can pick a backup while there’s still room to plan, instead of settling for whatever the yard has on a rushed afternoon.

Natural Stone Varies From Piece to Piece

Stone comes out of the ground, so no two pieces come out exactly alike. Color, veining, texture, and thickness all shift across a single pallet. A homeowner who expects every stone to copy one small chip is going to be surprised when the pallets arrive. That surprise often turns into a complaint that was never really a defect at all.

The smarter habit is to review the true range before signing off on anything. That can mean looking at several fresh samples, a range sample that shows the lightest and darkest ends, or a full pallet opened up in daylight. A small mockup on site helps even more, since it shows how the pieces read together rather than one at a time.

When people see the natural spread ahead of time, the delivered stone reads as normal instead of wrong. Setting that expectation early protects the mason too. A clear conversation about variation up front keeps a natural feature of the material from turning into a dispute after the wall is already up.

Count Every Piece the Job Needs

A finished order covers far more than the square footage of the main face. The mason has to add corners, caps, sills, step treads, and all the cuts those pieces require. Breakage and waste count too, since some stone cracks or gets trimmed away during setting. A quick guess at the front end often turns into a shortfall at the back end.

Running short partway through a build causes two problems at once. The work stops while more material comes in, and the new batch may not match the first pour of stone. A mason who maps the full piece count early, including the odd specialty units, keeps the color and texture even across the whole surface. That complete tally protects the timeline and the appearance at the same time.

Keep a Written Record of the Chosen Stone

Once everyone agrees on a stone, that choice belongs on paper. A clear record removes the guesswork if a question comes up mid-build. It also gives the property owner a real say if the material ever has to change for reasons outside anyone’s control.

A useful record spells out the details that define the exact product:

  • The quarry or manufacturer and the product name
  • The stone type, finish, and dimensions
  • The approved range of natural variation
  • The mortar color and any matching accessories

No substitute goes in without the owner’s approval. When a specified stone runs out, the proposed replacement gets weighed for fit, size, install needs, durability, appearance, cost, and delivery timing. A written baseline makes that comparison quick and fair instead of a rushed call on the job site. It turns a stressful moment into a simple side-by-side check, with the owner deciding rather than finding out after the fact.

Brick Masonry Details That Help New Buildings Respect Established Streetscapes

Brick masonry details helping a new commercial building complement an established historic streetscape

Brick masonry plays an important role in how a new building fits within an established streetscape. The color, texture, brick size, bond pattern, and detailing around doors and windows all influence how the building relates to the surrounding neighborhood. In areas with a well-defined architectural character, these design decisions can help new construction complement nearby buildings while maintaining its own identity. Careful brick masonry detailing supports a cohesive streetscape and creates a transition between new development and the existing built environment. 

Start by Reading the Street You’re Building On

The most useful design research happens on foot. Walking the block reveals what the existing buildings actually share, and the pattern is often narrower than photographs suggest. One street may run heavily toward warm red brick with tight mortar joints, while the next favors buff tones and wider joints that make walls look softer from a distance.

Scale carries as much weight as color. Older commercial blocks often use a standard modular brick that gives walls a fine grain, so a large format brick on the same street can look coarse even in a matching color. Window proportions, storefront height and the rhythm of openings tell you how the buildings around you divide their facades. Noting all of this before selecting materials gives the design team a real reference instead of a guess, and it usually shortens design review with a planning department that cares about compatibility.

Details Do the Work Most People Notice

Broad choices set the direction, and the details decide whether a wall looks considered or careless. Bond pattern is the clearest example, since running bond, common bond and stack bond each produce a different surface even with identical brick. A common bond with header courses every sixth row reads as older and heavier, while stack bond reads modern and flat.

Mortar deserves more attention than it usually gets, because joints can occupy close to a fifth of a brick wall’s visible surface. A dark mortar makes each brick stand out and a light mortar softens the whole field, so the same brick can produce two very different walls. Joint profile matters too, and a concave joint casts a shadow line that a flush joint doesn’t. Corners, water tables, soldier courses over windows, brick arches and simple lintel treatments all give the eye something familiar to land on. These small moves cost little compared to the wall itself and they carry most of the visual result.

Modern Buildings Using Traditional Brick Well

Contemporary architecture and traditional masonry get along better than people assume, provided the building respects the scale of its neighbors. A clean, modern form clad in brick that matches the surrounding color range often sits comfortably on an older street, because the material and the proportions do the connecting while the form stays current.

Problems appear when a new building breaks the established rhythm rather than the style. A blank brick wall running seventy feet without an opening will feel wrong on a street of twenty five foot storefronts no matter how good the brick is. Dividing long facades into bays, holding a consistent floor height at the street, and keeping ground level windows generous all preserve the pattern people recognize. Designers can then push the upper floors, the roofline or the entry in a more modern direction without the building feeling out of place. That balance gives owners a project that reads as new construction while still belonging.

Making Brick Work With Other Exterior Materials

Few buildings today use brick alone. Stone bases, metal panels, wood soffits, stucco and large glass openings all appear alongside masonry, and the transitions between them decide whether the facade looks resolved. Changing material at an inside corner, a floor line or a structural bay looks intentional. Changing it in the middle of a flat wall rarely does.

Color relationships need a decision rather than a default. Warm brick pairs comfortably with bronze, warm gray stone and natural wood, while cool gray brick sits better next to black metal and cooler stone. Keeping the material palette to three or four elements prevents a facade from turning busy, which matters on a street where neighboring buildings use one or two. Detailing at the joints has to work in the rain as well as on paper, so flashing, sealant joints and drip edges belong in the drawings before construction. Sloppy transitions collect water and stain the brick below within a few seasons.

Durable Masonry Keeps Curb Appeal Working

Good design fades quickly when the wall performs poorly. Brick selected for the local freeze and thaw exposure, mortar mixed to the right strength for that brick, and flashing installed correctly at every shelf angle and opening will keep the facade looking close to new for decades. Mortar that’s harder than the brick around it causes the brick faces to spall instead of the joints wearing, which is a repair nobody wants to fund ten years in.

Workmanship shows itself over time. Consistent joint tooling, clean brick faces, straight coursing and properly functioning weep holes are the difference between a wall that ages gracefully and one that streaks. Owners considering long term value should treat these items as part of the design conversation rather than as field decisions. A street that keeps its character tends to hold property values well, and each new building either supports that or works against it. Brick chosen and detailed with care puts a project firmly on the supporting side.

Outdoor Fireplace Designs That Move Smoothly Through Permit Review

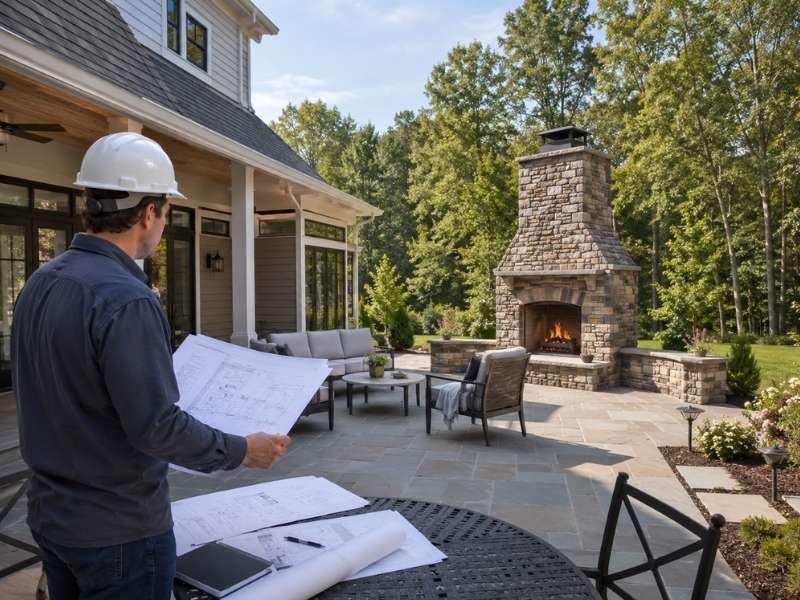
Outdoor fireplace designs reviewed on a residential patio before permit approval

Outdoor fireplace designs should balance appearance, function, and local permitting requirements from the very beginning. Where the fireplace sits, how it relates to the house, what fuel it burns, and how far it stands from property lines can all influence both the final design and the approval process. Because outdoor fire features may involve heat, smoke, chimneys, and gas connections, local permitting requirements often apply. Considering these factors before the plans are finalized helps reduce the need for design revisions and supports a smoother permit review process. 

Choosing the Location While Other Plans Are Still Flexible

Location drives nearly every other decision, which is why it should come first rather than last. Property lines and setbacks set the outer limits, and many areas restrict how close a permanent fire feature can sit to a lot boundary or a neighboring structure. Existing features narrow the choices further, since pools, patios, sheds and mature trees all occupy space that can’t easily move.

Overhead conditions deserve a careful look too. Power lines, low branches, roof eaves and second-story windows sit directly in the path of rising heat and smoke, and a chimney that clears the ground obstacles may still fail on that count. Prevailing wind matters as well, because a fireplace placed upwind of a dining area sends smoke exactly where nobody wants it. Walking the yard at different times of day gives a better answer than a sketch does.

Designing Around What the Site Actually Gives You

Once the spot is chosen, the site conditions shape the structure itself. A fireplace is heavy, often several tons once the firebox, chimney and hearth are complete, so it needs a footing sized for the soil under it. Sloped ground may call for a stepped footing or a small retaining element to create a level pad. Ground that stays wet after rain needs drainage attention before any masonry goes down.

Available space controls proportion. A tall chimney on a small patio looks awkward and can also crowd seating out of the usable area. Designers usually work backward from the space people need in front of the fire, then size the firebox opening and the overall mass to suit it. Wind exposure influences draft performance, and an open corner of a yard behaves differently than a spot tucked against a wall. Reviewing all of this before material selection keeps the design honest.

What Permit Reviewers Look At

Permit requirements for outdoor fireplaces vary widely, and the variables are fairly predictable. Size and height come up first, since taller chimneys and larger fireboxes carry more weight and produce more heat. Distance from property lines, structures and combustible features follows close behind, and some areas apply the same clearance rules used indoors.

Fuel type changes the picture significantly. A wood burning fireplace raises questions about smoke and clearances, while a gas unit brings a plumbing permit, a licensed gas fitter and shutoff requirements along with it. A few areas restrict open wood burning entirely during certain seasons. Attached fireplaces that share a wall or roof with the house usually face stricter review than freestanding ones. Reading local requirements early lets the designer draw something that already complies rather than something that has to be corrected.

Building It as Part of the Whole Backyard

Outdoor fireplaces almost never get built in isolation. They tend to arrive alongside seating walls, outdoor kitchens, walkways, lighting and irrigation, and the order those pieces go in determines how clean the result looks. Electrical for lighting, gas for a grill and conduit for speakers all belong underground before paving begins.

Sight lines and traffic flow are worth thinking through as a group. People should be able to walk past the seating area without stepping between a chair and the fire, and cooking space works better when it sits out of the smoke path. Matching materials across the fireplace, walls and paving ties the space together, so choosing brick, stone and mortar colors at the same time gives a better match than picking them one project at a time. Coordinated planning also spares the paving crew from cutting into fresh work for a gas line somebody forgot.

Planning That Holds Up Over the Years

A fireplace built with maintenance in mind ages far better than one built for opening day. Ash removal, chimney cleaning and occasional mortar repair all require reach, so leaving working space around and behind the structure saves trouble later. A cap or spark arrestor keeps rain and animals out of the flue, which prevents much of the water damage that shows up in older units.

Future changes deserve a thought as well. Owners who expect to add a pergola, extend the patio or install an outdoor kitchen can set sleeves, footings and utility stubs now at a fraction of what retrofitting costs. Choosing durable stone or brick and a mortar suited to outdoor freeze and thaw cycles keeps the face looking right after a decade of use.

Frequently Asked Questions

Does an outdoor fireplace usually require a permit?

In most areas, yes. Permanent masonry fire features involve structural weight, heat and clearances, and gas models add plumbing work that requires its own approval. Requirements depend on size, fuel type, location and whether the structure attaches to the home. Contacting the local building department before design work starts gives you the actual answer for your address.

Where should an outdoor fireplace be located?

Pick a spot that respects setbacks, keeps clear of overhead lines and branches, and sits where wind carries smoke away from seating and windows. The location should also work with how people move through the yard, so nobody has to walk between the fire and the seating. Ground conditions matter too, since the footing needs stable, well drained soil.

Can an outdoor fireplace be built near a property line?

Sometimes, though local setback rules usually set a minimum distance for permanent fire features. Some jurisdictions treat chimney height and clearance to neighboring structures as separate limits. Fences, sheds and overhanging trees on the adjoining lot can restrict placement further. Verify the specific setback before committing to a design.

Should an outdoor fireplace be planned with other backyard improvements?

Planning them together saves money and produces a better result. Utilities for lighting, gas and audio belong underground before paving, and matching materials across features is easier when everything gets selected at once. Coordinated layout also keeps walkways, seating and cooking areas from crowding the fire.

Retaining Wall Planning That Prevents Permit and Drainage Surprises

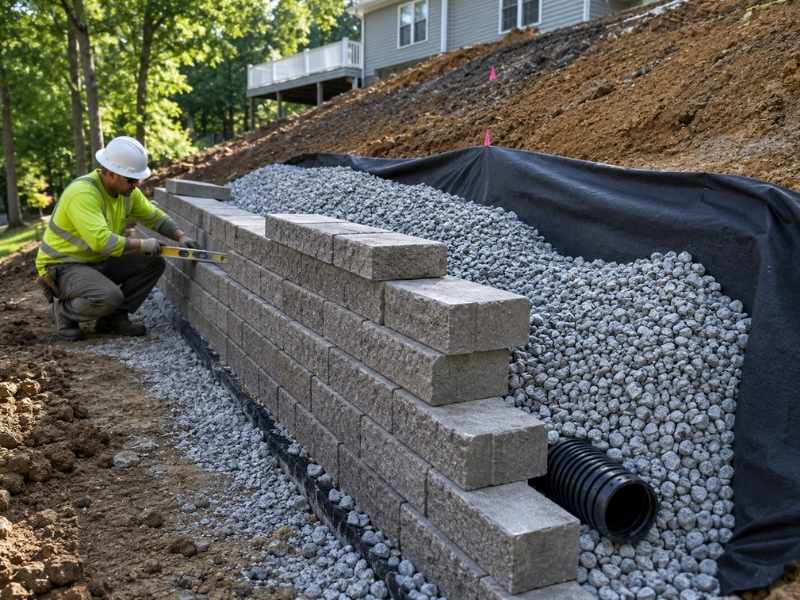
Retaining wall planning with gravel backfill, geotextile, and a perforated drain on a residential slope

A retaining wall holds back soil, but its job reaches further than that. The wall changes how water travels across a yard, how a slope behaves after a long rain, and how close a project can sit to a neighbor’s line. Local officials often take an interest as well, since walls past a certain height carry rules of their own. Homeowners who sort out these details before anyone breaks ground usually spend far less money fixing problems later. Taller walls, walls near a house or garage, and walls on steep ground all deserve a professional look before materials get ordered.

Reading the Site Before You Pick a Wall Location

Every wall answers to the ground it sits on. The steepness of the slope, the type of soil underneath, and the amount of water moving downhill all shape what the wall has to hold and where it can reasonably go. Clay soils swell and shrink with moisture, while sandy soils drain fast but shift under load. A soil that behaves one way in the front yard can behave differently forty feet back.

Property lines matter just as much as dirt. A wall built close to a boundary can push soil, water or footing pressure onto land that isn’t yours, and that turns a weekend project into a dispute. Nearby structures add another limit, since a wall too close to a foundation, a septic field or a mature tree can undermine what’s already there. Checking these conditions early costs a few hours. Discovering them after the first course of block goes in costs a redesign.

Why Drainage Belongs in the Design Stage

Water is the reason most retaining walls fail, and it usually gets left out of the plan until construction is underway. Soil behind a wall soaks up rain and holds it, and saturated soil weighs far more than dry soil. That extra weight presses against the back of the wall day after day, and even a well built structure gives way once the pressure passes what it was designed to resist.

Good drainage answers that pressure in three places. Clean gravel backfill lets water fall through instead of collecting, a perforated pipe at the base carries it away to daylight, and weep holes or a drainage layer relieve whatever still builds up. Surface water needs its own path too, since runoff pouring over the top of a wall erodes the soil behind it and stains the face. Grading above the wall should send that water sideways rather than straight down. None of this can be retrofitted cheaply, because reaching the back of a finished wall means taking the wall apart.

How Wall Height Changes What Reviewers Expect

Permit rules tend to scale with height, and the reason is simple. A short garden wall holds a modest amount of soil, while a tall wall holds tons of it above something people use. Many jurisdictions set a review threshold in the range of four feet, often measured from the bottom of the footing rather than from the ground you can see, which catches more walls than owners expect.

Once a wall crosses that line, reviewers may ask for a design prepared by a licensed engineer, along with drawings showing the footing, the reinforcement, the drainage details and the loads the wall must carry. Walls that support a driveway, a pool deck or a parked vehicle often face the same requirement at lower heights, since the added weight counts as a surcharge. Terraced walls can be treated as one taller structure if they sit close together. Local rules vary, so confirming the standard for your address before design work starts avoids a late and expensive correction.

Coordinating the Wall With Everything Around It

A retaining wall rarely stands alone in a yard. It touches driveways, walkways, patios, fences, irrigation, lighting and whatever a neighbor has built on the other side of the line. Planning those relationships together keeps crews from working against each other and keeps finished work from being cut apart later.

The features worth mapping before design gets locked include:

  • driveways and sidewalks that will bear on or drain toward the wall
  • patios, steps and seating areas that need matching elevations
  • fences and railings, since taller walls often require a barrier at the top
  • buried utilities, irrigation lines and future sleeves for power or water
  • landscaping with root systems large enough to move masonry over time
  • neighboring structures, downspouts and drainage that discharge nearby

Sorting this out early also settles sequencing. Utility sleeves belong under the wall, not through it, and a fence footing planned in advance is far easier than one drilled into finished cap stone.

What Thoughtful Planning Buys You Once Work Begins

Planning pays off in ways that show up on the schedule. Permit reviewers get complete drawings the first time, so approvals move instead of stalling on missing details. Crews arrive with the right base material, the right drainage components and clear grades to build to.

The benefits keep going after the last block is set. A wall with proper drainage and a stable footing needs little more than occasional inspection and cleaning of the outlets. Owners who skipped that groundwork spend their money on bulging faces, cracked caps and soil that keeps washing out. Time spent  on the front end is the cheapest time you’ll spend on the whole project.

Frequently Asked Questions

Does every retaining wall require a permit?

No. Many short landscape walls fall below the height where local review kicks in, though the threshold differs by jurisdiction and is often measured from the footing rather than the finished grade. Walls that hold up a driveway, pool or structure can trigger review at lower heights. Checking with your local building department before design work begins gives you a clear answer.

Why is drainage important behind a retaining wall?

Soil holds water, and wet soil pushes against a wall much harder than dry soil does. Without a way for that water to escape, pressure builds until the wall leans, cracks or slides. Gravel backfill, a drain pipe at the base and outlets that reach daylight relieve that pressure and keep the structure working through wet seasons.

Can a retaining wall affect neighboring property?

Yes. A wall changes where water flows and how soil loads transfer, so poor planning can send runoff or pressure onto adjacent land. Building close to a boundary may also require access from the other side during construction. Confirming the property line and reviewing drainage effects protects both the project and the relationship.

When should a retaining wall be professionally evaluated?

Bring in a professional when the wall will be tall, when it holds up something that carries weight, when the slope is steep, or when soil conditions look unstable. Walls near foundations, septic systems or waterways also benefit from expert review. If local rules require engineered drawings, that review becomes part of the permit process anyway.

What to Know Before Building an Outdoor Fireplace

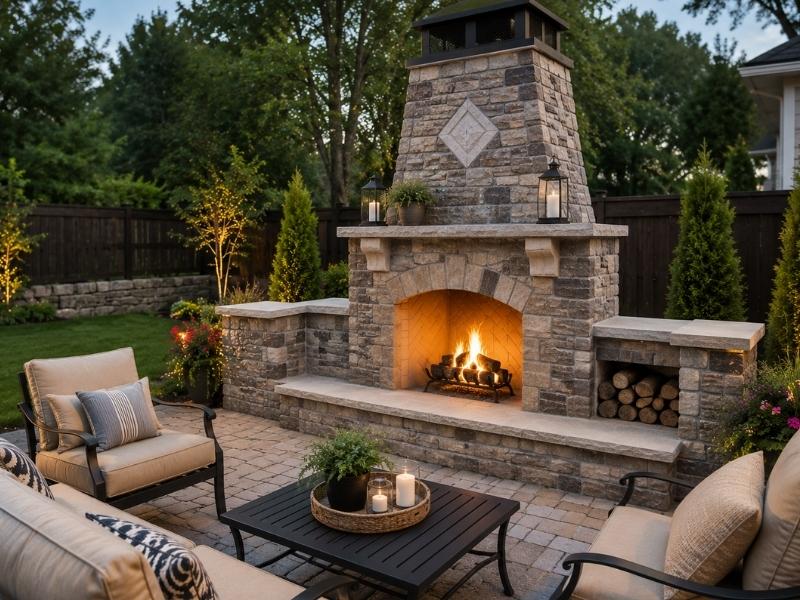
Custom outdoor stone fireplace with built-in seating area and paved patio in a landscaped backyard in Fort Worth, TX.

A backyard fire is one of the few features people actually use. An outdoor fireplace also comes with a permit, a footing and a smoke problem nobody warns you about. Most of what goes wrong gets decided before the first stone lands, back when someone picked a spot because it looked nice from the kitchen window. Settle the boring questions first and the rest of it goes fine.

Choosing the right location for an outdoor fireplace

Placement is the first decision and the hardest one to undo. You’re putting an open flame and a hot masonry mass near a house, a fence and whatever’s growing overhead. Clearance from combustibles gets set by local code, and it’s not a suggestion.

Look up before you look around. Tree limbs, a pergola, a covered patio roof or a low eave over the spot will all give you trouble, and a chimney needs open air above it to pull properly. Anything flammable within reach of the flue exit is a problem you’ll be told to fix later at your own cost.

Wind is the part people forget. Prevailing wind carries smoke somewhere, and that somewhere is often the neighbor’s porch or your own back door. Watch which way the air moves across your yard on a normal evening, then put the seating upwind and the fireplace where the smoke leaves the property.

Distance from the house cuts both ways. Too close and you’re fighting setbacks, heat and smoke drifting into windows. Too far and nobody walks out to use it, which is how a five figure structure turns into a decoration.

Selecting materials that match your climate and home

Brick, natural stone, manufactured stone veneer and concrete block all work outside. The block is usually the guts of the thing, and the brick or stone is the face you see. Your budget lives in that facing choice more than anywhere else.

Climate decides more than style does. In places that freeze, water gets into the masonry, expands and breaks the face over repeated cycles, so the units need to be rated for exposure. In hot dry climates the bigger issue is thermal movement and color fade, which is a slower and less expensive problem.

The firebox is a separate conversation from the pretty part. It gets firebrick and refractory mortar, because regular brick and standard mortar break down under direct heat. Anyone who quotes you a firebox without naming the refractory materials is guessing, and that’s a bid to walk away from.

Manufactured stone veneer costs less and weighs less, which sounds like a win. It’s also a coating over a substrate, and it fails from behind when water gets in. Natural stone and real brick cost more up front and forgive more over thirty years.

Planning the foundation and structural support

An outdoor fireplace is heavy. A masonry chimney stacks that weight tall and narrow, which puts real load on a small footprint and makes the structure sensitive to any tilt. A lean that would be invisible on a wall is obvious on a chimney.

The footing has to be sized for that load and poured on soil that can hold it. Clay soils swell and shrink with moisture, which lifts and drops what sits on them, so drainage around the footing matters as much as the concrete in it. In cold climates the footing goes below the local frost depth, and your building department will give you that number.

Do not tie the fireplace to your patio slab. A patio slab is thin and it moves on its own schedule, and a fireplace bolted to that movement cracks. The footing should be its own element, sized by someone who ran the numbers.

Get a design that shows footing dimensions, reinforcement and depth. Verbal assurances about a “good thick pad” are how leaning chimneys happen. This is the one line item where paying for engineering is cheaper than not.

Understanding local codes, permits, and fire safety requirements

Many jurisdictions require a permit for an outdoor fireplace, and some require an inspection at the footing stage before you can build on it. Skipping that means opening the footing back up later or tearing the structure out. Call the building department before you sign a contract, not after.

The rules you’ll run into cover setbacks from property lines and structures, chimney height, fuel type and clearance to combustibles. Wood burning is restricted or banned in some areas for air quality reasons, and gas may be your only legal option. Fuel type changes the design, so find out before anyone draws anything.

HOAs add their own layer and often go stricter than the city. They may limit height, fuel, location or even the facing material. Check all three sources, because a permit from the city means nothing to an HOA board.

Gas work is licensed work in most places. If you’re running a gas line, that’s a plumber or a licensed gas fitter with a separate permit and inspection. A mason who offers to handle it as part of the package is a red flag.

Designing an outdoor fireplace that fits your outdoor living space

Distance from the seating is a real number, not a feeling. Chairs too close cook the people in them, and chairs too far get no warmth at all. Somewhere around six feet from the firebox opening works for most builds, and you want room behind the chairs for people to walk past.

Traffic flow is the thing that ruins otherwise good projects. If the path to the back door, the grill or the gate runs between the fire and the seats, everyone’s crossing in front of the flame all night. Draw the walking routes first and place the fireplace so none of them cut through.

Think about where the smoke goes when people are sitting there. A tall structure against a fence can create a pocket of dead air that holds smoke at head height. Open air on the leeward side does more for comfort than any design detail.

Plan the whole area at once even if you build it in stages. Gas lines, electrical for lighting and any future footing are cheap to rough in and painful to retrofit under finished paving. Get the underground work on one drawing and put in the sleeves now.

Frequently Asked Questions

Do I need a permit to build an outdoor fireplace?

In most cases, yes. Many jurisdictions require a building permit and may also require footing or structural inspections before construction continues. Local regulations often address setbacks, chimney height, fuel type, and required clearances from combustible materials. Homeowners association (HOA) rules may also apply, so it’s best to confirm all requirements before starting the project.

What is the best material for an outdoor fireplace?

Brick and natural stone are among the most durable materials for outdoor fireplaces because they withstand weather and high temperatures well. Concrete block is commonly used as the structural core behind the finished surface. Regardless of the exterior material, the firebox should be built with firebrick and refractory mortar designed for high-heat applications.

How far should an outdoor fireplace be from my house?

The required distance depends on local building codes, fuel type, and property layout. Clearance from combustible materials, nearby structures, and overhead obstructions is an important safety consideration. Always verify setback requirements with your local building department before selecting a location.

Does an outdoor fireplace need a concrete foundation?

Yes. Outdoor fireplaces are heavy structures that require a properly designed concrete foundation to support their weight and reduce settling over time. In colder climates, the footing should extend below the local frost depth. A separate foundation from the patio slab is often recommended to accommodate independent movement.

Can an outdoor fireplace increase home value?

It can. A professionally designed and properly permitted outdoor fireplace may enhance the appeal of an outdoor living space and attract potential buyers. The value added depends on the quality of construction, local market conditions, and compliance with building codes and permit requirements.

Where to Place a Stone Mailbox for Safety and Accessibility

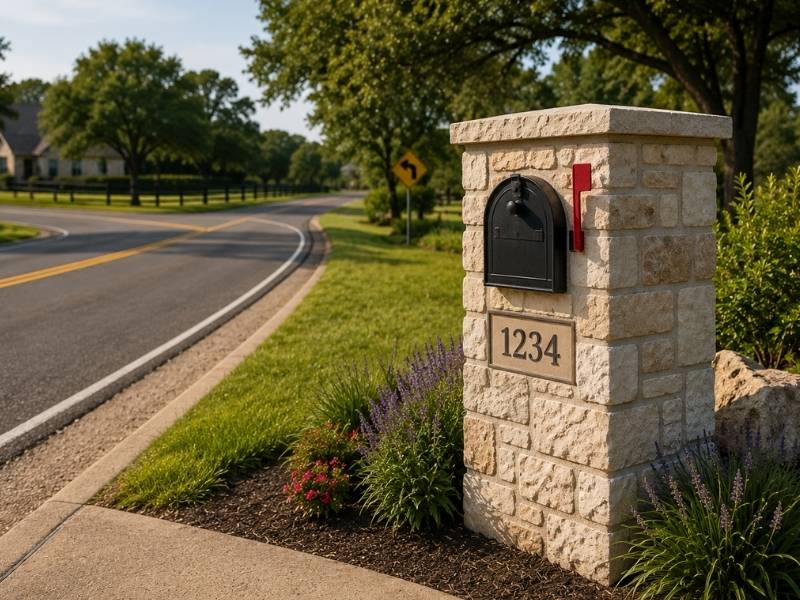
Stone mailbox installed with proper setback from the roadway, clear sight lines, and accessible placement along a residential street in Fort Worth, TX.

A stone mailbox weighs a few hundred pounds and doesn’t move when a car hits it. That’s the whole design problem in one sentence. Wood posts snap and steel pipes bend, but masonry stays put and the vehicle absorbs everything. Place it wrong and you’ve built a hazard at the edge of a public road with your name on the deed.

Choosing a safe location along the road

Start with what a driver can see and where a car ends up when things go wrong. Roadside safety guidance treats heavy fixed objects near travel lanes as hazards, and a stone structure fits that description. The closer it sits to the pavement and the faster the road, the worse the math gets.

Curves are the worst spot. Cars that leave the road do it on the outside of a bend, and that’s exactly where people love to put a nice stone mailbox. Straight sections with room behind them are the safer choice, and the extra few feet of setback matters more than any design detail.

Sight lines come next. Your mailbox shouldn’t block a driver’s view of an intersection, a crosswalk or a neighbor’s driveway. Stand where an approaching car would be and look. If the structure hides anything a driver needs to see, move it.

Meeting USPS and local placement requirements

USPS sets the basic numbers. The standard is 41 to 45 inches from the road surface to the bottom of the mailbox, and 6 to 8 inches back from the front face of the curb or road edge to the door of the box. Confirm the current standard before you build, because these get referenced wrong constantly.

The local postmaster has the final say on placement. That’s the part most people skip, and it’s a free phone call. Ask before you pour anything.

Local rules stack on top of the USPS numbers. Many cities and states restrict or ban masonry mailbox supports in the public right-of-way, and some allow them only with a specific breakaway detail. HOA rules add another layer, and they’re often stricter than the city. Check all three before design, because they don’t always agree.

The right-of-way surprise

That strip of grass between the sidewalk and the street usually isn’t yours. It’s public right-of-way, and you’re building on it with permission you may not have asked for. The city can require removal at your cost.

Some agencies issue an encroachment permit for structures in that zone. Others say no to masonry outright. Find out which one you’re dealing with before the stone shows up on a pallet.

Planning a stable foundation for a stone mailbox

Weight is the reason this needs a real footing. A stone mailbox concentrates a heavy load on a small patch of soil at the edge of a road, and that soil is often fill from when the road was built. Fill settles, and a settled corner shows up as a lean.

Soil moisture drives most of the movement. Clay soils swell when wet and shrink when dry, which lifts and drops whatever sits on them. Roadside soil also gets the runoff from the whole street, so it swings harder than the soil in your yard does.

Pick the location with drainage in mind. Avoid the low spot where water collects and stay out of the ditch line. In climates that freeze, the footing needs to reach below the local frost depth, and the building department will tell you that number.

Compaction under the footing matters as much as the concrete above it. A footing on loose fill leans no matter how much rebar it has. Have someone check the subgrade before the pour.

Maintaining easy access for homeowners and mail carriers

Carriers deliver from the vehicle without getting out. The approach needs to be clear, the box needs to open toward the road and there can’t be a parked car or a trash can living in that spot. A box the carrier can’t reach from the seat gets a delivery hold.

Driveway proximity cuts both ways. Too close and cars backing out clip it, which is the single most common way these get destroyed. Too far and you’ve got a long walk in the rain. Give it a few feet of clearance from the driveway edge.

Sidewalks change the answer. The box shouldn’t force a carrier to reach across a walkway, and the structure can’t narrow the pedestrian path or block a curb ramp. People with wheelchairs and strollers use that path, and a stone base that eats into it is a problem you’ll hear about.

Avoiding common stone mailbox placement mistakes

  • Too close to an intersection, where it blocks sight lines and sits in the path of turning cars
  • On the outside of a curve, which is where run-off-road crashes land
  • Next to a fire hydrant, a utility box or a transformer that crews need clear access to
  • In or beside a drainage ditch, where water undermines the footing
  • Under a tree, because roots lift the footing and limbs drop on the cap
  • Buried in landscaping that grows up and hides the box from the carrier
  • Over a buried utility line that nobody called to locate first

That last one deserves its own paragraph. Call the national 811 line before you dig, every time, and it’s free. Hitting a gas line while setting a mailbox footing is a story nobody wants to be in.

Frequently Asked Questions

How far should a stone mailbox be from the curb?

USPS guidelines generally recommend positioning the mailbox so the door is 6 to 8 inches back from the front face of the curb or road edge and 41 to 45 inches above the road surface. Local regulations may require additional setbacks for masonry mailboxes, so it’s important to verify all requirements before construction begins.

Does a stone mailbox need a concrete foundation?

Yes. A stone mailbox is significantly heavier than a standard mailbox and requires a properly designed concrete foundation. A stable footing placed on compacted soil and below the frost line in colder climates helps prevent settling, leaning, and long-term structural problems.

Can I place a stone mailbox anywhere on my property?

No. Mailbox placement must comply with USPS requirements and is often subject to approval by the local postmaster. In many areas, the space near the roadway is public right-of-way, and local governments or homeowners associations may have additional restrictions on masonry mailbox installations.

Are there USPS rules for stone mailbox placement?

Yes. USPS provides standards for mailbox height and setback, while the local postmaster determines the approved placement for mail delivery. USPS also offers guidance on mailbox support design to promote roadside safety. Confirm these requirements before building to avoid costly changes later.

What should I avoid when choosing a location for a stone mailbox?

Avoid placing a stone mailbox too close to intersections, curves, fire hydrants, utility boxes, drainage ditches, large trees, or driveway entrances. Before excavation begins, contact 811 to locate underground utilities and help prevent accidental damage during installation.

How Weather Affects Brick Repair Projects Throughout the Year

Mason repairing mortar joints on an exterior brick wall during cool weather conditions in Fort Worth, TX.

Mortar doesn’t care about your schedule. Brick repair is a chemistry job disguised as a construction job, and the weather is one of the ingredients. Pour water and cement together on the wrong day and you get a joint that looks fine for a year and then crumbles. The fix is simple: pick your window before you pick your crew.

Mortar is wet chemistry, not glue

Mortar hardens through a reaction called hydration, and that reaction needs water and time. It doesn’t dry like paint. If the water leaves too fast or freezes before the reaction finishes, the mortar never reaches full strength. Professional brick masonry depends on proper curing conditions to create durable mortar joints that last for years. 

That’s the whole reason weather matters here. Every rule below traces back to one question: does the mortar keep the right amount of water long enough? Temperature, sun, wind and rain all push on that answer. Some push harder than you’d think.

The 40 degree line

Masonry specs treat 40 degrees Fahrenheit as the switch point. Below that ambient temperature, the industry standard (TMS 602, the masonry specification) calls for cold weather procedures. That means heated materials, protected work and covered walls for a set period after the work is done. Confirm the current edition and your local code adoption before you quote it.

Fresh mortar that freezes is the real danger. Water expands when it turns to ice, and that expansion breaks the young bonds inside the joint. The damage is invisible on day one and obvious in year three.

Cold weather work isn’t banned, it’s expensive

A good mason can work in the cold. They warm the sand, warm the mixing water and tent the wall with heat. All of that costs money and slows the crew down.

Ask for the cold weather plan in writing before you sign a winter contract. If the bid doesn’t mention heating or protection, the mason is planning to skip it. That’s a bid you should be suspicious of, not happy about.

Heat steals your water

Hot days do the opposite damage and get far less respect. Sun and dry air pull water out of the mortar before hydration finishes. The joint stiffens fast and looks set, but it’s weak inside.

The same masonry spec flags hot weather procedures above 100 degrees, and also above 90 degrees when wind speed passes 8 miles per hour. Wind is the part people miss. A breezy 92 degree afternoon can be harder on mortar than a still 100 degree one.

What a good crew does when it’s hot

They wet the brick before laying it, so the brick doesn’t drink the mortar dry. They shade the mixing area and the stockpile. They also work early and stop before the worst of the afternoon.

Watch for the shortcut: adding extra water to a stiffening batch. Retempering has limits, and a crew that keeps splashing the mud all day is weakening it. Ask about their cutoff time and their retempering rule.

Rain runs on a clock

Rain on a finished wall is fine. Rain on a wall that was pointed two hours ago is a problem. It washes cement out of the joint face and leaves a sandy, streaky surface that never gets hard.

Fresh work needs cover for a day or more, depending on temperature. A tarp is cheap. A rewash of the whole elevation is not.

Wet brick before repair causes a different headache. Saturated brick won’t take mortar well, and trapped water can push salts to the surface later. Most masons want the wall to dry out first, and rushing that is how you buy a white stain.

Season by season

Spring and fall are the good windows. Mild temperatures, moderate humidity and long enough days to work. Everyone knows this, which is why those calendars fill up first. Book early or take what’s left.

Summer work is fine with the right hours and the right prep. Winter work is fine with heat and protection. Both are doable, and both cost more per square foot than a April repair would have.

The bad windows are the swings. A day that hits 70 and drops to 28 overnight is worse than a steady cold week. Freeze-thaw cycling is what breaks masonry, and shoulder seasons in a mixed climate deliver plenty of it.

What to ask before you sign a weather-sensitive contract

  • What ambient temperature range does this bid assume?
  • If it’s below 40 degrees, what’s the heating and protection plan, and is it priced in?
  • If it’s above 90, what’s the daily cutoff time and the retempering rule?
  • How long will fresh joints be covered, and who supplies the cover?
  • What happens to the schedule if rain lands within 24 hours of pointing?
  • Is there a weather delay clause, and who eats the cost?

Run this list before the crew mobilizes. Every one of these questions is free right now. Each is a callback later.

Frequently Asked Questions

What is the best time of year for brick repair?

Spring and fall usually work best because temperatures are moderate and mortar cures at a steady pace. Summer and winter repairs are still possible with proper preparation and protection. The weather during the first 48 hours after the repair is often more important than the season itself.

Can brick repair be done in winter?

Yes. Brick repair can be completed during winter when proper cold-weather masonry practices are followed. Masons typically heat the mixing water and sand, then protect the finished work while the mortar cures. These extra precautions may increase both the cost and the project timeline.

Is it too hot to repair brick in summer?

Not necessarily, but high temperatures and strong winds can cause mortar to dry too quickly. Experienced masons reduce this risk by dampening the brick, protecting materials from direct sunlight, and adjusting work schedules during extreme heat.

How long does mortar need to stay dry after repair?

Fresh mortar should be protected from heavy rain for at least the first 24 hours and sometimes longer in cooler weather. Rain during the early curing period can weaken the mortar joints. Ask your mason how long the repaired area should remain covered.

Why do brick repairs fail after a year?

Improper curing is one of the most common causes. Mortar that freezes, dries too quickly, or becomes saturated with rain before it fully cures may never reach its intended strength. Over time, normal weather exposure and freeze-thaw cycles can cause those weakened joints to crack or deteriorate.

How Decorative Brick Walls Improve Front Yard Design

Decorative brick planter wall adding structure and curb appeal to a Fort Worth front yard landscape

Decorative brick walls can turn a plain front yard into something that actually looks intentional. Instead of grass running straight to the sidewalk, a low brick wall adds shape, structure, and a sense of permanence that most yards are missing.

Here is what a lot of homeowners overlook. A front yard without any defined edges tends to look flat, no matter how nice the landscaping is. A brick wall gives the eye something to rest on and ties the whole space together.

Decorative brick walls add structure, privacy, and curb appeal to a front yard, and they do it in a way that holds up for decades with almost no upkeep.

Why Brick Walls Change the Whole Feel of a Front Yard

A front yard without clear boundaries can feel open in a way that reads as unfinished rather than spacious. Adding a brick wall gives the space a defined edge, which makes the whole yard feel more designed and less like an afterthought.

Creating a Sense of Arrival

A low brick wall near the front walkway or property line signals where the private space begins. This small shift changes how a visitor experiences the approach to the house, giving the yard a clear starting point instead of one space blending into the next.

Adding Height Without Blocking the View

Unlike a tall privacy fence, a decorative brick wall can add visual interest at a lower height. This works well for homeowners who want structure in the yard without fully closing off the view from the street.

Popular Styles of Decorative Brick Walls

Not every brick wall needs to be a solid, uniform structure. Several styles work well for different yard layouts and home designs.

Low Border Walls Along Walkways

A short brick wall running alongside a front walkway adds definition without overwhelming the space. This style works especially well for smaller front yards where a taller wall would feel too heavy.

Brick Planter Walls

Brick walls built to double as raised planters combine structure with greenery. This style adds dimension to a flat yard and gives homeowners a defined space for flowers or shrubs without needing separate garden beds.

Accent Walls With Pattern Details

Some homeowners choose a brick pattern, like a herringbone or basketweave design, worked into a small accent wall near the entrance. This adds visual interest without requiring a large structure, and it works well as a focal point near a front door or mailbox area.

Seat Walls for Extra Function

A brick wall built at seat height serves two purposes at once. It defines the yard’s edge and gives people a place to sit during a gathering or while waiting at the front of the house.

How Brick Walls Add Privacy Without Full Enclosure

Many homeowners want some separation from the street without building a wall tall enough to block the whole yard from view. Decorative brick walls can strike that balance.

Partial Height Walls That Soften Street Noise

Even a wall two or three feet tall can reduce the feeling of being fully exposed to the street. It also helps soften some street noise, without requiring the homeowner to give up natural light or an open feel in the yard.

Combining Brick With Landscaping for More Coverage

Pairing a lower brick wall with shrubs or small trees behind it adds more privacy over time as the plants grow in. This combination gives homeowners more coverage without needing to build a taller, heavier wall from the start.

Why Brick Holds Up Better Than Other Yard Wall Materials

Wood fencing needs regular staining or replacement. Vinyl can crack in extreme heat. Brick handles both the sun and the occasional freeze that Fort Worth sees each winter without much trouble at all.

Low Maintenance Over Many Years

A brick wall does not need painting, staining, or yearly sealing. An occasional rinse to clear off dust and pollen is usually all it takes to keep it looking clean year after year.

Holding Color and Structure Through Weather Changes

Brick resists fading far better than painted wood or vinyl fencing. It also handles the swings between hot summers and occasional freezes without warping or cracking the way other materials can over time.

Design Choices That Affect How Long a Brick Wall Lasts

A decorative wall still needs the right construction details to stay solid for decades, not just to look good on day one.

A Proper Footing Below the Frost Line

Even a low decorative wall needs a solid footing set below the frost line for the area. Skipping this step risks shifting or cracking as the ground moves slightly through freeze and thaw cycles each winter.

Weep Holes for Drainage

Small gaps called weep holes, built into the base of a brick wall, let trapped water escape instead of building up behind the structure. Without them, water pressure can slowly push a wall out of alignment over time.

Matching Mortar to the Local Climate

The mortar mix used in a decorative wall needs to hold up to the specific temperature swings and moisture levels common in North Texas. Using the wrong mix can lead to cracking well before the wall reaches the end of its expected lifespan.

Questions to Ask Before Building a Decorative Brick Wall

A few clear questions before construction begins can prevent problems down the road.

  • Will the footing be set below the local frost line?
  • Does the design include weep holes for proper drainage?
  • What brick and mortar combination is recommended for this specific yard and climate?
  • Will the wall height and style match the overall look of the home’s exterior?

Getting clear answers before the project starts helps avoid a wall that needs repair or rebuilding within just a few years.

Frequently Asked Questions

How Do Decorative Brick Walls Improve Front Yard Curb Appeal?

Decorative brick walls add structure, definition, and visual interest to outdoor spaces. They create clear borders and design features that landscaping alone may not provide.

Can a Low Brick Wall Add Privacy to a Front Yard?

Yes. A low brick wall can create a greater sense of separation from the street while helping define the space. When combined with plants or landscaping, it can improve privacy and reduce outside distractions.

How Long Can a Decorative Brick Wall Last?

With proper construction, including a strong footing, quality mortar, and proper drainage, a decorative brick wall can last for decades with minimal maintenance.

Why Are Weep Holes Important in Brick Wall Construction?

Weep holes allow trapped moisture behind a brick wall to drain away. Without proper drainage, water buildup can weaken the wall structure and contribute to shifting or damage over time.

Are Decorative Brick Walls a Good Option for Small Front Yards?

Yes. Lower brick walls, planter walls, and landscape borders can add character and organization to smaller yards without making the space feel crowded or closed off.

Why Brick Walkways Shift and How Proper Installation Prevents It

Mason installing a brick walkway in Fort Worth, Texas with a properly prepared gravel base to prevent shifting

A brick walkway that shifts and sinks a few years after installation is one of the most common complaints homeowners bring to a mason. The bricks themselves are rarely the problem. What sits underneath them almost always is.

Here is what most people do not realize. A brick walkway is only as stable as the ground it sits on. Skip the right prep work, and even the best bricks will heave, sink, or spread apart within a few seasons.

Brick walkways shift because of what happens below the surface, not because of the bricks themselves. Proper base prep and edge support are what keep a walkway flat and stable for years.

What Actually Causes a Brick Walkway to Shift

Most shifting problems trace back to the ground underneath the bricks, not the bricks on top. Once you understand what is happening below the surface, the fixes make a lot more sense.

Soil That Was Never Properly Compacted

If the soil under a walkway was not compacted before installation, it settles unevenly over time. Foot traffic and rain both push loose soil down at different rates in different spots. This creates the dips and humps that show up in older walkways.

Water Getting Trapped Underneath

Water that collects under a walkway instead of draining away causes the ground below to soften. Soft ground shifts easily under weight. Over time, this creates low spots where water keeps collecting, making the problem worse each season.

Clay Soil That Expands and Contracts

North Texas soil often has a high clay content, and clay reacts strongly to moisture changes. It expands when wet and shrinks when dry. A walkway built without accounting for this movement will crack, heave, or separate as the ground beneath it swells and shrinks throughout the year.

The Base Layer That Prevents Most Shifting Problems

The base layer under a brick walkway does more work than most people expect. Getting this step right prevents the majority of shifting issues before they start.

Why a Gravel Base Matters More Than the Bricks

A properly compacted gravel base gives water somewhere to go instead of pooling under the bricks. It also creates a stable, even surface for the bricks to sit on, instead of resting directly on soil that will shift with the seasons.

How Deep the Base Needs to Be

A shallow base cannot handle the weight of foot traffic or the pressure from expanding clay soil. A base that is too thin will compact further over time, causing the bricks above it to sink unevenly.

Compacting the Base in Layers

Adding all the gravel at once and compacting it a single time often leaves weak spots buried inside the base. Compacting in layers, a few inches at a time, creates a denser and more even base overall.

Why Edge Restraints Keep a Walkway From Spreading

A walkway does not just sink. It can also spread outward at the edges over time, which throws off the pattern and creates gaps between bricks.

What Happens Without a Solid Edge

Without a rigid edge restraint, bricks along the border have nothing holding them in place. Foot traffic and soil movement slowly push them outward, which then creates gaps that widen across the whole walkway.

Metal or Plastic Edging Versus a Mortared Border

Rigid edging, whether metal, plastic, or a mortared brick border, locks the outer bricks in place. This keeps the entire pattern tight, even as the ground beneath continues to shift slightly with the seasons.

How Fort Worth Weather Adds to the Problem

Fort Worth sees hot, dry summers followed by periods of heavy rain, and this swing puts extra stress on any hardscape project.

Long Dry Spells Followed by Heavy Rain

Extended dry periods shrink clay soil, leaving small gaps underneath a walkway. When heavy rain follows, water fills those gaps and the soil expands again. This repeated cycle of shrinking and swelling is one of the biggest reasons walkways installed without proper prep fail within just a few years.

Occasional Freeze and Thaw Damage

While freezing weather is less frequent in Fort Worth than farther north, a handful of hard freezes each winter can still cause moisture trapped in the base to expand and contract. Over several years, this adds up and contributes to slow shifting.

Questions to Ask Before Installing a Brick Walkway

A few direct questions before construction starts can save a lot of frustration later.

  • How deep will the gravel base be, and will it be compacted in layers?
  • What type of edge restraint will be used to keep the border bricks in place?
  • Has the soil type on this property been considered when planning the base depth?
  • Is there a plan for water drainage away from the walkway, not just under it?

Clear answers to these questions before the project starts help avoid a walkway that needs to be redone within a few years.

Frequently Asked Questions 

Why Do Brick Walkways Shift Even When the Bricks Are High Quality?

Brick quality is rarely the main cause of shifting. Movement usually happens because of issues underneath the surface, such as poor base preparation, drainage problems, or soil movement.

How Deep Should the Base Material Be Under a Brick Walkway?

The required base depth depends on soil conditions, walkway use, and site requirements. A properly prepared base helps prevent settling, sinking, and uneven surfaces over time.

Why Does Clay Soil Create Problems for Brick Walkways?

Clay soil expands when wet and contracts when dry. These repeated changes can move the materials above it, causing bricks to shift, rise, crack, or settle unevenly without proper installation methods.

What Is an Edge Restraint and Why Is It Important for Brick Walkways?

An edge restraint keeps the outer bricks secured and prevents the walkway from spreading outward over time. Without proper edging, gaps can develop and the walkway can lose its original shape.

Does Fort Worth Weather Affect the Stability of Brick Walkways?

Yes. Temperature changes, dry periods, and heavy rainfall can affect the soil beneath a walkway. Proper drainage and base preparation help reduce movement caused by changing weather conditions.