
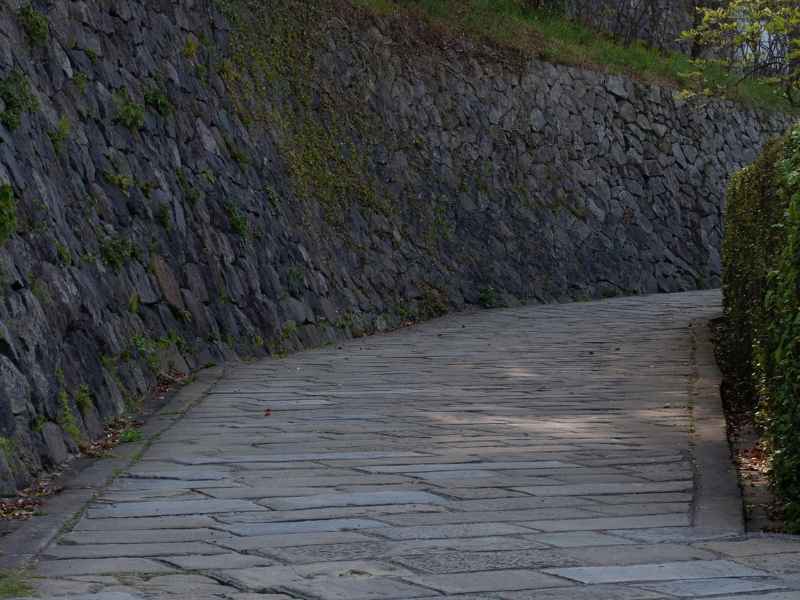
Stone pavers handle a gradual grade well when the slope is measured, the base is built for it, and drainage gets planned from the start. Gentle slopes fool people. A path that rises a couple of feet over its length looks easy, but water, gravity, and foot traffic all pull the pavers downhill over time.
Start with the slope before you shop for stone. How much the ground rises, where water runs, and what the path connects to will shape every other decision. Get those right and the walkway stays comfortable and tight for years.
Evaluating Gentle Slopes Before Planning a Stone Pavers Walkway
Measure the grade along the full route. A string line and level, or a laser level, will show how much the ground rises and where it changes. Some sections may be nearly flat, while others pitch up faster than they look.
Watch the yard during a hard rain. Note where water collects, where it runs across the planned path, and where it leaves the yard. Those patterns tell you whether the walkway can follow the slope as is or needs regrading, drains, or a short retaining wall alongside it.
Think about the destinations too. A path linking a back door to a stone patio, an outdoor kitchen, or a garden gate has fixed elevations at each end. If the difference is too much for a smooth ramp, a step or two may make the walk more comfortable. Your mason can help you decide where the grade works and where it doesn’t.
Selecting Stone Pavers for Comfortable Walking Surfaces
Comfort and grip matter most on a slope. Textured or tumbled surfaces give better footing than polished stone, especially when wet. Flagstone, bluestone, travertine, and limestone all show up on sloped walks, and each feels different underfoot.
Even thickness helps on grades. Cut stone pavers of consistent thickness sit flatter and are easier to set at a steady slope than irregular pieces. Irregular flagstone can work, but it takes more skill to keep the surface even.
Brick pavers are worth comparing. They’re uniform, grip well, and match nearby brick masonry or a brick patio. The choice between brick and stone comes down to appearance, existing masonry, traffic, maintenance, and budget.
Size and width count as well. Larger pavers mean fewer joints but can rock if the base isn’t perfect, while smaller units adapt better to gentle curves. Plan a walkway wide enough for two people or a wheelbarrow if it’s a main route.
Preparing a Stable Base Across Gradual Elevation Changes
A sloped walkway needs a base that won’t creep downhill. Excavate to a consistent depth below the finished surface, then compact a gravel base in thin layers. The base should follow the planned slope so each paver sits at the right angle without extra bedding fill.
Edge restraints matter more on a grade. Gravity and foot traffic push pavers downhill, and loose edges let the whole field shift. Concrete edges, buried restraints, or a mortared border can hold the walk together.
Some slopes benefit from extra anchoring. A concrete header at the bottom of the run helps keep pavers from sliding. On longer slopes, headers partway up can break the walkway into shorter sections. Base depth and design may vary with soil conditions, slope, and expected traffic.
Managing Surface Drainage Along Sloped Walkway Sections
Water picks up speed on a slope. A walkway can turn into a channel if runoff from the yard or roof drains straight down its length. Plan where water will cross or leave the path before it starts washing out joint sand.
A slight cross slope helps. Tilting the walk a little from one side to the other moves water off the surface instead of letting it race downhill. Swales, gravel strips, or a channel drain along the uphill side can catch water before it reaches the pavers.
Joint material matters on sloped stone pavers. Polymeric sand or tighter joints can resist washout better than loose sand, though the right product varies with the stone and joint width. Check the joints after big storms during the first season and refill where needed.
Creating Smooth Transitions and Maintaining Stone Pavers Alignment
Transitions between the walkway and other surfaces should feel smooth. Where the path meets a patio, step, or driveway, match the elevations closely so there’s no trip edge. A border course or a change in pattern can mark the transition and hide small differences in height.
Steps may be needed where the grade gets steeper than a comfortable walk. Stone or brick steps should have consistent height and depth so people don’t stumble. A low retaining wall beside the steps can hold back soil and give the area a finished look.
Keep an eye on alignment after installation. Look for joints opening up, pavers sliding downhill, or edges pulling away. Catching small shifts early lets a mason reset a few pieces before a whole section needs work.
Frequently Asked Questions
Can stone pavers be installed on a slope?
Yes, they work well on gentle slopes when the base and edges are built for it. A compacted gravel base and solid edge restraints keep the pavers from sliding. Drainage planning helps stop water from washing out the joints. Steeper areas may need steps instead of a continuous ramp.
What type of stone pavers works best on a sloped walkway?
Textured stone with good grip is a smart choice for slopes. Cut stone with even thickness is easier to set at a consistent angle. Irregular flagstone can work with careful installation. Your choice should balance appearance, footing, and budget.
How do I stone pavers from sliding downhill?
Use solid edge restraints and a well-compacted base. A concrete header at the bottom of the slope can act as a stop. Long walkways may need extra headers to break up the run. Proper joint filling also helps lock the pavers together.
